In this article, I am going to explain how we can export the data of the on-premise MySQL database to Azure SQL database. This task can be performed in two phases.
- Export the data of MySQL table in CSV files using MySQL Workbench
- Import the CSV file in Azure SQL database using SQL Server Import/Export wizard
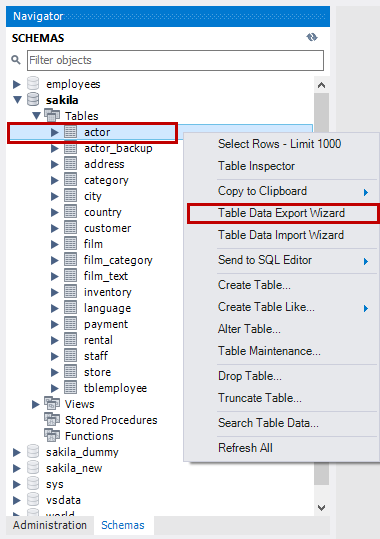
First, let us import data from the MySQL Table to the CSV files. To do that, open MySQL Workbench Connect to the MySQL Server From the left pan, expand the sakila database Expand Tables Right-click on any Table click on Table Data Export Wizard.
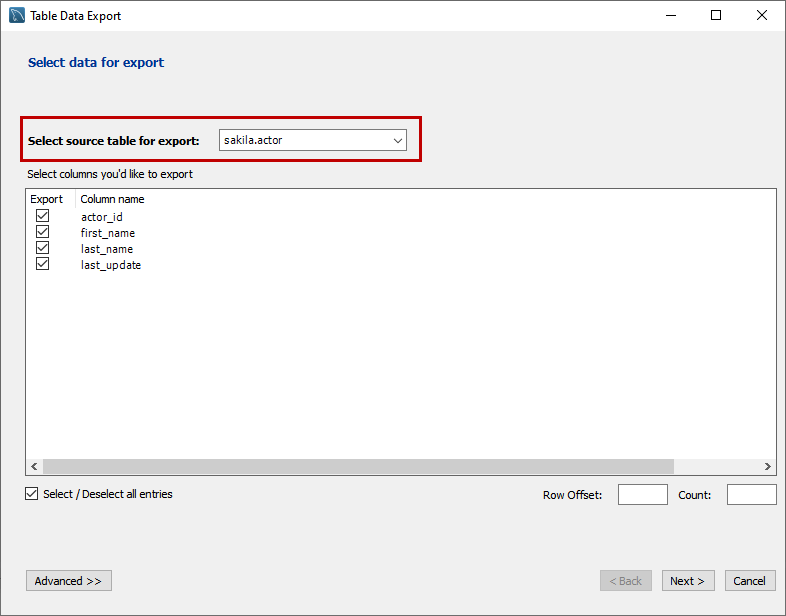
A Table Data Export wizard opens, on the “Select data for export” screen, choose the desired table from the Select source table for export drop-down table. Click on Next.
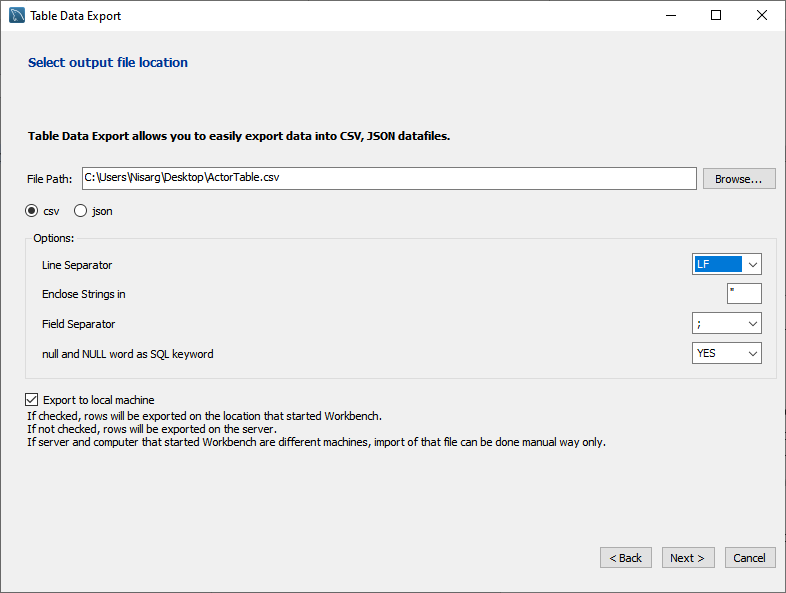
On select output location screen, provide the location of the file in the text box. You can export table data in JSON or CSV files. We will export data in CSV format, hence select CSV. You can specify the format of CSV files. Details are the following:
- Line separator: The valid options are LF (Line feed), CR (Carriage return), and CR LF (both)
- Enclose strings in: You can specify the character in which you want to enclose the string
- Field separator: You can specify the field separator character from the drop-down box
- NULL or NULL word as a SQL Keyword: If you want to use the value of a NULL or NULL keyword, then specify Yes from the drop-down box
Change the options according to the requirement and click on Next.
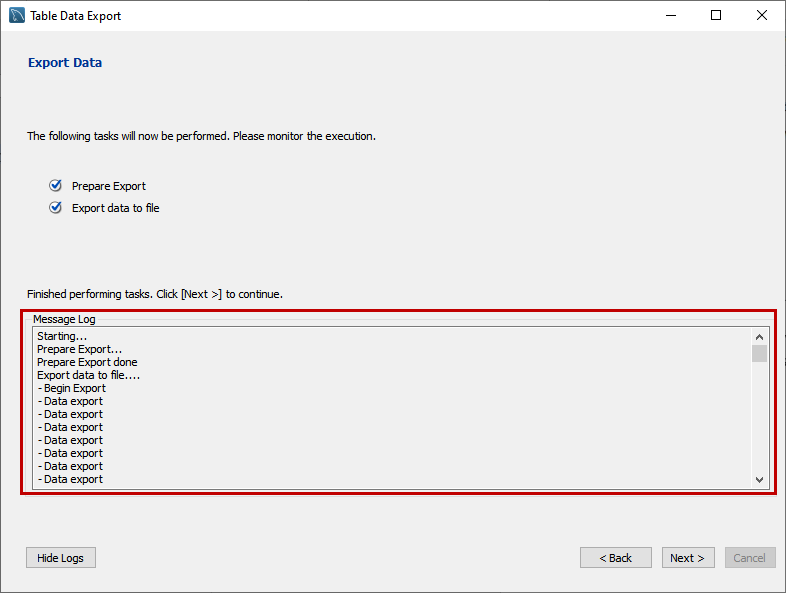
On the export data screen, you can view the list of tasks to be performed. Click on Next to perform the export. You can see the status of the task in the message box.
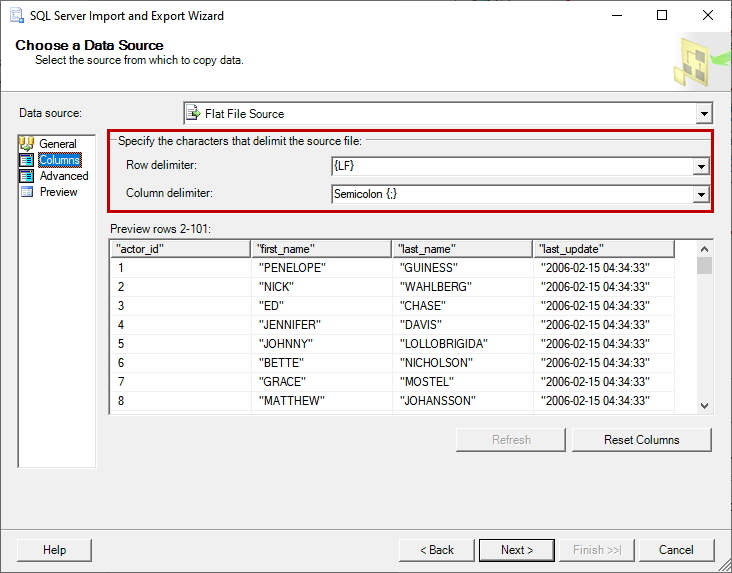
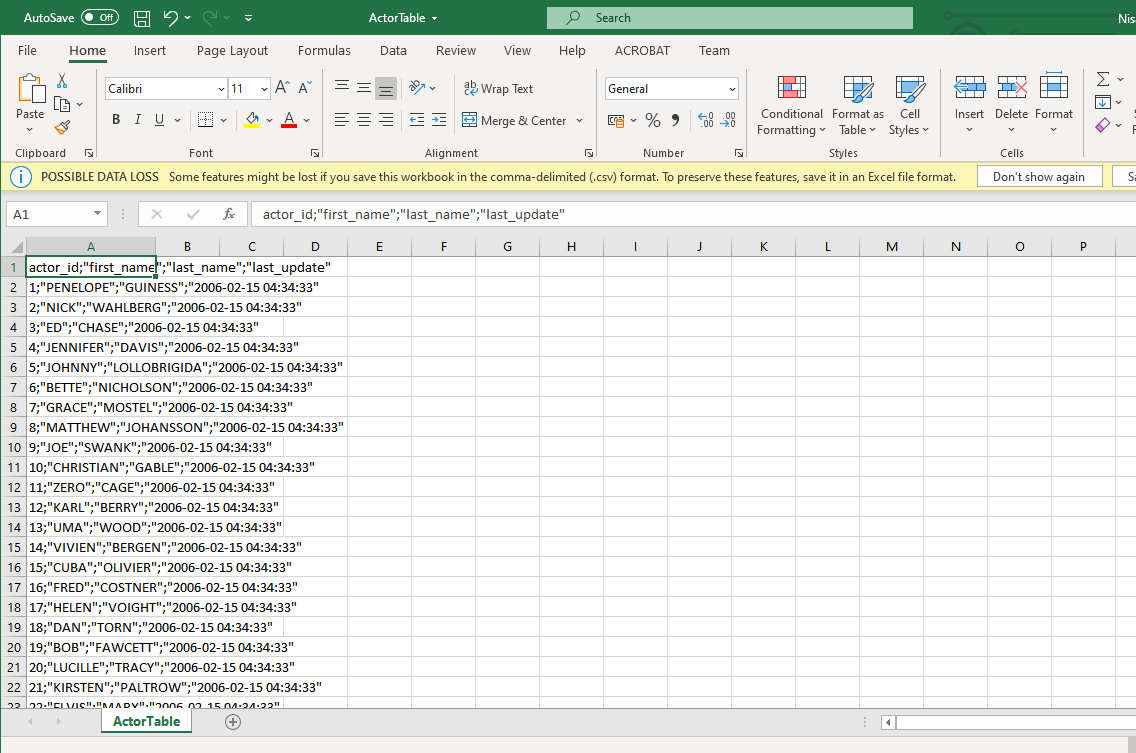
The exported CSV file looks like the following image:
#azure #importing # exporting #migration #mysql