How to Build and Use Custom Pipes in Angular
Pipes are a useful feature in Angular. They are a simple way to transform values in an Angular template. A pipe takes in a value or values and then returns a value.
The CurrencyPipe which transforms a given number into a currency string is a prime example of Angular pipe. The CurrencyPipe is one of several Angular pipes provided by the Angular framework directly out of the box. In addition to these built-in pipes, developers can create their own custom pipes. Being able to create custom pipes for your project is a useful tool to have in your developer toolbox.
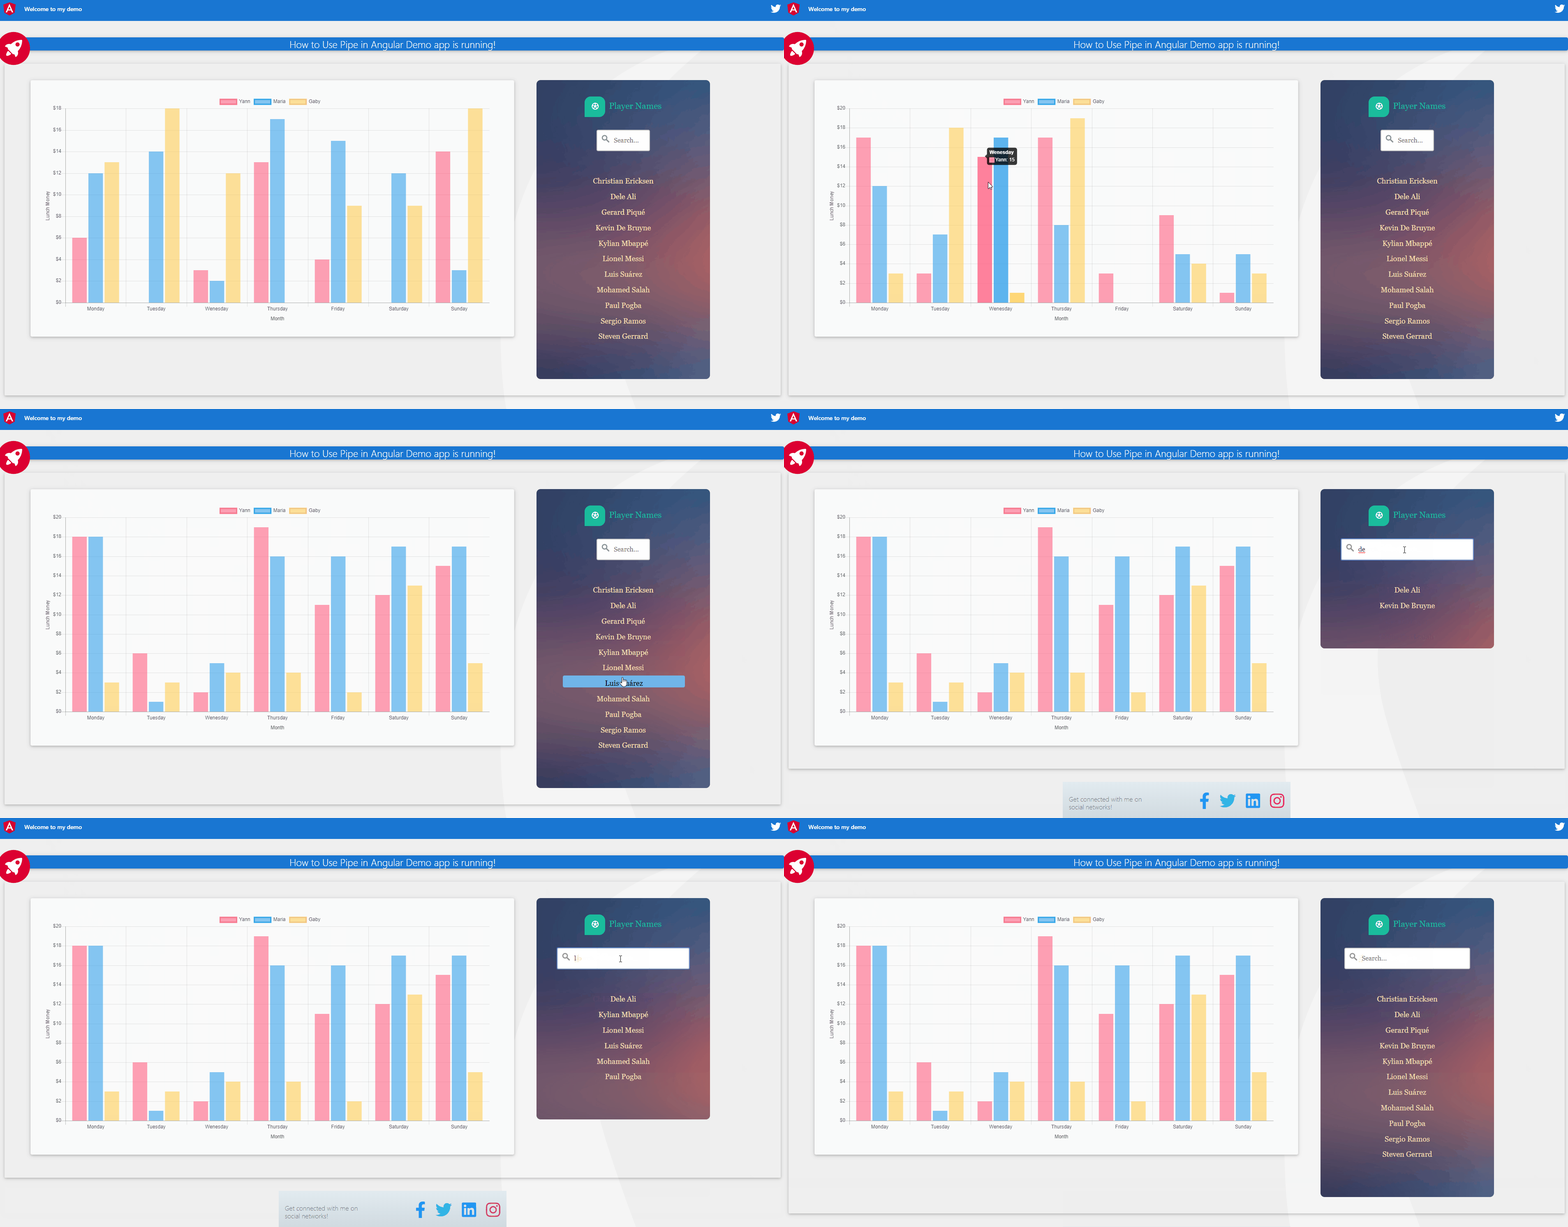
In this tutorial, we will create custom pipes and use them to organize data. All of this will be done using a pipe Module that I will create and add to my project. Here are what I’m going to showcase:

- A chart displaying random daily lunch expenses for 3 persons with data on the y-axes formatted in US dollars currency.
- A form displays a list of soccer player names in ascending order and a search input with a filter option.
Prerequisites:
Have previously worked with angular
Understand the concept of Angular pipe
So, let’s write some code and try to demonstrate how to use a couple of custom pipes:
import { Pipe, PipeTransform } from '@angular/core';

@Pipe({
    name: 'filter'
})
export class FilterPipe implements PipeTransform {

    transform(items: any[], text: string): any[] {

        if (!items) { return []; }

        if (!text) { return items; }

        text = text.toLowerCase();
        return items.filter(it => {
            return it.toLowerCase().includes(text);
        });
    }
}
- Filter pipe; takes an array as input and returns a subset of that array based on the term enter in a search input.
- Sort\orderBy pipe; takes an array as input and returns a sorted subset of that array.
- Size pipe that takes a number and returns its equivalent in ‘bytes’, ‘KB’, ‘MB’, ‘GB’, ‘TB’, ‘PB’ on a chart.
- Capitalize pipe that capitalizes the first later of every word that’s longer than 2 characters
import { Pipe, PipeTransform } from '@angular/core';

@Pipe({
    name: 'fileSize'
})
export class FileSizePipe implements PipeTransform {
    private units = ['bytes', 'KB', 'MB', 'GB', 'TB', 'PB'];

    transform(bytes: number = 0, precision: number = 2): string {
        // tslint:disable-next-line:curly
        if (isNaN(parseFloat(String(bytes))) || !isFinite(bytes)) return '?';

        let unit = 0;

        while (bytes >= 1024) {
            bytes /= 1024;
            unit++;
        }

        return bytes.toFixed(+precision) + ' ' + this.units[unit];
    }
}
It’s easy to create custom pipes to use in your templates to modify interpolated values. You don’t have to duplicate your code if you want to also use a pipe’s functionality in a component class. All you have to do really is inject the pipe like a service and then call its transform method.
import { Pipe, PipeTransform } from '@angular/core';

@Pipe({
    name: 'capitalize'
})
export class CapitalizePipe implements PipeTransform {
    transform(value: string, _args?: any): any {
        return value.split(' ').map(word => {
            return word.length > 2 ? word[0].toUpperCase() + word.substr(1) : word;
        }).join(' ');
    }
}
I’m going to make changes on this project to demo pipe use in Angular. If you would like to follow along, simply clone it and run it locally:
git clone https://github.com/YannMjl/Ng-read-localJSON

Cd Ng-read-localJSON

npm install

ng serve --open
I created a branch: ng_pipe, where I’m going to modify the app and demo pipe usage. You can go ahead and create your own branch.
git checkout -b "yourBranchName"
git branch -a
Now, for the purpose of this tutorial. I’m going to showcase how I use different pipes to filter, sort, format, and order data display on my application.
The first step is to properly add the pipes to your project folder.
- create pipe files; copy-paste the content of custom pipes I made or simply write your own custom pipe if you’re filling like giving it a try
import { Pipe, PipeTransform } from '@angular/core';
import * as _ from 'lodash';

@Pipe({
    name: 'orderBy',
    pure: false
})
export class OrderByPipe implements PipeTransform {

    transform(value: any[], order = '', column: string = ''): any[] {

        if (!value || order === '' || !order) {
            return value;
        } // no array

        if (!column || column === '') {
            return _.sortBy(value);
        } // sort 1d array

        if (value.length <= 1) {
            return value;
        } // array with only one item

        return _.orderBy(value, [column], [order]);
    }
}

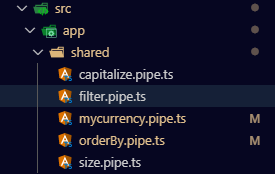
2. I saved my custom pipes in a shared folder inside of the app project folder:
Pipes are used for formatting the data before displaying it in the View. A pipe is used by using |. This symbol is called a Pipe Operator.
The next step is properly added your pipes to your module’s declarations. Here is how i added those custom pipes on my module’s declaration:
import { FormsModule } from '@angular/forms';
import { NgModule } from '@angular/core';
import { AppComponent } from './app.component';
import { BrowserModule } from '@angular/platform-browser';
import { MDBBootstrapModule } from 'angular-bootstrap-md';

import { FileSizePipe } from './shared/size.pipe';
import { FilterPipe } from './shared/filter.pipe';
import { OrderByPipe } from './shared/orderBy.pipe';
import { CapitalizePipe } from './shared/capitalize.pipe';
import { CustomCurrencyPipe } from './shared/mycurrency.pipe';

@NgModule({
  declarations: [
    AppComponent,
    OrderByPipe,
    FileSizePipe,
    CapitalizePipe,
    CustomCurrencyPipe,
    FilterPipe
  ],
  imports: [
    BrowserModule,
    FormsModule,
    MDBBootstrapModule.forRoot()
  ],
  providers: [],
  bootstrap: [AppComponent]
})
export class AppModule { }
Now, after you have successfully added your pipes to your module’s declarations, you can inject it in a component’s class like this:
// ...
import { CurrencyPipe } from '@angular/common';
import { FileSizePipe } from './shared/size.pipe';
import { FilterPipe } from './shared/filter.pipe.js';
import { OrderByPipe } from './shared/orderBy.pipe.js';
import { CapitalizePipe } from './shared/capitalize.pipe';
import { CustomCurrencyPipe } from './shared/mycurrency.pipe.js';

@Component({
  selector: 'app-root',
  templateUrl: './app.component.html',
  styleUrls: ['./app.component.css'],
  providers: [
        FileSizePipe, CapitalizePipe, OrderByPipe,
        FilterPipe, CurrencyPipe, CustomCurrencyPipe
  ]
})
export class AppComponent implements OnInit {

  constructor(
        private currency: CurrencyPipe,
        private datasize: FileSizePipe,
        private capitalize: CapitalizePipe,
        private mycurency: CustomCurrencyPipe
    ) {}

    ngOnInit() {
        // ...
    }
}
The last step is simply using your pipe either in typescript or in your app HTML component during data display. Here is an example of how I use the Capitalize pipe in TypeScript to capitalize the first letter of every word with more than 2 characters of the application title:
ngOnInit() {

			// let use capitlaize pipe on the title
	this.title = this.capitalize.transform(this.title);
}
Here is an example of how I use the filter or orderBy pipe in the app HTML component:
// add filter option in the search input
<input type="text" name="search" placeholder="Search..." [(ngModel)]="text">

// add filter and orderby pipe in the list of names display
<li class="mx-2" *ngFor="let name of Names | filter : text | orderBy: 'asc'">
      {{name}}
</li>
You can have a look at my demo here: https://ng-pipe-demo.netlify.com/
At this point, if you still have issues getting your app to work as expected and would live to review my files. Feel to check out my GitHub demo repository
#Angular #JavaScript #WebDev #Angularjs
