React-Redux with TypeScript
TypeScript is a typed superset of JavaScript. It has become popular recently in applications due to the benefits it can bring. If you are new to TypeScript it is highly recommended to become familiar with it first before proceeding.
TypeScript is a great language to choose if you are a JavaScript developer and interested in moving towards a statically typed language. Using TypeScript is such a logical move for developers that are comfortable with JavaScript but haven’t written in languages that are statically typed (like C, JVM’s, Go, etc).
As I began my journey to TypeScript, (I’m most comfortable with JS, but have written a little bit in Go and C), I found it to be pretty easy to pick up. My initial thought was: “It really isn’t that bad typing all the argument in my function and typing the return value; what’s the fuss all about?” It was nice and simple until we had a project where we needed to create a React/Redux app in TypeScript.
It’s super easy to find material for React + JS, but as you begin to search for React + TS and especially React + Redux + TS, the amount of online tutorials (including YouTube videos) begin to dwindle significantly. I found myself scouring Medium, Stack Overflow, etc. for anything I could find to help explain how to set up the project, how types are flowing between files (especially once Redux is involved), and how to build with Webpack. This article is a way for me to solidify my knowledge of React + Redux + TS, and to hopefully provide some guidance for anyone else who is interested in using this tech stack for the front end. TypeScript is becoming more popular, so I hope this is useful to others in the community.
Prerequisites: I assume you’re aware of how React, Redux, and Webpack work, and also most concepts in TypeScript (at least interfaces and generics).
What are we gonna build? Just to keep it simple, we’ll build the infamous to-do list application. Remember that the purpose is to understand how to set up the project and know how TypeScript integrates with React and Redux. The features that this application will support are:
- Add a new item to a list.
- Remove an item from the list.
The code for the project can be found here: https://github.com/sterlingdeng/react-redux-ts-boilerplate.
For my project, I didn’t use create-react-app --typescript to get the project started. I found that it was a valuable learning experience to get it started from scratch. I’ll go step by step through the import files and folders needed to get this project up and running. Before we start, let me show you what the final structure looks like.
TS-Redux-React-Boilerplate
├── build
├── node_modules
├── public
│   ├── bundle.js
│   └── index.html
├── src
│   ├── App.tsx
│   ├── index.tsx
│   ├── actions
│   │   ├── actions.ts
│   │   └── index.ts
│   ├── components
│   │   ├── index.ts
│   │   └── TodoItem.tsx
│   ├── containers
│   │   └── TodoContainer.tsx
│   ├── reducers
│   │   ├── index.ts
│   │   └── todoReducers.ts
│   ├── store
│   │   └── store.ts
│   └── types
│       └── types.d.ts
├── .gitignore
├── package-lock.json
├── package.json
├── tslint.json
├── tsconfig.json
├── webpack.config.js
└── README.md
First, let’s look at the package.json file and install these dependencies using npm i.
"dependencies": {
    "@types/node": "^12.0.0",
    "@types/react": "^16.8.15",
    "@types/react-dom": "^16.8.4",
    "@types/react-redux": "^7.0.8",
    "react": "^16.8.6",
    "react-dom": "^16.8.6",
    "react-redux": "^7.0.3",
    "redux": "^4.0.1",
    "ts-loader": "^5.4.5",
    "typesafe-actions": "^4.2.0",
    "typescript": "^3.4.5",
    "webpack": "^4.30.0",
    "webpack-cli": "^3.3.1"
  }
Let’s first look at the dependencies with the format @types/[npm module here]. If you aren’t familiar with what these modules are, look up https://github.com/DefinitelyTyped/DefinitelyTyped. Since most modules are written in JavaScript, they aren’t written with proper type definitions. Once you attempt to import a module without any type information into a project that is all typed, TypeScript will complain. To prevent this, the community of contributors at DefinitelyTyped create high-quality type definition of the most commonly used JavaScript modules so that those modules will integrate as seamlessly as possible with TS.
You are probably familiar with the next four. ts-loader is needed because Webpack needs a plugin to parse .ts and .tsx files. (This is similar to babel.)
typesafe-actions is a library I use with Redux + TypeScript. Without it, the files can get quite noisy in terms of declaring types for the Store, Reducer, and Actions. This library provides methods that infer type definition for redux code so that the files are a bit cleaner and focused.
webpack and webpack-cli are used to bundle the .ts and .tsx files into one.js file that can be sent to the front end.
Next, let’s look at thetsconfig.json file. The purpose of this file is to configure how you want the ts compiler to run.
{
  "compilerOptions": {
    "baseUrl": ".",
    "outDir": "build/dist",
    "module": "commonjs",
    "target": "es5",
    "sourceMap": true,
    "allowJs": true,
    "jsx": "react"
  }
}
baseUrl denotes the folder. outDir directs the compiler where it should put the compiled code. module tells the compiler which JavaScript module types to use. target tells the compiler which JS version to target. sourceMap tells the compiler to create a bundle.js.map along with bundle.js. Because bundling will turn multiple files into one large .js file, troubleshooting code will be difficult because you wouldn’t easily know which file and at which line the code failed (since everything is just one big file). The .map file will map the bundled file to the respective unbundled file.
tslint.json provides options on how strict or loose you want the ts linter to be. The various options you can set for the linter can be found online.
Action Creators
Normally when I start projects with Redux, I begin at the action creators. Let’s quickly review the features that we need to implement: Adding an item to a list and removing an item from the list. This means we’ll need two action creators, one for adding and another for removing.
import { action } from "typesafe-actions";

// use typescript enum rather than action constants
export enum actionTypes {
  ADD = "ADD",
  DELETE = "DELETE"
}

export const todoActions = {
  add: (item: string) => action(actionTypes.ADD, item),
  delete: (idx: number) => action(actionTypes.DELETE, idx)
};
In the actions.ts file, I’m using the enum feature in TS to create the action constants. Secondly, I’m using the action method provided from the typesafe-actions module. The first argument you pass into the method is a string which represents that action, and the second argument is the payload. The add method will add an item to the list of to-dos, and the deletemethod will remove an item, based on the provided index, from the list of to-dos.
In terms of type safety, what we want in our reducers file is the proper type of the payload, given a specific action. The feature in TypeScript that provides this support is called discriminated union and type guarding. Consider the example below:
// this is an example of discriminated unions
// this file isn't used in the project

interface ActionAdd {
  type: "ADD",
  payload: string
}

interface ActionDelete {
  type: "DELETE",
  payload: number
}

type Actions = ActionAdd | ActionDelete

function reducer(a: Actions) {
  switch(a.type) {
    case "ADD" : {
      // payload is a string
    }
    case "DELETE" : {
      // payload is a number
    }
  }
}
Given the shape of the two action objects, we can discriminate between them based on the type property. Using control flow analysis, like if-else or switch-case statements, it’s very logical that in line 16, the only type that the payload can be is a string. Since we only have two actions, the remaining payload in line 22 will be a number. If you are interested in learning more about discriminated unions and type guarding, I would recommend learning more about it here and here.
Reducer
After defining our action creators, let’s create the reducer for this project.
import * as MyTypes from "MyTypes";
import { actionTypes } from "../actions/";

interface ITodoModel {
  count: number;
  list: string[];
}

export const initialState: ITodoModel = {
  count: 2,
  list: ["Do the laundry", "Do the dishes"]
};

export const todoReducer = (state: ITodoModel = initialState, action: MyTypes.RootAction) => {
  switch (action.type) {
    case actionTypes.ADD: {
      return {
        ...state,
        count: state.count + 1,
        list: [...state.list, action.payload]
      };
    }
    case actionTypes.DELETE: {
      const oldList = [...state.list];
      oldList.splice(action.payload, 1);
      const newList = oldList;

      return {
        ...state,
        count: state.count - 1,
        list: newList
      };
    }
    default:
      return state;
  }
};
In lines four through seven, I’m defining the model (or schema) of our Todostore. It will keep track of how many to-do items we have, as well as the array of strings. Lines nine through 12 are the initial state when the application first starts. Within the todoReducer function, we want type safety within the casestatements. Based on the earlier gist, we accomplished that by discriminated unions and type guarding, done by typing the action parameter. We have to first define an interface for every action object, and then create a union of them all and assign that to a type. This can get tedious if we have a lot of action creators — luckily, typesafe-actions has methods to help create the proper typing of the action creators without having to actually write out all the interfaces.
declare module "MyTypes" {
  import { StateType, ActionType } from "typesafe-actions";
  // 1 for reducer, 1 for action creators
  export type ReducerState = StateType<typeof import("../reducers").default>;
  export type RootAction = ActionType<typeof import("../actions/actions")>;
}
Ignoring line four for now and focusing on line five, we use a method called ActionType from the module, and import the actions from actions.ts to create the discriminated union types, which are then assigned to a type called RootAction. In line one of the todoReducers.ts, we import MyTypes and in line 14, we type the action parameter with MyTypes.RootAction. This allows us to have IntelliSense and autocompletion within the reducers!
Now that we have the reducer set up, the ReducerState type from the types.d.ts file allows TypeScript to infer the shape of the state object in the reducer function. This will provide IntelliSense when we try to access the payload object within the Reducer. An example of what that looks like is in the picture below.

IntelliSense in the Reducer
Redux Store
Finally, let’s hook up the reducer to the redux store.
import { createStore } from "redux";
import rootReducer from "../reducers";

const store = createStore(rootReducer);

export default store;
Let’s recap what we have accomplished up until this point. We have created and typed our action creators using the action method from typesafe-actions. We have created our types.d.ts file which provide type information on our action creators and reducer state. The reducer has been created and the actions are typed by using MyTypes.RootAction, which provide invaluable auto-completion information of the payload within the reducer’s case statements. And lastly, we created our Redux store.
React and TS
Let’s change gears and begin working on creating and typing our React components. I’ll go over examples of how to properly type both function and class based components, along with instructions on how to type both the props and state (for stateful components).
App.tsx
import * as React from "react";
import TodoContainer from "./containers/TodoContainer";

export const App: React.FC<{}> = () => {
  return (
    <>
      <h1>React Redux Typescript</h1>
      <TodoContainer />
    </>
  );
};
App is a functional component that is typed by writing const App: React.FC<{}>. (FC refers to functional component.) If you aren’t familiar with generics (which is the <{}> ), I think of them like variables but for types. Since the shape of props and state can differ based on different use cases, generics are a way for us to, well, make the component generic! In this case, App doesn’t take any props; therefore, we pass in an empty object as the generic. How do we know that the generic is specifically for props? If you use VS code, IntelliSense will let you know what type it needs.
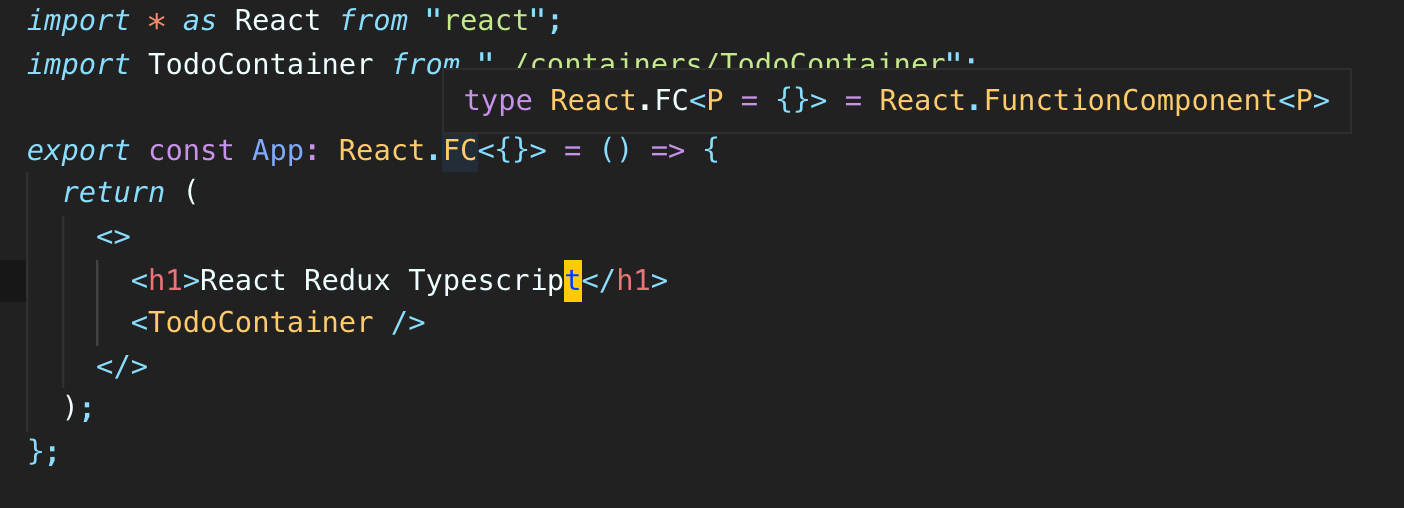
Where it says <P = {}> , it means type {} has been assigned to P, where Pstands for props. For class-based components, React will use S to refer to state. App is a functional component that receives no props and is not connected to the Redux store. Let’s go for something a little more complicated.
TodoContainer.tsx
import * as React from "react";
import { connect } from "react-redux";
import { Dispatch } from "redux";
import * as MyTypes from "MyTypes";
import { actionTypes } from "../actions";
import { TodoItem } from "../components";

interface TodoContainerState {
  todoInput: string;
}

interface TodoContainerProps {
  count: number;
  todoList: string[];
  addToDo: (item: string) => object;
  deleteToDo: (idx: number) => object;
}

class TodoContainer extends React.Component<TodoContainerProps, TodoContainerState> {
  constructor(props) {
    super(props);
    this.state = {
      todoInput: ""
    };
  }

  handleTextChange = e => {
    this.setState({
      todoInput: e.target.value
    });
  };

  handleButtonClick = () => {
    this.props.addToDo(this.state.todoInput);
    this.setState({
      todoInput: ""
    });
  };

  handleDeleteButtonClick = (idx: number) => {
    console.log("deleting", idx);
    this.props.deleteToDo(idx);
  };

  render() {
    let todoJSX: JSX.Element[] | JSX.Element;
    if (!this.props.todoList.length) {
      todoJSX = <p>No to do</p>;
    } else {
      todoJSX = this.props.todoList.map((item, idx) => {
        return (
          <TodoItem item={item} key={idx} idx={idx} handleDelete={this.handleDeleteButtonClick} />
        );
      });
    }

    return (
      <div>
        {todoJSX}
        <input
          onChange={this.handleTextChange}
          placeholder={"New To Do Here"}
          value={this.state.todoInput}
        />
        <button onClick={this.handleButtonClick}>Add To Do</button>
      </div>
    );
  }
}

const MapStateToProps = (store: MyTypes.ReducerState) => {
  return {
    count: store.todo.count,
    todoList: store.todo.list
  };
};

const MapDispatchToProps = (dispatch: Dispatch<MyTypes.RootAction>) => ({
  addToDo: (item: string) => dispatch({ type: actionTypes.ADD, payload: item }),
  deleteToDo: (idx: number) => dispatch({ type: actionTypes.DELETE, payload: idx })
});

export default connect(
  MapStateToProps,
  MapDispatchToProps
)(TodoContainer);
OK, TodoContainer.tsx is the most complicated of them all, but I’ll walk you through what’s going on in the code. TodoContainer is a React Class Component because I need it to hold in its state the value for the input box. It is also connected to the redux store, so it’ll have MapStateToProps and MapDispatchToProps . First, I’ve definedTodoContainerState . Since I’ll be holding the value of the input box in state, I’ll type the property as a string.
Next, I’ve defined TodoContainerProps, which will be the shape of the Container’s props.
Because class-based components can have both state and props, we should expect that there should be at least two generics that we need to pass into React.Component.

P for Props and S for State
If you mouse over React.Component, you can see that it takes in three generics, P, S, and SS. The first two generics are props and state. I’m not quite sure whatSS is and what the use case is. If anyone knows, please let me know in the comments below.
After passing in the generics into React.Component , IntelliSense and autocompletion will work within this.state and for props.
Next, we want to type MapStateToProps and MapDispatchToProps. This is easily achievable by leveraging the MyTypes module that we built in the redux section. For MapStateToProps, we assign the store type to be MyTypes.ReducerState. An example of the IntelliSense it will provide is in the below screenshot.

IntelliSense for MapStateToProps
Lastly, we want to have type safety within MapDispatchToProps. The benefit that is provided is a type-safe payload given an action type.

Type-safe payloads
In the screenshot above, I purposely typed item as a boolean. Immediately, the TSServer will pick up that the boolean payload within MapDispatchToProps is not correct because it’s expecting the payload to be a string, given that the type is actionTypes.ADD. TodoContainer.tsx has the most going on since it is a class based React component, with both state and props, and is also connected to the store.
Before we wrap up, let’s look at our last component: TodoItem.tsx
TodoItem.tsx
This component is a functional component with props — code below.
import * as React from "react";

interface TodoItemProps {
  item: string;
  idx: number;
  handleDelete: (idx: number) => void;
}

export const TodoItem: React.FC<TodoItemProps> = props => {
  return (
    <span>
      {props.item}
      <button onClick={() => props.handleDelete(props.idx)}>X</button>
    </span>
  );
};
The shape of the props are defined in the interface TodoItemProps. The type information is passed into as a generic in React.FC. Doing so will provide auto-completion for props within the component. Awesome.
Another great feature that TypeScript provides when used with React is IntelliSense for props when rendering React Components within JSX. As an example, if you delete idx:number from TodoItemProps and then you navigate to TodoContainer.tsx, an error will appear at the place where you render <TodoItem />.

Property ‘idx’ does not exist
Because we removed idx from the TodoItemProps interface, TypeScript is letting us know that we have provided an additional prop that it couldn’t find, idx, into the component.
Lastly, let’s build the project using Webpack. In the command line, type npm run build. In the public folder within the root directory, you should see bundle.js alongsideindex.html. Open index.html in any browser and you should see a very simple, unstyled, to-do app.

After webpack build
I hope that I was able to demonstrate the power of TypeScript coupled with React and Redux. It may seem a bit overkill for our simple to-do list app — you just need to imagine the benefit of TS + React + Redux at scale. It will help new developers read the code quicker, provide more confidence in refactoring, and ultimately improve development speed.
If you need more reference and material, I used the following two Git repos to teach myself
Both these repos have proved invaluable for my learning, and I hope they will be the same for you.
#redux #reactjs #typescript #javascript