Build Progressive Web App (PWA) with Angular 9/8
Ok so, In this tutorial, we’ll create a PWA using the Angular 8. The application will be consuming a simple REST API from Simplified Javascript Jargon and display that in the UI.UI will be designed by Material Design via using the Angular Material package.
We will be running Audits panel (Lighthouse) from Chrome developer tools to validate the PWA core principle on our newly built App and we will be also ensuring that all the principles should be validated successfully
But before this, we need to know what is PWA
What is a PWA?
Progress Web Application or PWA is a set of guidelines to use modern browser features in a way that creates a more native app-like user experience. Though it is still a website, it will look and feel like an app and provide functionality not available to normal websites. When users visit your PWA in their browser at your URL, they will get a prompt if they would like to “Add to Home Screen”, without the need to download and install from app stores. When they open the PWA from the home screen, it will be opening like an App and behaving so.
Features of PWA
Here are the features of PWA and why we should care.
1. Progressive
The app should work for every user no matter what the browser choice is because it is built with progressive enhancement as a core principle. So your website can act as an app across multiple mobile OS.
2. Responsive
The app can respond to the user’s behaviour and environment based on screen size, platform, and orientation. It will be closer to the bootstrap-based mobile site, however, it should be opened from the device as an app instead of through browser by typing URL.
3. Connectivity Independent
When the network is not available or too slow, the app should still work on a device. So it should be able to load the features which can be run through locally, unlike the real website it will be loading the parts of the site which are not calling any API or loading data from internet.
4. App-like
It will be just another App in your device except you don’t have to get it from the market place, which is a bit cool as well.
5. Fresh
The service worker update process will always keep the app up-to-date. So the app will be updated along with the website gets updated and you don’t have to manually update it from the marketplace.
6. Secured
Like other Apps from the market place, it will be also accessed via HTTPS to allow authorization, secured transactions, and also to prevent unauthorized access
7. Splash Screen
Like any other native Apps, the PWA also provides an option to add a Splash screen is added during the startup of the app. This feature also gives closer to real-world apps.
Generating Project using Angular CLI
Here, we’ll be installing the latest version of Angular CLI of version 8 for the current stable release. Since Angular CLI runs on Node, so node.js installation needs to be done before completing the Angular CLI part. For this tutorial, I have used node 12.16.1 but anything higher than 10.x.x is recommended. Node.js can be downloaded from the following from here. The download page should look like the following

Click on the Windows Installer 64/32 bit depending on your system. This tutorial was created on windows environment, however, if you’re using mac then for macOS you can choose the macOS installer since it only comes with 64-bit so no confusion there.
Once downloaded, install it. On completion of installation open the command prompt and run the following commands
node -v
Now we can install angular CLI with the following command:
npm i -g @angular/cli
During the installation, it will be required to choose the stylesheet format(refer to screenshot), I have used CSS option

Once installed we can create a new project using Angular CLI by the following command:
ng new pwa-angular
Once the new project is created then we can add angular material, we will be using the angular material based theme to create our application:
cd pwa-angular
ng add @angular/material
Angular Material installation, it will prompt you to either choose any prebuilt theme or can go for customizing new theme, I have used “Indigo/Pink”, but you can choose any other options you like. Refer to the screenshot below for further understanding.

Next, install HammerJS for gesture recognition and browser animations for Angular Material, run the following command:
npm i hammerjs
So we are done with project setup and configuration.
Consuming API and Displaying on UI
Since we will be consuming a REST API so we will need to add a reference of the HttpClient in the angular.module.ts, Here is the code snippet:
import { BrowserModule } from ‘@angular/platform-browser’;
import { NgModule } from ‘@angular/core’;
import { AppRoutingModule } from ‘./app-routing.module’;
import { AppComponent } from ‘./app.component’;
import { BrowserAnimationsModule } from ‘@angular/platform...’;
import { HttpClientModule } from ‘@angular/common/http’;@NgModule({
  declarations: [
    AppComponent
  ],
imports: [
  BrowserModule,
  AppRoutingModule,
  BrowserAnimationsModule,
  HttpClientModule
],
providers: [],
bootstrap: [AppComponent]
})
export class AppModule { }
For this tutorial, we’ll consume a statically generated JSON API from the Simplified JavaScript Jargon GitHub repository. If you want to use any other resource, make sure you have CORS enabled so the browser doesn’t disallow reading the remote resource due to the Same Origin Policy.
Next, we’ll create a service that interacts with the API. Inside our project root folder, execute the following command:
ng g service services/api
Add the following changes to api.service.ts file:
import { Injectable } from ‘@angular/core’;
import { HttpClient } from ‘@angular/common/http’;
import { Observable } from ‘rxjs’;export interface ResponseData{
 name: string;
 description: string;
 url: string;
 html: string;
 markdown: string;
}@Injectable({
 providedIn: ‘root’
})export class ApiService {
 private baseURL = ‘https://www.techiediaries.com/api/data.json';
 constructor(private httpClient: HttpClient) { }
 fetch(): Observable<ResponseData[]> {
 return this.httpClient.get(this.baseURL) as Observable<ResponseData[]>;
 }
}
We declared ResponseData an interface which represents a single item of the returned JSON data. Then we created fetch() a method which will send an HTTP GET request to the JSON endpoint in the baseURL variable declared.
Next, open app.component.ts and add the following code:
import { Component, OnInit } from '@angular/core';
import { ResponseData, ApiService } from './services/api.service';@Component({
  selector: 'app-root',
  templateUrl: './app.component.html',
  styleUrls: ['./app.component.css']
})export class AppComponent implements OnInit {
  title = 'pwa-angular';
  responses: Array<ResponseData>;constructor(private apiService: ApiService) {}ngOnInit(): void {
    this.fetchData();
  }fetchData() {
    this.apiService.fetch().subscribe(
      (data: Array<ResponseData>) => {
         console.log(data);
         this.responses= data;
      }, (err) => {
        console.log(err);
      }
    );
  }
}
Rendering the Data in the UI
For our application page, we’ll add a navigation bar and the skeleton of the page by using Angular Material.
First, we need to import Angular Material components in our app.module.ts. Update the file with the following code
import { BrowserModule } from '@angular/platform-browser';
import { NgModule } from '@angular/core';import { AppRoutingModule } from './app-routing.module';
import { AppComponent } from './app.component';
import { BrowserAnimationsModule } from '@angular/platform-browser/animations';
import { HttpClientModule } from '@angular/common/http';
import { MatToolbarModule } from '@angular/material/toolbar';
import { MatCardModule } from '@angular/material/card';
import { MatButtonModule } from '@angular/material/button';@NgModule({
  declarations: [
    AppComponent
  ],
  imports: [
    BrowserModule,
    AppRoutingModule,
    BrowserAnimationsModule,
    HttpClientModule,
    MatToolbarModule,
    MatCardModule,
    MatButtonModule
  ],
  providers: [],
  bootstrap: [AppComponent]
})
export class AppModule { }
Next, update app.component.html the file with the following code
<mat-toolbar color="primary">
  <mat-toolbar-row>
    <span>Api Loader</span>
  </mat-toolbar-row>
</mat-toolbar>
<main>
  <mat-card *ngFor="let item of responses">
    <mat-card-header>
     <mat-card-title>{{item.name}}</mat-card-title>
    </mat-card-header>
    <mat-card-content>
     {{item.description}}
    </mat-card-content>
    <mat-card-actions>
     <a mat-raised-button href="{{item.url}}" color="primary">More</a>
    </mat-card-actions>
  </mat-card>
</main>
<router-outlet></router-outlet>
Let’s build the application since we are creating a PWA so the building procedure will be a bit different from the regular angular application, however, you can check the current status of the application just by running the following command:
ng build
ng serve
So to test the PWA feature of the application let’s build it in the production environment as most of the PWA features are only available in production mode not in development mode.
Build the app for production by using the following command.
ng build --prod
Our production build will be available in the folder dist/pwa-angular and we can use http-server to serve it. Let’s install http-serverusing the following command:
npm i -g http-server
Run the application by using the following command:
cd dist/pwa-angular
http-server -o
Your browser will be automatically opened because adding-o option and navigate to http://127.0.0.1:8080.
Now, at this point in time, we haven’t added the PWA application features, for now, its just a regular website, so let’s see-through Lighthouse audit which parts are failing.
Analyze the App
We’ll use Lighthouse to analyze our app. Lighthouse is an open-source auditing tool created by Google which can be used to audit websites and applications for accessibility performance, SEO, best practices, and PWA features.
To access the Lighthouse, open Chrome DevTools by clicking F12 or Ctrl + Shift + I and click on the Audits tab.

We need to set the Device option to Mobile instead of Desktop to emulate a mobile environment and check on Progressive Web App checkbox as a type of audit we would like to perform. Next, click on the Generate Report button.
Here is the screenshot of the result as for the current stage.

Our application has failed audits mostly related to Service Workers, Progressive Enhancement, HTTPS and Web App Manifest which are the core aspects of a PWA.
Implement PWA Features
Fortunately Angular provides a package to convert an application to PWA, we will be using the same package here, we can install it using the following command.
ng add @angular/pwa
The new PWA features added are:
- manifest.webmanifest file.
- Different size of icons in src/assets/icons folder.
- Service Worker —
ngsw-worker.json
A Service Worker is a feature that’s available in modern browsers which can be used as a network proxy that lets your application intercept network requests to cache assets and data. This could be used for implementing PWA features such as offline support, push notifications, etc.
The two failed audits (“Does not register a service worker” and “Does not respond with a 200 when offline”) are related to Service Workers and caching.
We need to set up a service worker and use it to cache files locally to pass these audits. When offline, the Service Worker should return the locally cached version of the file.
Now we’ll re-build for production and re-run Lighthouse to check our application hosted locally.
Here is our new audit report.

Now you can see only 2 failed audits which are related to HTTPS and a valid apple-touch-icon. For HTTPS, we need to host the application and configure HTTP to HTTPS redirect.
To fix invalid apple-touch-icon, we can simply add the following changes in our index.html in the <head>. We need to point to a non-transparent 192px (or 180px) square PNG.
<link rel="apple-touch-icon" href="assets/icons/icon-192x192.png">
Re-run the audit and we’ll pass and you should see all the audits are passed. So we have built the basic structure of the PWA application however we need to add an option in our website so users can add this website to their device and can use it as like a native APP, PWA was for this so let’s go ahead and implement that.
Add UI button
Modify the following files with the following code
app.component.html
<mat-toolbar color="primary">
  <mat-toolbar-row>
    <span>Api Loader</span>
    <span class="example-spacer"></span>
    <button mat-raised-button color="accent" *ngIf="this.showButton" (click)="addToHomeScreen()">Add to home screen</button>
  </mat-toolbar-row>
</mat-toolbar>
<main>
  <mat-card *ngFor="let item of responses">
    <mat-card-header>
     <mat-card-title>{{item.name}}</mat-card-title>
    </mat-card-header>
    <mat-card-content>
     {{item.description}}
    </mat-card-content>
    <mat-card-actions>
     <a mat-raised-button href="{{item.url}}" color="primary">More</a>
    </mat-card-actions>
  </mat-card>
</main>
<router-outlet></router-outlet>
app.component.css
.example-spacer {
    flex: 1 1 auto;
}
Add to Home Screen Functionality
Next, we’ll add the functions to prompt the message. Add the code below in our app.component.ts.
deferredPrompt: any;
  showButton = false;@HostListener('window:beforeinstallprompt', ['$event'])
  onbeforeinstallprompt(e: { preventDefault: () => void; }) {
    console.log(e);
    // Prevent Chrome 67 and earlier from automatically showing the prompt
    e.preventDefault();
    // Stash the event so it can be triggered later.
    this.deferredPrompt = e;
    this.showButton = true;
  }

  addToHomeScreen() {
    // hide our user interface that shows our A2HS button
    this.showButton = false;
    // Show the prompt
    this.deferredPrompt.prompt();
    // Wait for the user to respond to the prompt
    this.deferredPrompt.userChoice
      .then((choiceResult: { outcome: string; }) => {
        if (choiceResult.outcome === 'accepted') {
          console.log('User accepted the A2HS prompt');
        } else {
          console.log('User dismissed the A2HS prompt');
        }
        this.deferredPrompt = null;
      });
  }
Now let’s run the application, you should be seeing something similar to this
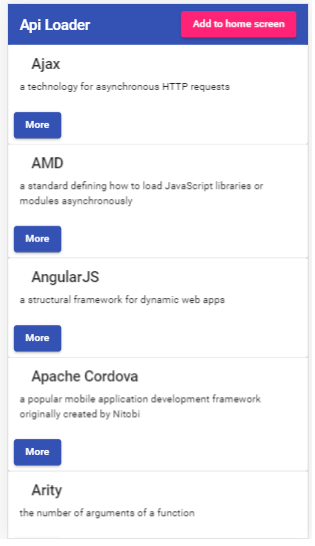
Click on the “Add To Home Screen” button and you should be seeing a confirmation box with “Add” and “Cancel” option. Click on the Add button. Now you should see the following icon on your desktop

Double click to open that, as you can see it no longer uses the default chrome browser to open the site, rather it’s opening like a native desktop application, if you open this URL by enabling remote debugging on chrome browser then you can see the similar behaviour. The final output on the desktop it should be like this

The complete source code can be found here
So if you like this tutorial, please add a clap. Building this kind of tutorial takes a lot of effort, your appreciations will give immense moral support to create more tutorials.
#angular #web-development #javascript #pwa