How to Use NestJS, Node.js Framework to Build a Secure API
In this tutorial, you’ll learn how to build a secure API using NestJS, a module-based architecture framework for Node.js powered by TypeScript.
NestJS helps developers create highly scalable, modular, and maintainable server-side web applications. It leverages the Express framework to easily implement the MVC (Model-View-Controller) pattern and to provide you with extensibility, as you can use any of the third-party modules available for Express. However, the most outstanding feature of NestJS is its native support for TypeScript, which lets you access optional static type-checking along with strong tooling for large apps and the latest ECMAScript features.
What You Will Build
In this tutorial, you’ll build a feature-complete API that lets clients perform data operations on resources that describe a restaurant menu.
You’ll be using a production client called “WHATABYTE Dashboard” to consume, test, and even try to hack the API!
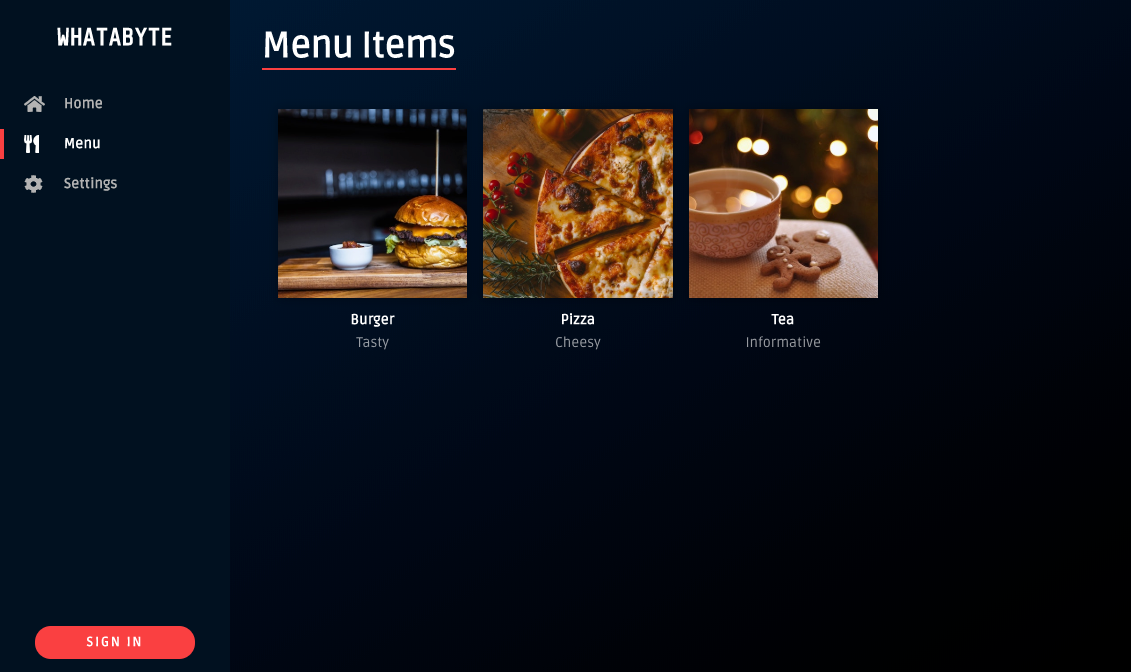
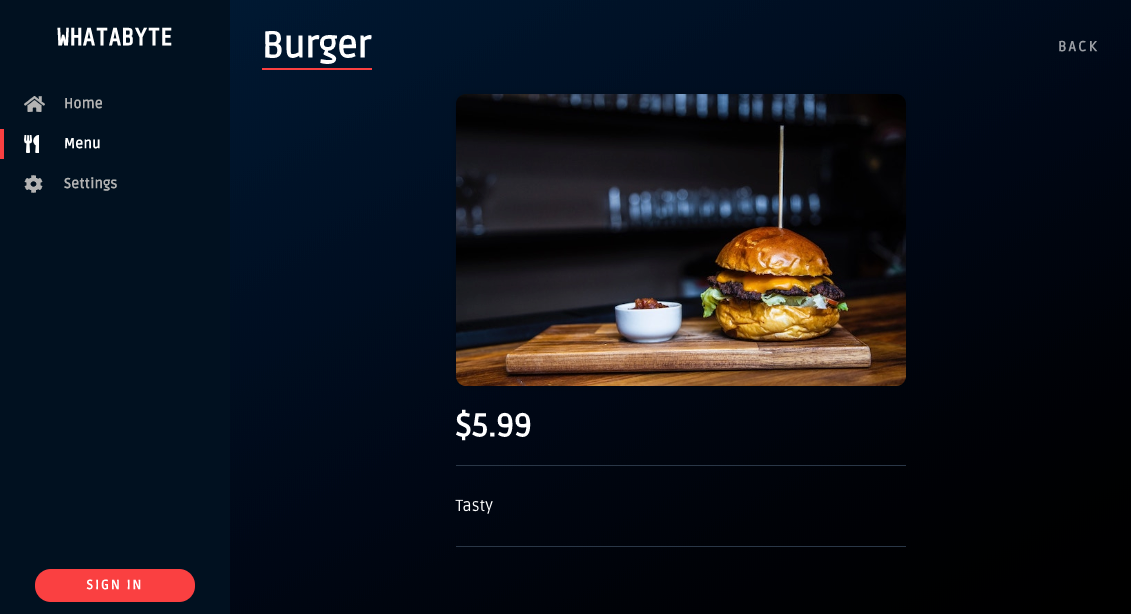
This dashboard is inspired by the sleek web player from Spotify.
API access will be constrained by the following business rules:
-
Anyone can read data: read menu items.
-
Only users with a
menu-adminrole are authorized to write data: create, update, or delete menu items.
For simplicity, you’ll store data in-memory and not in an external database for this phase of the tutorial.
Getting Started with NestJS
NestJS requires Node.js and NPM to run. Check if these are installed by running the following commands in your terminal:
node -v && npm -v
If you need to install any of them, follow the instructions provide by the Node.js Foundation for your operating system. This tutorial was tested using Node.js v10.16.3 and NPM v6.9.0.
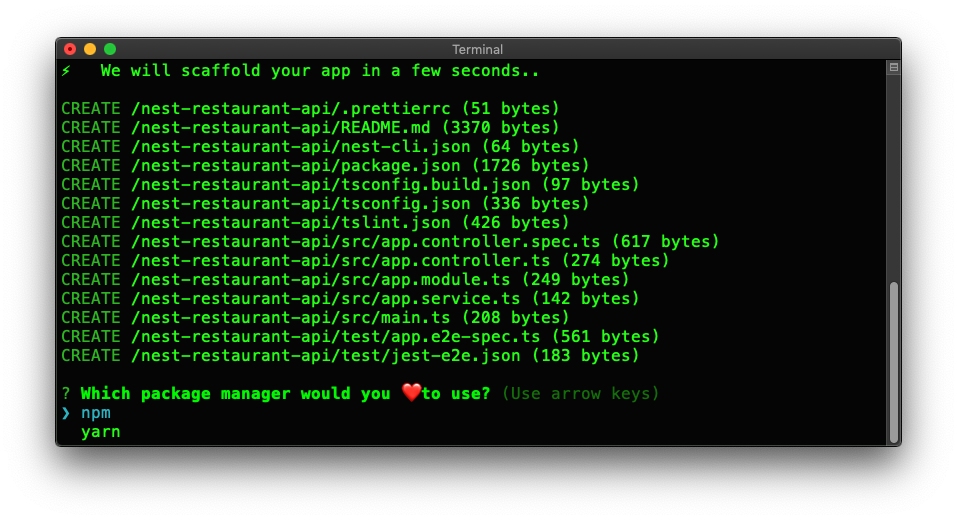
NestJS offers a powerful CLI tool to create and build your application. To generate a new project, use npx to run the NestJS CLI without installing it globally in your system:
npx @nestjs/cli new nest-restaurant-api
The
npxcommand is available withnpm v5.2.0and higher.
The CLI will ask you to choose a package manager, npm or yarn, and proceed to install project dependencies using your selection. To follow this tutorial choose npm.
Once the installation is complete you’ll get a directory called nest-restaurant-api. Navigate to this directory:
# move into the project directory
cd nest-restaurant-api
Cleaning Up the NestJS Starter Project
For simplicity, you won’t be writing any tests in this tutorial. However, you should write solid tests for any production-ready application. As such, delete the test directory and the src/app.controller.spec.ts file from your project:
rm -rf test/
rm src/app.controller.spec.ts
Refer to the NestJS Testing documentation for details on how to perform automated tests.
After that, delete the files defining AppController and AppService:
rm src/app.controller.ts src/app.service.ts
Deleting these files breaks AppModule as it depends on AppController and AppService. To fix that, open your project in your preferred IDE and update src/app.module.ts as follows:
// src/app.module.ts

import { Module } from '@nestjs/common';

@Module({
  imports: [],
  controllers: [],
  providers: [],
})
export class AppModule {}
Using Environmental Variables
src/main.ts is the entry point of your application; however, this file has hard-coded configuration dependencies that make your application less flexible and adaptable to different deployment environments.
Open src/main.ts and notice that the app is configured to listen for incoming requests on a hard-coded port number, 3000:
await app.listen(3000);
To fix this configuration rigidity, you’ll use environmental variables to provide your application with configuration values, such process.env.PORT, instead of hard-coded ones.
To start, install dotenv in your project:
npm i dotenv
dotenv is a zero-dependency module that loads environment variables from a .env file into the global variable process.env.
Create this hidden file under the root project directory as follows:
touch .env
Open .env and populate it with the following variable:
PORT=7000
The configuration variables held by .env can be attached to process.env by calling the dotenv.config() method. As such, update src/main.ts to call this method right below the module imports and replace the hard-coded port number with process.env.PORT:
// src/main.ts

import { NestFactory } from '@nestjs/core';
import { AppModule } from './app.module';
import * as dotenv from 'dotenv';

dotenv.config();

async function bootstrap() {
  const app = await NestFactory.create(AppModule);
  await app.listen(process.env.PORT);
}
bootstrap();
Now anytime you run your application, it will be listening for requests on port 7000 — or whatever the value of process.env.PORT may be. This allows your application to be externally configured by deployment services such as AWS or Heroku.
Caution! Your
.envfile eventually may contain sensitive information, such as API keys or secrets. As such, it’s critical that you add it to your.gitignorefile to prevent it from being committed to version control, such asgit.
Installing the NestJS CLI Locally
Now that the project is clean and configured, you’ll use the NestJS CLI locally as a development dependency to easily generate the architectural elements of your app. Run the following command to install it:
npm install --save-dev @nestjs/cli
It’s critical to pass the --save-dev flag to npm to ensure that the package is installed locally for development and testing purposes and it’s not included in the production bundle of your app.
Checkpoint
Similar to video games, it’s important to save your progress as you work through a software project. While IDEs and text editors may offer the ability to roll back different versions of a project file, it’s a good idea to use version control as your “checkpoint”.
Create an empty Git repository for your project as follows:
git init
Add your current project files to the repository, ignoring any file listed in .gitignore:
git add .
Finally, commit the file bundle as follows:
git commit -m "Set up foundation of NestJS app"
#nodejs #node #nest #nest-js #api
