Input Types in HTML - Explained with Code Examples
Demystify HTML input types! We will explore different input types in HTML and provide code examples to help you understand their use and implementation.
So, let's dive right in!
Introduction
Input types are the building blocks for creating interactive forms on web pages, allowing users to enter information and interact with the website. HTML offers a variety of input types suitable for different purposes, making it easy for beginners to design and create user-friendly forms.
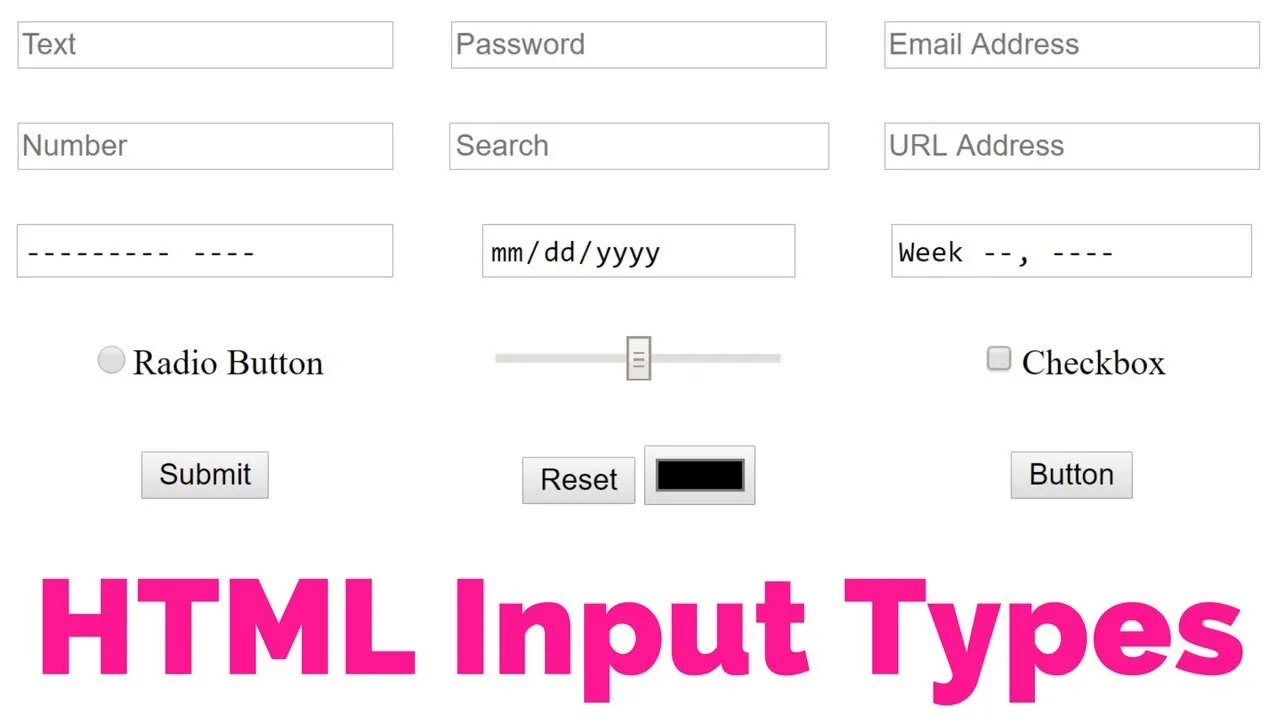
Text Input
The text input type is used to create a single-line text input field where users can enter text.
<!-- Example of a text input -->
<label for="name">Name:</label>
<input type="text" id="name" name="name">
This simple code snippet creates a label and a single-line text input field for entering the user's name.
Password Input
The password input type is similar to the text input type, but it masks the entered characters to provide privacy.
<!-- Example of a password input -->
<label for="password">Password:</label>
<input type="password" id="password" name="password">
This code creates a label and a password input field, where the entered characters will be obscured.
Email Input
The email input type is designed for entering email addresses. It offers basic validation to ensure that the entered value is a valid email address.
<!-- Example of an email input -->
<label for="email">Email:</label>
<input type="email" id="email" name="email">
This example demonstrates the creation of a label and an email input field with built-in validation.
Number Input
The number input type is specifically designed for entering numeric values. It allows you to set a minimum, maximum, and step value for the input field.
<!-- Example of a number input -->
<label for="age">Age:</label>
<input type="number" id="age" name="age" min="0" max="100" step="1">
Here, we create a label and a number input field for entering the user's age, with a minimum value of 0, a maximum value of 100, and a step value of 1.
Radio Buttons
Radio buttons are used to select one option from a group of choices. To create radio buttons, use the type="radio" attribute.
<!-- Example of radio buttons -->
<label for="gender">Gender:</label>
<input type="radio" id="male" name="gender" value="male">
<label for="male">Male</label>
<input type="radio" id="female" name="gender" value="female">
<label for="female">Female</label>
In this example, we create a label and two radio buttons for selecting the user's gender. The name attribute should be the same for all radio buttons in a group to ensure that only one option can be selected.
Checkboxes
Checkboxes are used to select multiple options from a set of choices. To create checkboxes, use the type="checkbox" attribute.
<!-- Example of checkboxes -->
<label for="interests">Interests:</label>
<input type="checkbox" id="music" name="interests" value="music">
<label for="music">Music</label>
<input type="checkbox" id="sports" name="interests" value="sports">
<label for="sports">Sports</label>
In this example, we create a label and two checkboxes for selecting the user's interests. Users can select multiple options by checking the boxes.
Date Input
The date input type is used for selecting a date. This input type provides a calendar widget to help users pick a date easily.
<!-- Example of a date input -->
<label for="dob">Date of Birth:</label>
<input type="date" id="dob" name="dob">
This code creates a label and a date input field for entering the user's date of birth.
Color Input
The color input type allows users to select a color using a color picker widget.
<!-- Example of a color input -->
<label for="favcolor">Favorite Color:</label>
<input type="color" id="favcolor" name="favcolor">
In this example, we create a label and a color input field for selecting the user's favorite color.
File Input
The file input type is used to enable users to upload files. It creates a file picker dialog that allows users to browse and select files from their devices.
<!-- Example of a file input -->
<label for="upload">Upload a File:</label>
<input type="file" id="upload" name="upload">
This code creates a label and a file input field for uploading a file.
#html #html5