It always looks cool to control any electrical equipment with a mobile device remotely without even going near it.
Today, we will demonstrate how you can give any normal AC power plug, socket or switch a touch of magic using IoT. This will enable us to control any electrical equipment in our house using a mobile device, with the help of an app (of course, built with Flutter) having Bluetooth capability.
This article will cover a lot of things:
- Integrating Bluetooth in a Flutter app (for communicating with the IoT device)
- Connecting various modules to Arduino (Bluetooth module and a 5V relay)
- Setting up Arduino (to send and receive signals)
Tutorial by Codemagic: Creating an IoT based Flutter app to interact with any home electrical equipment. Wow!
CLICK TO TWEET
Let’s get started by integrating Bluetooth in a Flutter app.
Integrating Bluetooth
The final app UI will look like this:
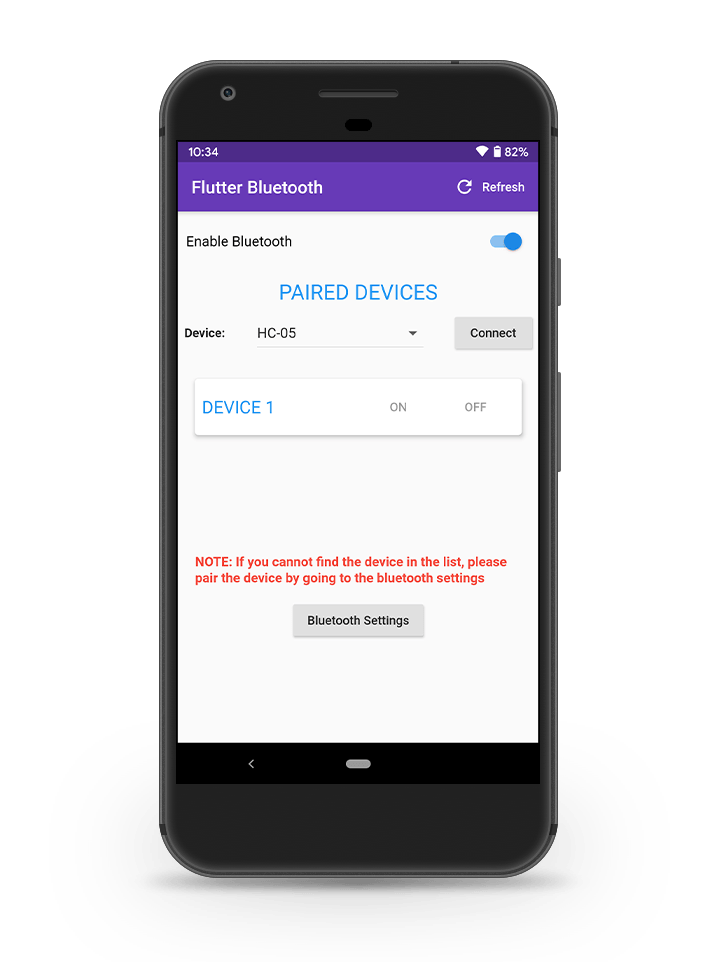
For this project, we will be using a plugin called flutter_bluetooth_serial. There is another awesome plugin for integrating Bluetooth in a Flutter app, flutter_blue.
I am using flutter_bluetooth_serial plugin in this project because it has a lot more features and gives much greater control over the Bluetooth connection while communicating with other devices.
The downside of this plugin is that it only has support for Android as of now. Any iOS developer who wants to contribute to this project can add iOS support to it (there is also an issue open on the plugin’s GitHub repo for this).
Defining the basic structure
Create a new Flutter app and add the following to the main.dart file after removing all of the Flutter Demo Counter app code:
import 'package:flutter/material.dart';

void main() => runApp(MyApp());

class MyApp extends StatelessWidget {
  @override
  Widget build(BuildContext context) {
    return MaterialApp(
      title: 'Flutter Demo',
      theme: ThemeData(
        primarySwatch: Colors.blue,
      ),
      home: BluetoothApp(),
    );
  }
}

class BluetoothApp extends StatefulWidget {
  @override
  _BluetoothAppState createState() => _BluetoothAppState();
}

class _BluetoothAppState extends State<BluetoothApp> {
  @override
  Widget build(BuildContext context) {
    return MaterialApp(
      home: Scaffold(),
    );
  }
}
This is the basic structure for starting our project. We have to use a StatefulWidget for the BluetoothApp class because we will need to mutate the state multiple times during the lifecycle of the app.
Enabling Bluetooth and retrieving devices
Now that we have the basic structure of the app, we can focus on enabling the Bluetooth connection of the user’s device and retrieve the paired devices.
- Initialize some of the variables which will be required (we will be adding more class member variables as needed later while building the app):
// main.dart

class _BluetoothAppState extends State<BluetoothApp> {
  // Initializing the Bluetooth connection state to be unknown
  BluetoothState _bluetoothState = BluetoothState.UNKNOWN;

  // Get the instance of the Bluetooth
  FlutterBluetoothSerial _bluetooth = FlutterBluetoothSerial.instance;

  // Track the Bluetooth connection with the remote device
  BluetoothConnection connection;

  // To track whether the device is still connected to Bluetooth
  bool get isConnected => connection != null && connection.isConnected;

  // ...
}
- Inside
initState(), we first have to get the current Bluetooth state. If the state indicates that Bluetooth is not turned on, request that the user give Bluetooth permissions for enabling Bluetooth on their device.
#iot #code #ai #codemagic
