How to setup Node.js on a Raspberry Pi and run a node script on boot. How to set up a … your script. Run node app.js and make sure it doesn’t give any errors.
Recently I’ve got a little piece of hardware (Raspberry Pi 2 Model B) on my desk. Rather than have it sit on its ass all day, I got a little Node.js application up and running through Nginx.
Get that Raspberry Pi up and running
A headless install doesn’t require any kind of extra hardware (such as screens or keyboard), so everything that you need is the Raspberry Pi itself, a microSD (or SD, depending on your hardware) card and an internet connection (wired or wireless, again depending on your Raspberry).
1. Get the Raspbian Stretch image
Raspbian is the most optimized OS for Raspberries and I use it when I need a minimum and fast setup. Just go the official website and download the latest version of Raspbian Stretch Lite.

2. Burn that image
Insert your card in your PC and burn the Raspbian image on it.
I followed these instructions (Linux/Windows also available) because I prefer using my terminal, but Etcher (a graphical alternative on steroids) is also available on all platforms.
3. Enable headless SSH connections
SSH is not enabled by default in Raspbian, so you will have to do it before you boot the card for the first time.
After the installation, go to boot/ and create a file called ssh (no extension).
touch ssh
4. Boot that Raspberry Pi
Insert the card, the power source, and the network cable. After the green LEDs stop blinking, your Raspberry Pi is good to go!

5. Find that Raspberry Pi
So you have power, network and an OS, no keyboard, no screen. How do you connect to the Raspberry Pi?
In order to SSH into it, you will have to find it in your network first. Supposing that you connected the Raspberry to your home network, you can see all the devices (MAC and IP addresses) in your LAN from the ARP table. Simply run in your terminal (working on all platforms)
arp -a
and you will find your Raspberry Pi right there.
fritz.box (192.168.178.1) on en1 ifscope [ethernet]
raspberrypi.fritz.box (192.168.178.73) on en1 ifscope [ethernet]
In my case, fritz.box is my router and right after is my Raspberry Pi. So from now on, I will connect to it through 192.168.178.73 address.
More about ARP tables and how you should find your devices there.
[
 ](https://res.cloudinary.com/practicaldev/image/fetch/s--pynt8F0w--/c_limit%2Cf_auto%2Cfl_progressive%2Cq_auto%2Cw_880/https://res.cloudinary.com/practicaldev/image/fetch/s--Qq1LHpN3--/c_fill%2Cf_auto%2Cfl_progressive%2Ch_150%2Cq_auto%2Cw_150/https://thepracticaldev.s3.amazonaws.com/uploads/user/profile_image/20120/f6355e24-68e5-42a1-bf8f-07dcb87e14b5.jpeg) “https://res.cloudinary.com/practicaldev/image/fetch/s--pynt8F0w--/c_limit%2Cf_auto%2Cfl_progressive%2Cq_auto%2Cw_880/https://res.cloudinary.com/practicaldev/image/fetch/s--Qq1LHpN3--/c_fill%2Cf_auto%2Cfl_progressive%2Ch_150%2Cq_auto%2Cw_150/https://thepracticaldev.s3.amazonaws.com/uploads/user/profile_image/20120/f6355e24-68e5-42a1-bf8f-07dcb87e14b5.jpeg)”)
](/onmyway133) [
Understanding ARP at the MAC layer
Khoa Pham
#arp#mac#ip
](/onmyway133/understanding-arp-at-the-mac-layer-2a14)
6. Finally SSH into that Raspberry Pi
The default credentials are
username: pi
password: raspberry
SSH into the Raspberry Pi. On Mac or Linux you can just simply run
ssh pi@192.168.178.73
while on Windows are a few alternatives such as Putty or the default config on Cmder.
Get your Node.js application up and running
You are in! You should get your Node.js application up, so the following steps are run through SSH, on your Raspberry Pi.
1. Install Node.js on Raspbian
There are a lot of ways to install Node.js on a Linux machine, but I always follow NodeSource’s instructions, being the safest way I ever did.
For Node.js v11.x I ran
sudo apt-get update
curl -sL https://deb.nodesource.com/setup_11.x | bash -
sudo apt-get install -y nodejs
Anyways, curl -sL [https://deb.nodesource.com/setup_11.x](https://deb.nodesource.com/setup_11.x "https://deb.nodesource.com/setup_11.x") | bash - will provide more instructions if you need more tools or add-ons.
Check if Node.js and npm are installed properly.
$ node -v
v11.10.0

$ npm -v
6.7.0
For other versions or troubleshooting take a look to NodeSource’s comprehensive docs. Raspbian is a Debian based OS, so look for Debian instructions.
 nodesource / distributions
NodeSource Node.js Binary Distributions
NodeSource Node.js Binary Distributions

This repository contains documentation for using the NodeSource Node.js Binary Distributions via .rpm, .deb and Snap packages as well as their setup and support scripts.
![]()
If you are looking for NodeSource’s Enterprise-grade Node.js platform, N|Solid, please visit https://downloads.nodesource.com/
Please file an issue if you are experiencing a problem or would like to discuss something related to the distributions.
Pull requests are encouraged if you have changes you believe would improve the setup process or increase compatibility across Linux distributions.
Table of Contents
- Debian and Ubuntu based distributions (deb)
Installation instructionsManual installation* Enterprise Linux based distributions (rpm)
Installation instructions* Snap packages
AboutInstallation instructionsAdvanced usage* Tests - FAQ
- Requested Distributions
- License
Debian and Ubuntu based distributions
Available architectures:
NodeSource will continue to maintain the following architectures and may add additional ones in the future.
- Debian and Ubuntu based distributions (deb)
Installation instructionsManual installation* Enterprise Linux based distributions (rpm)
Installation instructions* Snap packages
AboutInstallation instructionsAdvanced usage* Tests - FAQ
- Requested Distributions
- License
View on GitHub](https://github.com/nodesource/distributions) “https://github.com/nodesource/distributions)”)
If you choose to write or paste the code, quickly install vim, it will make our lives easier and later I will walk you through, don’t worry.
sudo apt-get update
sudo apt-get install vim -y
2. Get your Node.js app
Write, copy-paste or clone the Node.js application. For testing purposes, I created app.js file.
cd ~
vim app.js
I pasted the following boilerplate
const http = require('http');

const HOSTNAME = '127.0.0.1';
const PORT = 3000;

const server = http.createServer((req, res) => {
  res.statusCode = 200;
  res.setHeader('Content-Type', 'text/plain');
  res.end('Hello dev.to!\n');
});

server.listen(PORT, HOSTNAME, () => {
  console.log(`Server running at ${HOSTNAME} on port ${PORT}.`);
});
If vim is too overwhelming you can try to use other ways as nano. But just to be sure, this is a really quick follow-up:
-
Open (or create) the file with
vim app.js. -
Now,
vimis in the normal mode and it’s waiting for your command. Pressito go in the insert mode, this will allow you write code. -
Type or paste your code now, exactly how you’d do it in your editor.
-
If you’re done writing, press
escso you go back to the normal mode so you can commandvimto save and exit. -
Usually,
vimcommands start with:. Gently press:followed bywfor writing andqfor quitting. You can actually see the commands that you’re typing on the bottom of your terminal. Press enter to acknowledge the commands. -
Taa-daaaaa.
app.jsis saved.
If you want to do more crazy tricks with vim, follow-up this beginner guide and you will see that vim is not that bad.
[
 ](https://res.cloudinary.com/practicaldev/image/fetch/s--DVPUhCju--/c_limit%2Cf_auto%2Cfl_progressive%2Cq_auto%2Cw_880/https://res.cloudinary.com/practicaldev/image/fetch/s--L3sgMMqB--/c_fill%2Cf_auto%2Cfl_progressive%2Ch_150%2Cq_auto%2Cw_150/https://thepracticaldev.s3.amazonaws.com/uploads/user/profile_image/50687/03827052-2382-44b8-adbb-2315f8d649ee.png) “https://res.cloudinary.com/practicaldev/image/fetch/s--DVPUhCju--/c_limit%2Cf_auto%2Cfl_progressive%2Cq_auto%2Cw_880/https://res.cloudinary.com/practicaldev/image/fetch/s--L3sgMMqB--/c_fill%2Cf_auto%2Cfl_progressive%2Ch_150%2Cq_auto%2Cw_150/https://thepracticaldev.s3.amazonaws.com/uploads/user/profile_image/50687/03827052-2382-44b8-adbb-2315f8d649ee.png)”)
](/hamza) [
Vim for starters - the minimum you need to know
Hamza Tamenaoul
#vim#linux#terminal#beginners
](/hamza/vim-for-starters—the-minimum-you-need-to-know-3ob)
3. Finally run the Node.js application
Run
$ node app
Server running at 127.0.0.1 on port 3000.
and your Node.js app will run on localhost:3000/.
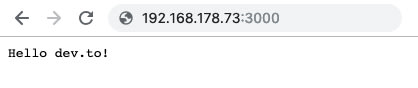
Because none of the ports are opened by default, you can test the app only from your Raspberry Pi. Open a new tab of the SSH connection and run
curl localhost:3000
and you should get
Hello dev.to!
4. Install PM2
Of course that you want your application daemonized (in background) and of course that you want your application to start when the system is restarting. PM2 will provide all of this.
Stop your Node.js application (ctrl + C) and proceed to installation.
We will use npm to install PM2 globally -g.
sudo npm install -g pm2
Start the application with PM2
To start app.js with PM2 run
pm2 start app.js
and you should see
[PM2] Starting /home/pi/app.js in fork_mode (1 instance)
[PM2] Done.
┌──────────┬────┬─────────┬──────┬─────┬────────┬─────────┬────────┬─────┬───────────┬──────┬──────────┐
│ App name │ id │ version │ mode │ pid │ status │ restart │ uptime │ cpu │ mem       │ user │ watching │
├──────────┼────┼─────────┼──────┼─────┼────────┼─────────┼────────┼─────┼───────────┼──────┼──────────┤
│ app      │ 0  │ N/A     │ fork │ 738 │ online │ 0       │ 0s     │ 0%  │ 21.8 MB   │ pi   │ disabled │
└──────────┴────┴─────────┴──────┴─────┴────────┴─────────┴────────┴─────┴───────────┴──────┴──────────┘
Now app.js is daemonized running. You can test it as we did before with curl localhost:3000.
Bonus: if the app crashes, PM2 will restart it.
PM2 startup
The pm2 startup command will generate a script that will lunch PM2 on boot together with the applications that you configure to start.
pm2 startup systemd
will generate
[PM2] Init System found: systemd
[PM2] To setup the Startup Script, copy/paste the following command:
sudo env PATH=$PATH:/usr/bin /usr/lib/node_modules/pm2/bin/pm2 startup systemd -u pi --hp /home/pi
Copy the generated command and run it.
sudo env PATH=$PATH:/usr/bin /usr/lib/node_modules/pm2/bin/pm2 startup systemd -u pi --hp /home/p
This created a system unit that will start PM2 on boot. When the system will boot PM2 will resurrect from a dump file that is not created yet. To create it run
pm2 save
This will save the current state of PM2 (with app.js running) in a dump file that will be used when resurrecting PM2.
That’s it! Your application is currently running and in case of a restart, it will start when the system boots.
PM2 daemon
You will be able to check anytime the status of your application with pm2 list, pm2 status or pm2 show.
$ pm2 list
┌──────────┬────┬─────────┬──────┬─────┬────────┬─────────┬────────┬──────┬───────────┬──────┬──────────┐
│ App name │ id │ version │ mode │ pid │ status │ restart │ uptime │ cpu  │ mem       │ user │ watching │
├──────────┼────┼─────────┼──────┼─────┼────────┼─────────┼────────┼──────┼───────────┼──────┼──────────┤
│ app      │ 0  │ N/A     │ fork │ 451 │ online │ 0       │ 96m    │ 0.2% │ 31.8 MB   │ pi   │ disabled │
└──────────┴────┴─────────┴──────┴─────┴────────┴─────────┴────────┴──────┴───────────┴──────┴──────────┘

$ pm2 show app
┌───────────────────┬──────────────────────────────────┐
│ status            │ online                           │
│ name              │ app                              │
│ version           │ N/A                              │
│ restarts          │ 0                                │
│ uptime            │ 97m                              │
│ script path       │ /home/pi/app.js                  │
│ script args       │ N/A                              │
│ error log path    │ /home/pi/.pm2/logs/app-error.log │
│ out log path      │ /home/pi/.pm2/logs/app-out.log   │
│ pid path          │ /home/pi/.pm2/pids/app-0.pid     │
│ interpreter       │ node                             │
│ interpreter args  │ N/A                              │
│ script id         │ 0                                │
│ exec cwd          │ /home/pi                         │
│ exec mode         │ fork_mode                        │
│ node.js version   │ 11.10.0                          │
│ node env          │ N/A                              │
│ watch & reload    │ ✘                                │
│ unstable restarts │ 0                                │
│ created at        │ 2019-02-17T14:14:35.027Z         │
└───────────────────┴──────────────────────────────────┘
There is a lot of greatness within PM2 that you can use, read more about logs and processes below.
[
 ](https://res.cloudinary.com/practicaldev/image/fetch/s--D2lgk2QQ--/c_limit%2Cf_auto%2Cfl_progressive%2Cq_auto%2Cw_880/https://res.cloudinary.com/practicaldev/image/fetch/s--Cvne3mtI--/c_fill%2Cf_auto%2Cfl_progressive%2Ch_150%2Cq_auto%2Cw_150/https://thepracticaldev.s3.amazonaws.com/uploads/user/profile_image/23591/6b3970ab-71b1-4cdb-8413-57ac3c24174b.jpg) “https://res.cloudinary.com/practicaldev/image/fetch/s--D2lgk2QQ--/c_limit%2Cf_auto%2Cfl_progressive%2Cq_auto%2Cw_880/https://res.cloudinary.com/practicaldev/image/fetch/s--Cvne3mtI--/c_fill%2Cf_auto%2Cfl_progressive%2Ch_150%2Cq_auto%2Cw_150/https://thepracticaldev.s3.amazonaws.com/uploads/user/profile_image/23591/6b3970ab-71b1-4cdb-8413-57ac3c24174b.jpg)”)
](/nickparsons) [
Running PM2 & Node.js in Production Environments
Nick Parsons
#pm2#node#processmanagement
](/nickparsons/running-pm2–nodejs-in-production-environments-23i5)
Make use of a Reverse Proxy
As I mentioned before, none of the ports on your devices are publicly open yet, so you cannot access your Raspberry Pi from the outer world. There are a ton of reason why you should or shouldn’t use a reverse proxy for your Node.js application. Because of scalability and security reasons (and also is really simple to setup and manage), I will use Nginx as a Reverse Proxy Server for this application.
0. Don’t use a Reverse Proxy :(
If you plan to use a Reverse Proxy don’t follow this step otherwise you will mess up the ports (like having 80 and 3000 opened at the same time).
An uncomplicated way to go without a Reverse Proxy is to use [ufw](https://help.ubuntu.com/community/UFW "ufw") to allow some of the ports to allow incoming traffic. But note that this might be a big security flaw.
Install it by running
sudo apt-get install ufw
A quick sudo ufw status verbose will show us that ufw is currently inactive. Before you enable it, you should allow all the SSH traffic to your device, so the connection is not disturbed.
$ sudo ufw allow ssh
Rules updated
Rules updated (v6)
Now you can enable it.
sudo ufw enable
Another quick sudo ufw status verbose will show that all incoming SSH traffic is allowed. All the outgoing traffic is allowed, so don’t worry about it. Now just go on and allow connections on 3000, the port of your application.
sudo ufw allow 3000
Now you can access from the outside of the world! You can type your device’s address followed by the port in your browser.
1. Install NGINX
I used Nginx as a Reverse Proxy Server to redirect all the traffic to/from port 80 to my application, on port 3000. Install Nginx running
sudo apt update
sudo apt install nginx
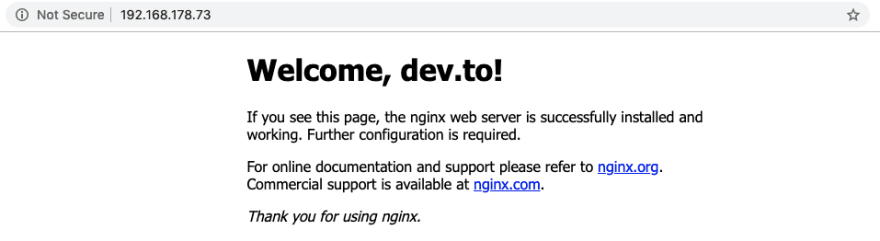
After the installation, Nginx will be running right away. The default port opened is 80 and you can test it by browsing to your Raspberry’s address.
2. Configure the Reverse Proxy Server
There is a lot to say about Reverse Proxies, but we will stick to basics now.
You will edit the default configuration (that serves the HTML page that you saw in your browser) to make the proper redirects.
sudo vim /etc/nginx/sites-available/default
If you are not familiar to Nginx, /etc/nginx/sites-available/default is a long, confusing file. I will get rid of all the comments so you can see it better.
server {
        listen 80 default_server;
        listen [::]:80 default_server;

        root /var/www/html;

        index index.html index.htm index.nginx-debian.html;

        server_name _;

        location / {
            # First attempt to serve request as file, then
            # as directory, then fall back to displaying a 404.
            try_files $uri $uri/ =404;
            # proxy_pass http://localhost:8080;
            # proxy_http_version 1.1;
            # proxy_set_header Upgrade $http_upgrade;
            # proxy_set_header Connection 'upgrade';
            # proxy_set_header Host $host;
            # proxy_cache_bypass $http_upgrade;
        }
}
You will need the basic configuration, therefore leave it be. You will make changes to location / { block.
Uncomment the commented section inside that block, change the port to 3000, get rid of the first lines and that exact configuration is a Reverse Proxy (or just copy the following code).
server {
        listen 80 default_server;
        listen [::]:80 default_server;

        root /var/www/html;

        index index.html index.htm index.nginx-debian.html;

        server_name _;

        location / {
            proxy_pass http://localhost:3000;
            proxy_http_version 1.1;
            proxy_set_header Upgrade $http_upgrade;
            proxy_set_header Connection 'upgrade';
            proxy_set_header Host $host;
            proxy_cache_bypass $http_upgrade;
        }
}
Check for syntax errors in Nginx with
sudo nginx -t
and finally restart the Nginx server.
sudo systemctl restart nginx
Test it out by browsing to your Raspberry’s address.

Done! All the requests to your Raspberry’s address will be redirected to your Node.js application.
Note that this is a basic configuration of Nginx, you can discover more about other features here.
[
 ](https://res.cloudinary.com/practicaldev/image/fetch/s--cxPIt7H1--/c_limit%2Cf_auto%2Cfl_progressive%2Cq_auto%2Cw_880/https://res.cloudinary.com/practicaldev/image/fetch/s--nr6UezBJ--/c_fill%2Cf_auto%2Cfl_progressive%2Ch_150%2Cq_auto%2Cw_150/https://thepracticaldev.s3.amazonaws.com/uploads/user/profile_image/22851/c1e857d6-6ad3-46af-88d0-933d3078611c.jpg) “https://res.cloudinary.com/practicaldev/image/fetch/s--cxPIt7H1--/c_limit%2Cf_auto%2Cfl_progressive%2Cq_auto%2Cw_880/https://res.cloudinary.com/practicaldev/image/fetch/s--nr6UezBJ--/c_fill%2Cf_auto%2Cfl_progressive%2Ch_150%2Cq_auto%2Cw_150/https://thepracticaldev.s3.amazonaws.com/uploads/user/profile_image/22851/c1e857d6-6ad3-46af-88d0-933d3078611c.jpg)”)
](/mozartted) [
Understanding nginx (proxying, reverse proxying, load balancing)
Osita Chibuike
#servers#programming#devops
](/legobox/understanding-nginx-proxying-reverse-proxying-load-balancing-1pjd)
Finale
Now you are done! So you got a Node.js application running (daemonized) on a headless Raspberry Pi that deals with requests through an Nginx Reverse Proxy Server.
Hopefully, this was a comprehensive enough guide, but I am open to discussions and questions below. Let us know what you’ve experienced or what other alternatives you found on the way.
Learn More
☞ The Complete Node.js Developer Course (2nd Edition)
☞ GraphQL: Learning GraphQL with Node.Js
☞ Angular (Angular 2+) & NodeJS - The MEAN Stack Guide
☞ Beginner Full Stack Web Development: HTML, CSS, React & Node
☞ Node with React: Fullstack Web Development
☞ MERN Stack Front To Back: Full Stack React, Redux & Node.js
#node-js