How to build Coding test platform with Node.js
Coding tests are used by more and more companies these days during the recruitment of software developers. Websites like HackerRank, Codility, etc. help companies to administer these tests and score the candidates based on the performance of their code when run against some test cases.
In this article, I’ll describe how to build a simple web application for administering a coding test. The web app will present users with a problem, allow the user submit their solution, run the solution on some predefined test cases, and display the results to the user.
We’ll be working with Express.js for the web back end, while Python will be the language solutions will be submitted in.
Setting Up the Stage
We’ll begin by creating the user interface, which will consist of a question area and a coding area.
To do this, we’ll first create two div elements for each area. Then, we’ll style them:
<div class="question">
  <h2><strong>QUESTION</strong></h2>
  <span id="questionText"></span>
</div>
<div class="code-area">
  <textarea rows="20" autofocus>def solution(arr):</textarea>
</div>
Next, we style the two divs:
.question, .code-area {
  padding: 25px;
  display: table-cell;
  width: 50%;
}
.question {
  text-align: left;
  position: absolute;
  top: 0vh;
}
.code-area {
  border-left: 2px solid navy;
}
In the above CSS, we’re making the two divs’ table cells (so they can be side by side). We need to have a table to contain them. We’ll create a containing div for that:
<div class="container">
  <div class="question">
    ...
  </div>
  <div class="code-area">
    ...
  </div>
</div>
And then we’ll style it:
.container {
  display: table;
  height: 95vh;
  width: 95vw;
}
We will also add some styling to the body element to change the background colour and font:
body {
  background-color: aliceblue;
  text-align: center;
  font-size: 16pt;
  font-family: 'Gill Sans', 'Gill Sans MT', Calibri, 'Trebuchet MS', sans-serif;
}
Earlier, we created a textarea element whose default text was def solution(arr):. Let’s give this textarea a class and ID:
<textarea rows="20" class="input" id="code" autofocus>def solution(arr):</textarea>
Let’s also create a button element for running tests and a span element for the results:
...
<textarea rows="20" class="input" id="code" autofocus>def solution(arr):</textarea>
<br/><br/>
<button>RUN TESTS</button>
<br/><br/>
<span id="results"></span>
...
Let’s now add some styling to the elements:
.input, #results {
  height: 60%;
}
.input {
  border: 1px solid gray;
  width: 90%;
  font-family: monospace;
  font-size: 12pt;
  padding: 10px;
}
button {
  width: 150px;
  height: 50px;
  cursor: pointer;
  background-color: lightgreen;
  color: white;
  font-weight: bolder;
}
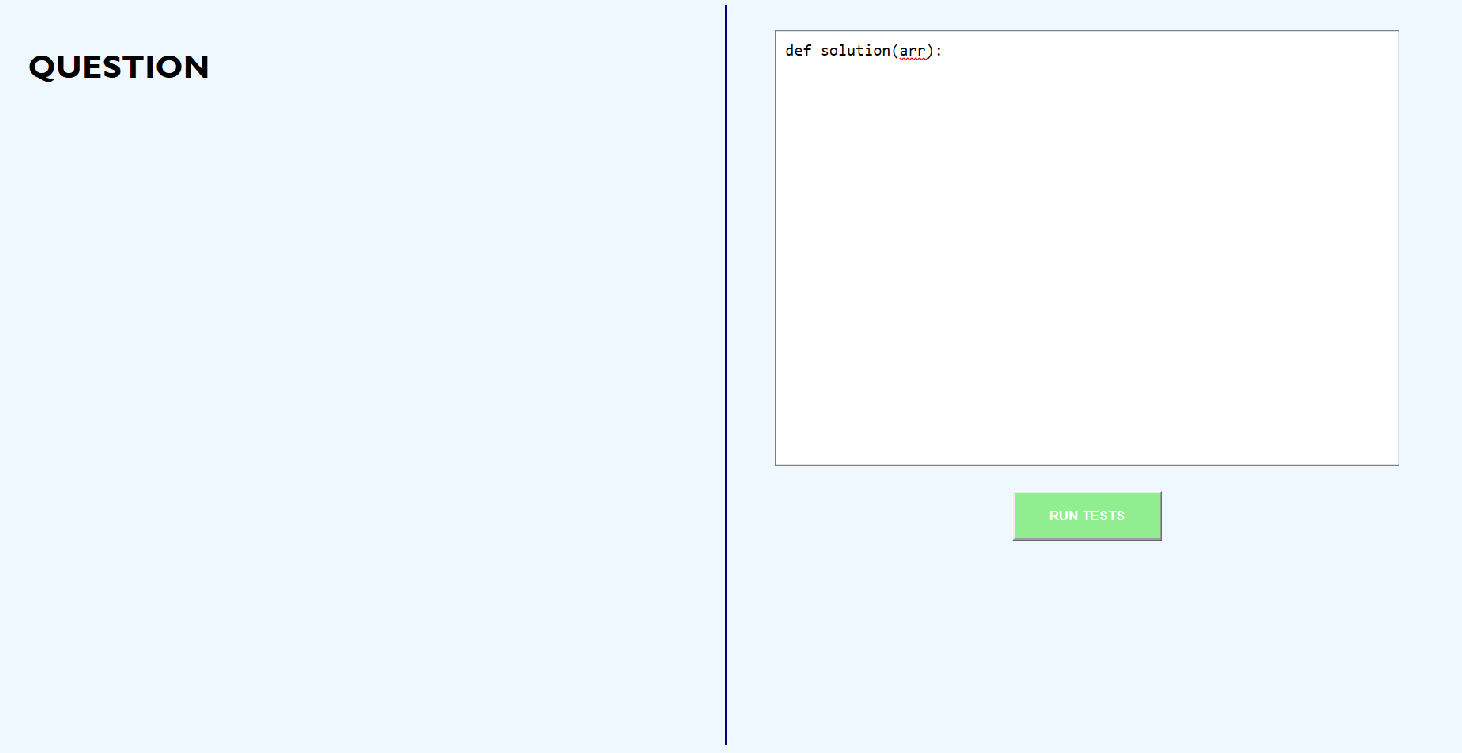
That concludes our work on the user-interface design. The web page now looks like this:

The user interface
Preparing the Back End
On the other end of the web application, we’ll begin by importing the libraries needed:
const bodyParser = require('body-parser');
const cors = require('cors');
const execSync = require('child_process').execSync;
const express = require('express');
const fs = require('fs');
const path = require('path');
We need:
body-parserto help us with our POST requestscorsfor cross-origin requestschild_process,fs, andpathfor executing the user’s code solutionexpress, obviously.
Next, we’ll create an Express application and set it up to use the dependencies we need:
const app = express();
app.use(cors());
app.use(bodyParser.json());
app.use(bodyParser.urlencoded({ extended: true }));
And finally, we’ll set up the end points and make the app listen on port 5000:
function testCode(req, res) {
  return res.send("Success");
}
app.get('/', (req, res) => {
  res.send("Hello world");
});
app.post('/test/', testCode);
app.listen(5000, () =>
  console.log(`Listening on port 5000.`),
);
We have two end points above:
/: for serving the front-end page and/test/: for testing the user’s code.
The /test/ end point calls the function testCode when visited. This function will write the user’s code to a Python file and then run another Python script to test the code:
...
const CODE_FOLDER = "code";
function testCode(req, res) {
  let code = req.body["code"];
  try {
    fs.writeFileSync(path.join(__dirname, CODE_FOLDER, "input_code.py"), code);
    const proc = execSync("python3 " + path.join(CODE_FOLDER, "tests.py"));
    const results = proc.toString();

    return res.send(results);
  } catch (error) {
    console.log("An error occurred");
    console.log(error);
    return res.send("An error occurred.");
  }
}
In the code above, the code the user enters — which will be sent as a request parameter called code from the front end — will be saved to a file called input_code.py, then the Python script tests.py will be executed using Node’s execSync function (which executes a console command, waits for its output, and returns it). Then the output from the script will be sent to the front end.
Here’s what the tests.py script contains:
from input_code import solution
def get_test_cases():
  pass
def get_expected_outputs():
  pass
def test_code():
  pass
if __name__ == '__main__':
  test_code()
It contains three functions:
get_test_cases(): to get the test cases to run the user’s code againstget_expected_outputs(): to get the expected output for each test casetest_code(): to test the user’s solution against the test cases
Let’s fill up these functions:
def get_test_cases():
  return {
    "SMALL_INPUT": [1, 2, 3],
    "LARGE_INPUT": [1, 2, 3] * 1000 + [4],
  }
def get_expected_outputs():
  return {
    "SMALL_INPUT": 3,
    "LARGE_INPUT": 4,
  }
These first two functions provide us with the input and output of some sample test cases. They also label the test cases “SMALL_INPUT” and “LARGE_INPUT” for identification.
Let’s now use them in the third function to test the user’s code:
def test_code():
  test_cases = get_test_cases()
  expected = get_expected_outputs()
  test_cases_count = len(test_cases)
  passed_test_cases = 0
  failed_test_cases = []

  for label in test_cases.keys():
    code_result = solution(test_cases[label])
    if code_result == expected[label]:
      passed_test_cases += 1
    else:
      failed_test_cases.append(label)

  print("Passed", passed_test_cases, "out of", test_cases_count, "test cases.")

  if len(failed_test_cases) > 0:
    print("Test cases not passed:", ", ".join(failed_test_cases))
With the code above, we loop through each test case, call the user’s solution on the test case input, and compare the user’s result with the expected result.
If the results are the same, we add one to the number of test cases passed; otherwise, we add the label of the failed test case to an array.
Finally, we print the number of passed test cases, and if there are any failed ones, we print their labels. Notice that the user’s code must contain a function called solution(), which will be passed via an array for each test case and must return a number.
With this, the back end is completed.
Connecting the Two Ends
Our next task is to connect the front end to the back end.
To do that, we’ll create a JavaScript function to be called whenever the user clicks the RUN TESTS button. This function will send the user’s code to the back end and display the user’s results.
<script>
  function runTests() {
    document.getElementById("results").innerHTML = "Running...";
    const code = document.getElementById("code").value;
    let xhr = new XMLHttpRequest();

    xhr.onreadystatechange = () => {
      if (xhr.readyState == 4 && xhr.status == 200) {
        document.getElementById("results").innerHTML = xhr.responseText;
      }
    }
    xhr.open("POST", "http://localhost:5000/test/");
    xhr.setRequestHeader("Content-type", "application/x-www-form-urlencoded");
    xhr.send("code=" + code);
  }
</script>
The function first gets the user’s code from the textarea with the ID code, then it uses AJAX to send a request to the back end’s /test/ end point. Then when it receives a response, it sets the results in the span with ID results.
Let’s add this event handler to the RUN TESTS button:
<button onclick="runTests()">RUN TESTS</button>
Testing the Application
To test the web application, let’s add a simple question to the question area:
<div class="question">
  <h2><strong>QUESTION</strong></h2>
  Find the maximum number in an array of integers.
  <br/> For example, in the array [1, -3, 5], the maximum number is 5.
</div>
The question simply asks the user to find the largest number in an array. Here’s a solution to the problem:
def solution(arr):
  maximum = arr[0]
  return maximum
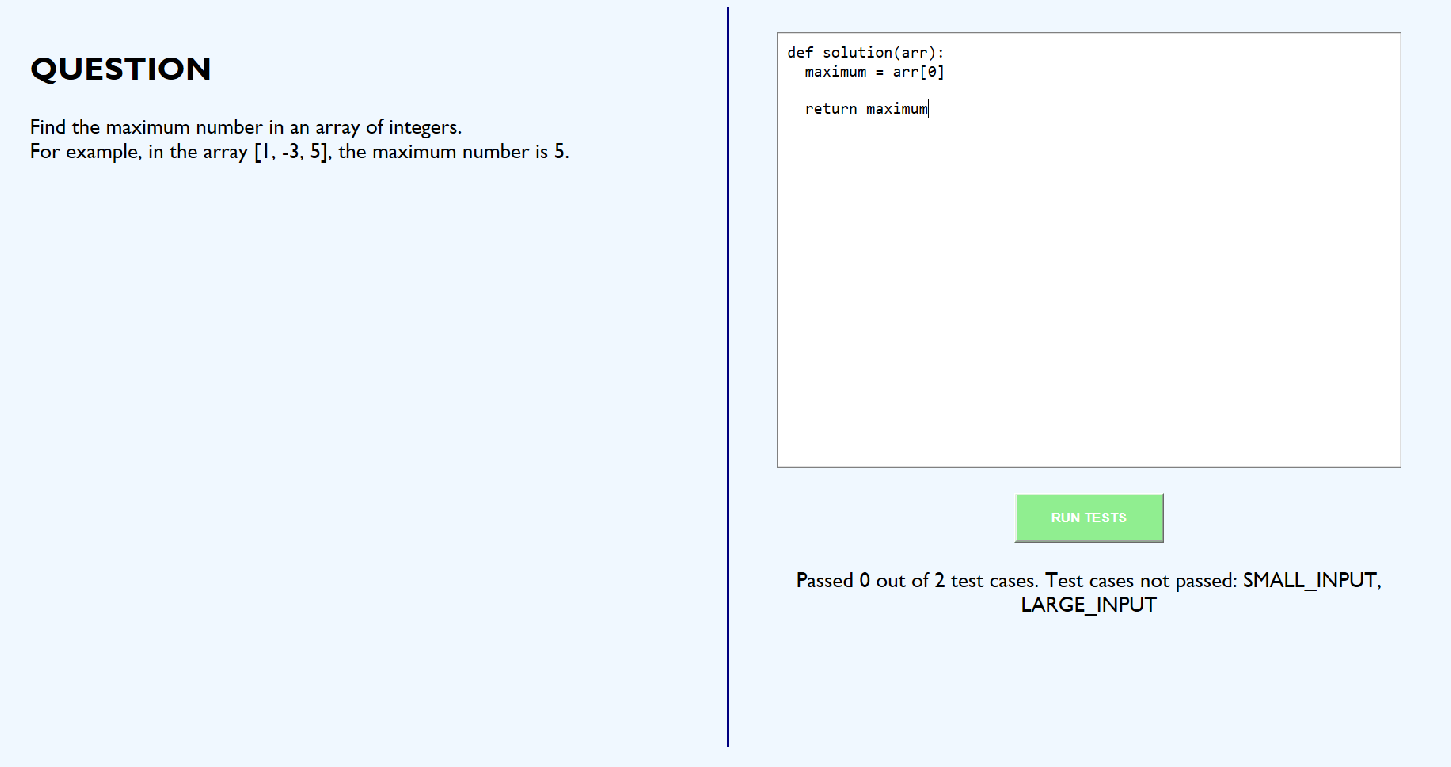
The solution returns the first element in the array (which is obviously wrong). Clicking the RUN TESTS button gives us this:

Testing with a wrong solution
The test results tell us the solution is wrong as it does not pass any test case. It also states the names of the test cases failed to help the user adjust their code appropriately.
Now let’s try with the following code:
def solution(arr):
  maximum = 0

  for elem in arr:
    if elem > maximum:
      maximum = elem
  return maximum
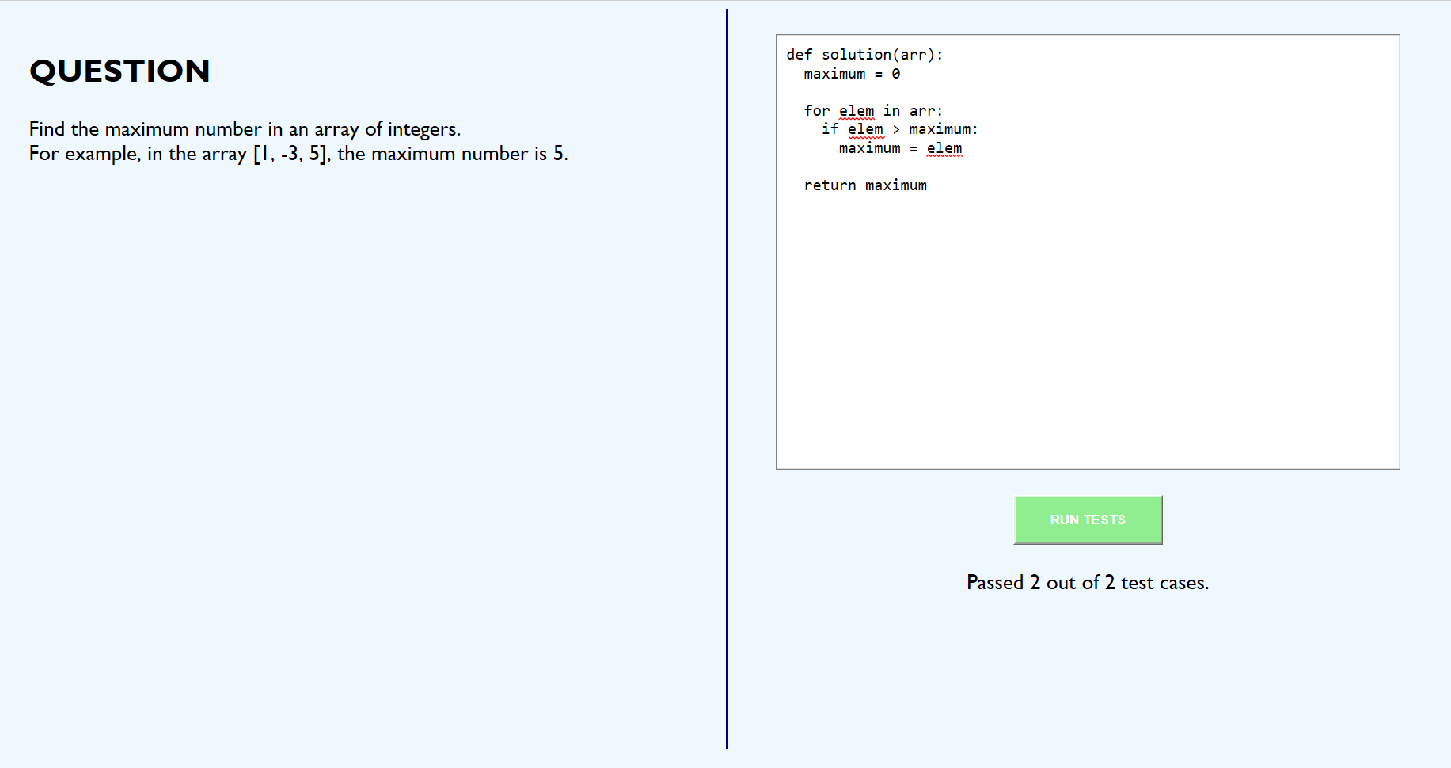
This solution loops through the array and checks which item is the largest by comparing each element with the previously known largest element. This is more likely a correct solution, but let’s test it to confirm:

Testing with a correct solution
The code passed both test cases! Our coding test web application works as expected.
Thanks for following this far. You can find the entire code for the web application in my GitHub repository.
#nodejs #javascript
