Prologue
I have confessed my love for R in my previous posts, so I won’t repeat the same here. It is absolutely the best tool for performing statistical analysis of data, but as it is a programming language, it can do so much more. It may not be as complete or powerful as Python, but people in academia love it for the myriad of packages available, and new ones are being developed daily. R also has a fantastic integrated development environment (IDE) called RStudio. Beginners should definitely take advantage of the user-friendly interface to get used to the language faster, but the IDE is equally useful to advanced users. I have tried other IDEs and code editors, but I always come back to using RStudio. One of the primary reason behind this is R notebook.
Markdown
R Notebook, is essentially, a form of markdown. If you have no idea what markdown is, take a look at the GIF below:
Example of Markdown formatting (Recorded in Visual Studio Code)
Basically markdown is a way of typesetting documents. In the GIF, you see text being typed in the left pane, while the preview of the final render being shown in the right pane. Markdown is a very easy way to format text with minimal commands, and is much easier to use compared to selecting, clicking and formatting of text in word processors. Markdown also lets you export the document in various formats such as HTML, PDF, EPUB, MS Word etc. To know more about markdown, visit this link; and to know more about the various commands and formatting tools available in markdown, visit this one.
R Notebook
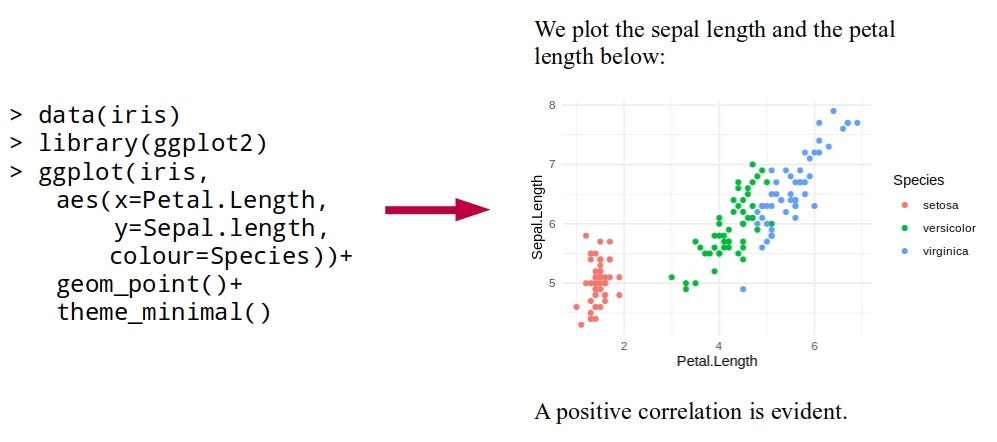
You can write markdown in RStudio — but that’s just not it. RStudio markdown interface — known as R notebook, is a fantastic way of saving and sharing results of data analysis. You type your R code inside the notebook, and running the code displays your results inside the notebook, and finally you can export code and results together in a single file. It makes it easy for anyone to understand and reproduce the analysis you have done. Take a look at the GIF below:
Example of working with R Notebook in RStudio
After you create a R Notebook file, you insert code chunks in the file — where you write your code. Running the code chunk (as shown in the GIF) gives you the output inside the notebook.
Using R Notebook
I will describe the basics of using R notebook here, along with basic markdown syntaxes that you will need. For a more detailed tutorial, visit this link.
To open a R notebook, either click on the File menu and select R Notebook under New File section; or easier — click on the small arrow beside the small green plus icon and choose R Notebook. A new notebook will open with some example code. You can delete the example code, just do not delete the YAML metadata, which are the instructions written at the beginning between two --- . These two lines contain instructions for the title of the notebook, and the format the notebook will be rendered to. The title can be changed to whatever you like. The format, by default, will be set to HTML, but you can change it to PDF or Word document by clicking on the small arrow beside the Preview button and selecting “Knit to PDF” or “Knit to Word document”.
#rstudio #markdown #r #r-notebook #data-analysis #data analysis