Originally published by Pier Paolo Ippolito at freecodecamp.org
Introduction
Jupyter Notebook is a client-server application used for running notebook documents in the browser. Notebook documents are documents able to contain both code and rich text elements such as paragraphs, equations, and so on.
In this article, I will walk you through some simple tricks on how to improve your experience with Jupyter Notebook. We will start from useful shortcuts and we will end up adding themes, automatically generated table of contents, and more.
Shortcuts
Shortcuts can be really useful to speed up writing your code. I will now walk you through some of the shortcuts I found most useful to use in Jupyter.
There are two possible way to interact with Jupyter Notebook: Command Mode and Edit Mode. Some shortcuts work only on one mode or another while others are common to both modes.
Some shortcuts which are common in both modes are:
- Ctrl + Enter: to run all the selected cells
- Shift + Enter: run the current cell and move the next one
- Ctrl + s: save notebook
In order to enter Jupyter command mode, we need to press Esc and then any of the following commands:
- H: show all the shortcuts available in Jupyter Notebook
- Shift + Up/Down Arrow: to select multiple notebook cells at the same time (pressing enter after selecting multiple cells will make all of them run!)
- A: insert a new cell above
- B: insert a new cell below
- X: cut the selected cells
- Z: undo the deletion of a cell
- Y: change the type of cell to Code
- M: change the type of cell to Markdown
- Space: scroll notebook down
- Shift + Space: scroll notebook up
In order to enter Jupyter edit mode instead, we need to press Enter and successively any of the following commands:
- Tab: code competition suggestions
- Ctrl + ]: indent code
- Ctrl + [: dedent code
- Ctrl + z: undo
- Ctrl + y: redo
- Ctrl + a: select all
- Ctrl + Home: move cursor to cell start
- Ctrl + End: move cursor to the end of the cell
- Ctrl + Left: move cursor one word left
- Ctrl + Right: move cursor one word right
Shell commands and Packages installation
Not many users are aware of this, but it is possible to run shell commands in a Jupyter notebook cell by adding an exclamation mark at the beginning of the cell. For example, running a cell with !ls will return all the items in the current working directory. Running a cell with !pwd will instead print out the current directory file-path.
This same trick can also be applied to install Python packages in Jupyter notebook.
!pip install numpy
Jupyter Themes
If you are interested in changing how your Jupyter notebook looks, it is possible to install a package with a collection of different themes. The default Jupyter theme looks like the one in Figure 1. In Figure 2 you will see how we will be able to personalise its aspect.
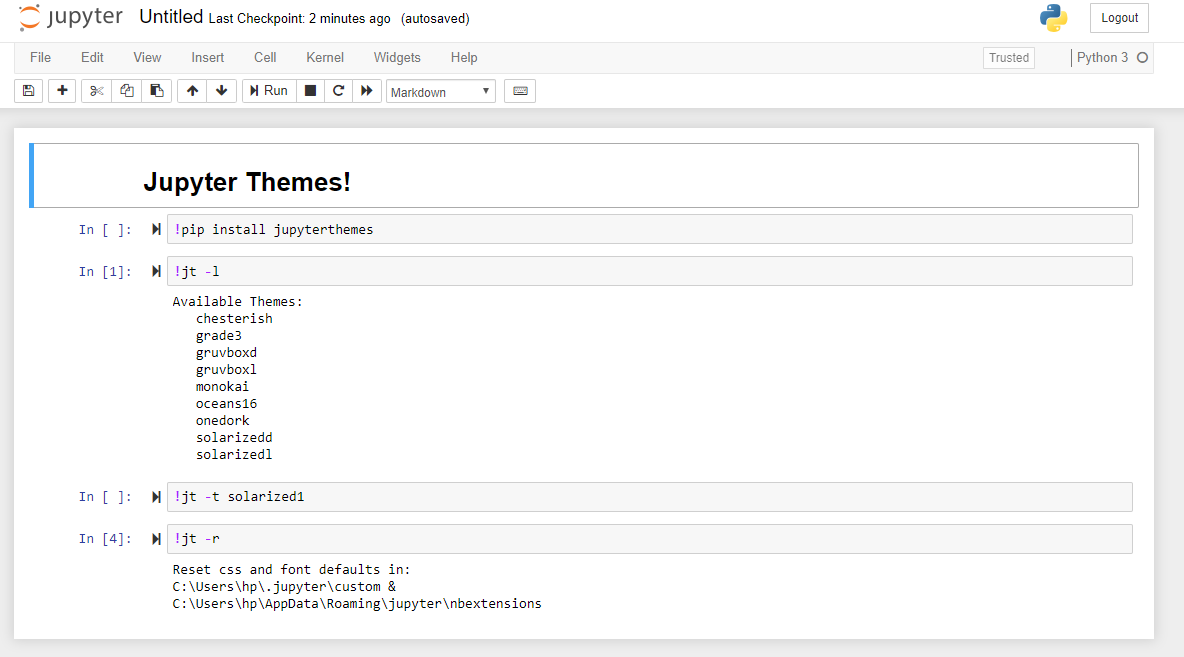
Figure 1: Default Jupyter Notebook Theme
We can install our package directly in the notebook using the trick I showed you in the previous section:
!pip install jupyterthemes
We can the run the following command to list the names of all the available themes:
!jt -lCell output:
Available Themes:
chesterish
grade3
gruvboxd
gruvboxl
monokai
oceans16
onedork
solarizedd
solarizedl
Finally, we can choose a theme using the following command (in this example I decided to use the solarized1 theme):
!jt -t solarizedl
Once we’ve run this command and refreshed the page, our notebook should look like the one in Figure 2.
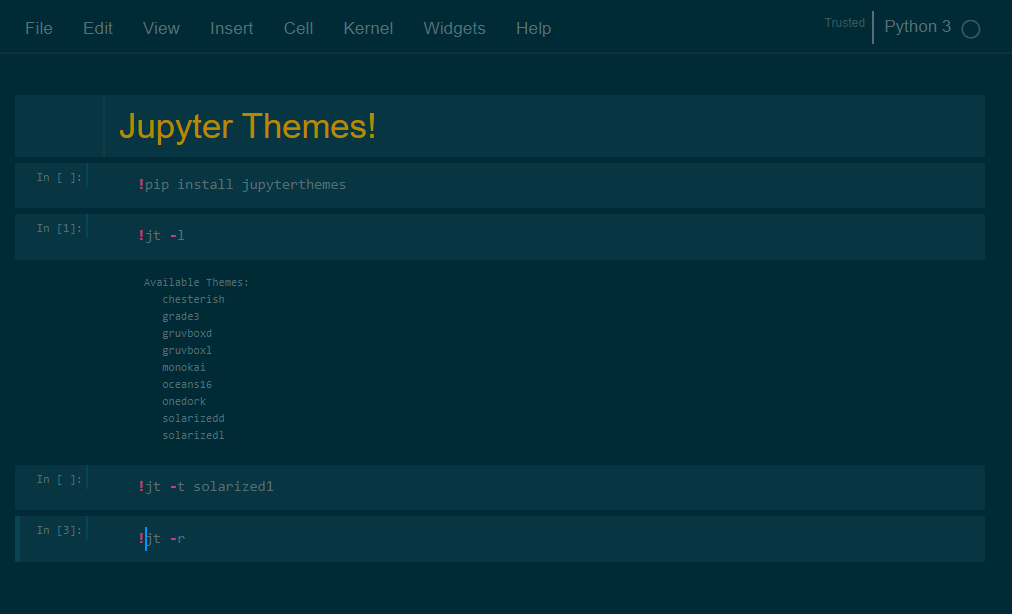
Figure 2: Solarized1 notebook Theme
In case you wish anytime to come back to the original Jupyter notebook theme, you can just run the following command and refresh your page.
!jt -r
Jupyter Notebook Extensions
Notebook extensions can be used to enhance the user experience and offer a wide variety of personalization techniques.
In this example, I will be using the nbextensions library in order to install all the necessary widgets (this time I suggest you to first install the packages through terminal and then open the Jupyter notebook). This library makes use of different Javascript models in order to enrich the notebook frontend.
! pip install jupyter_contrib_nbextensions

! jupyter contrib nbextension install --system
Once nbextensions is installed you will notice that there is an extra tab on your Jupyter notebook homepage (Figure 3).
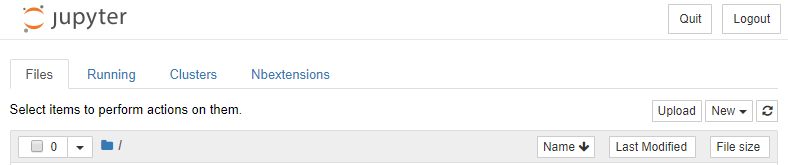
Figure 3: Adding nbextensions to Jupyter notebook
By clicking on the Nbextensions tab, we will be provided with a list of available widgets. In my case, I decided to enable the ones shown in Figure 4.
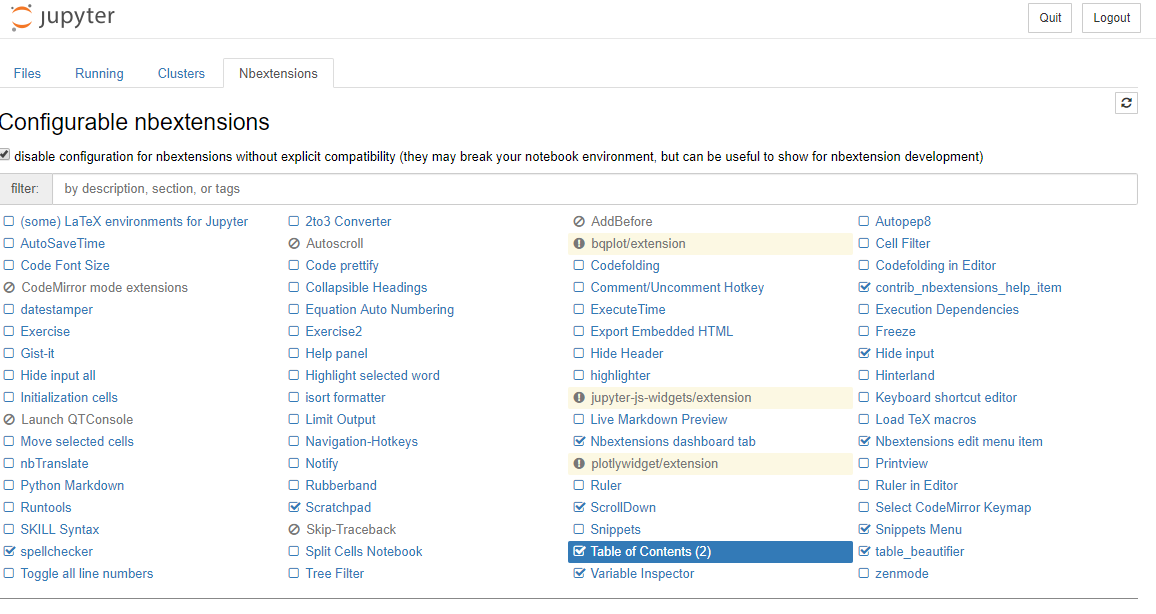
Figure 4: nbextensions widgets options
Some of my favourite extensions are:
- Table of Contents
Auto-generate a table of contents from markdown headings (Figure 5).
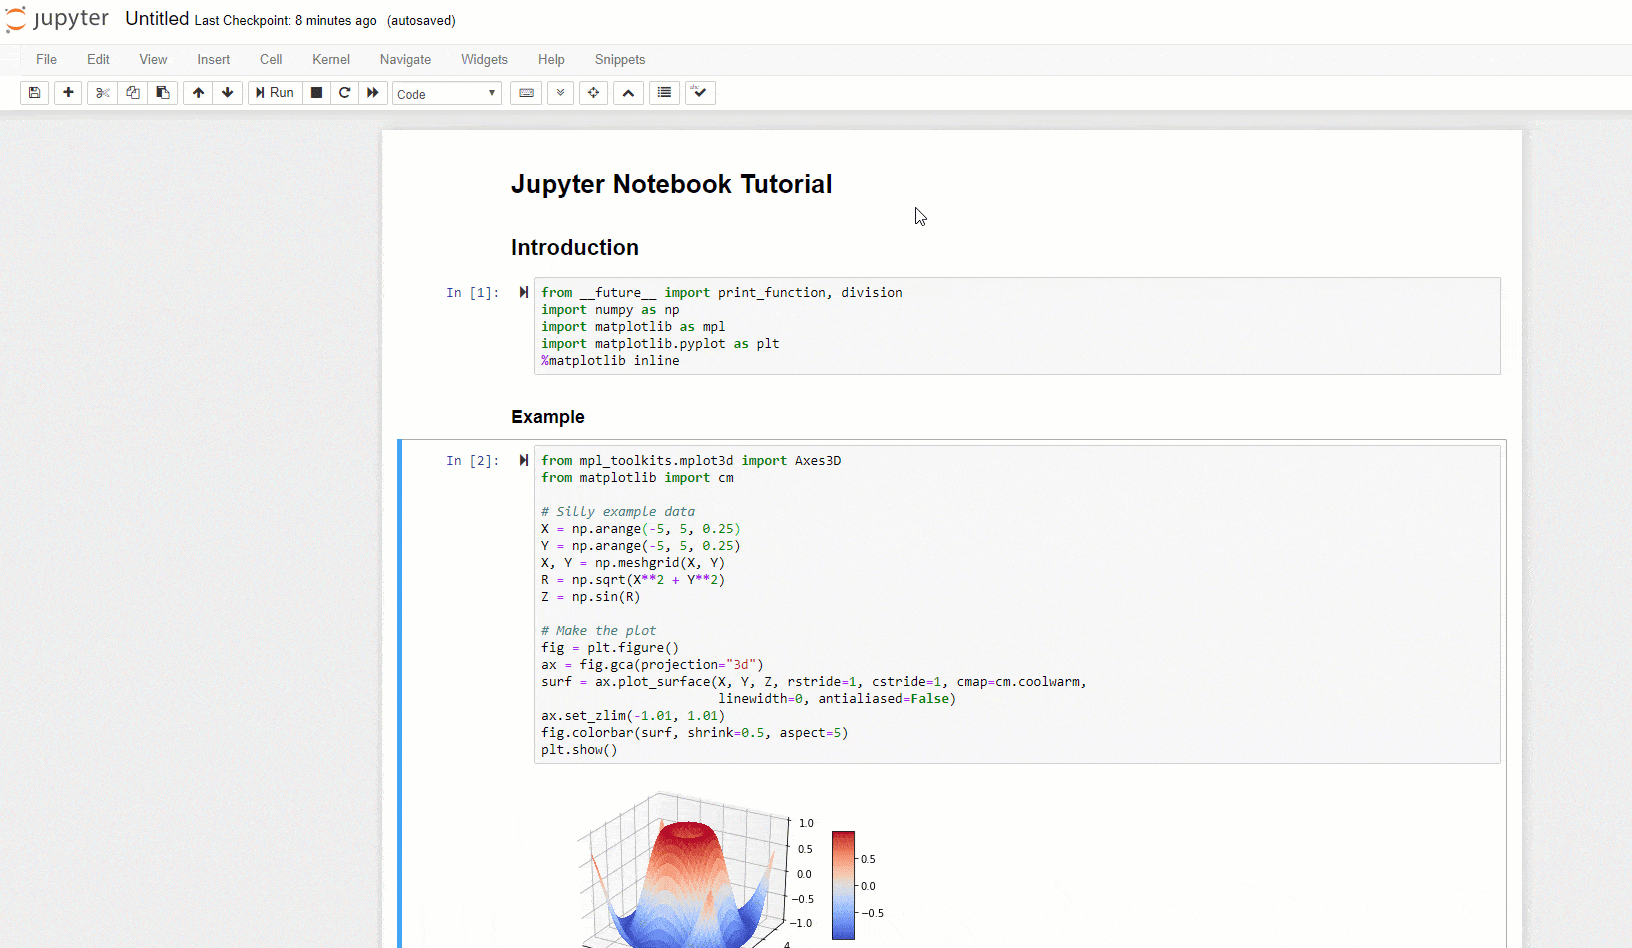
Figure 5: Table of Contents
2. Snippets
Sample codes to load common libraries and create sample plots which you can use as a starting point for your data analysis (Figure 6).
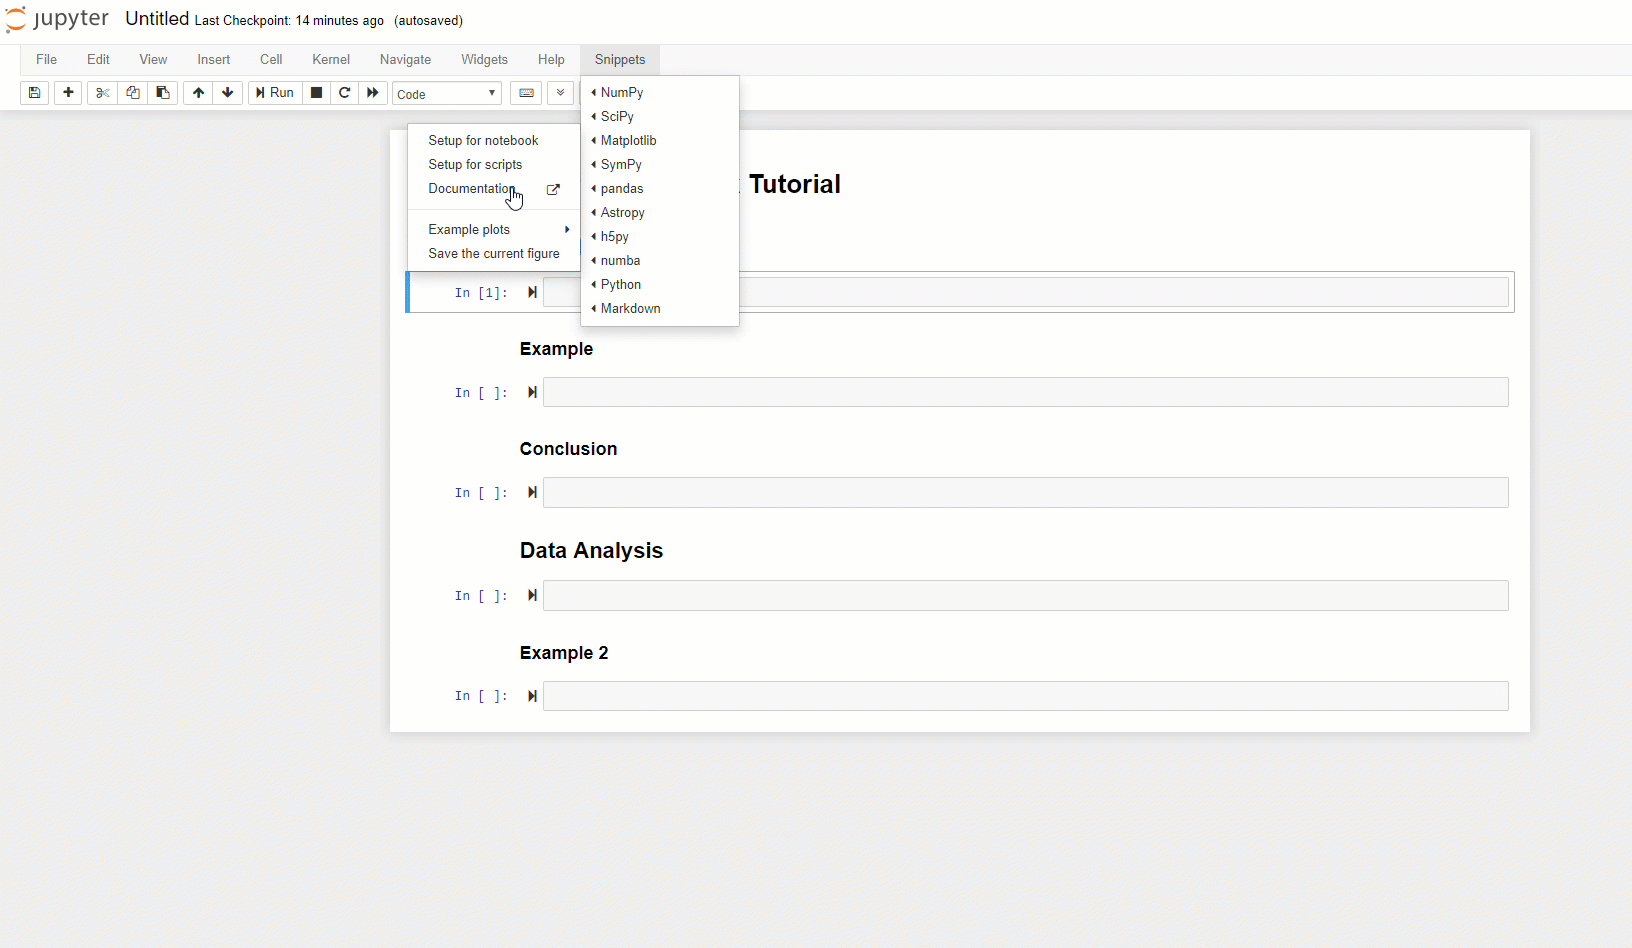
Figure 6: Snippets
3. Hinterland
Code autocompletion for Jupyter Notebooks (Figure 7).
Figure 7: Code autocompletion
The nbextensions library provides many other extensions apart for these three, so I encourage you to experiment and test any other which can be of interest for you!
Markdown Options
By default, the last output in a Jupyter Notebook cell is the only one that gets printed. If instead we want to automatically print all the commands without having to use print(), we can add the following lines of code at the beginning of the notebook.
from IPython.core.interactiveshell import InteractiveShell

InteractiveShell.ast_node_interactivity = “all”
Additionally, it is possible to write LaTex in a Markdown cell by enclosing the text between dollar signs ($).
Notebook Slides
It is possible to create a slideshow presentation of a Jupyter Notebook by going to View -> Cell Toolbar -> Slideshow and then selecting the slides configuration for each cell in the notebook.
Finally, by going to the terminal and typing the following commands the slideshow will be created.
pip install jupyter_contrib_nbextensionsand successively:
jupyter nbconvert my_notebook_name.ipynb --to slides --post serve

Magic
Magics are commands which can be used to perform specific commands. Some examples are: inline plotting, printing the execution time of a cell, printing the memory consumption of running a cell, and so on.
Magic commands which start with just one % apply their functionality just for one single line of a cell (where the command is placed). Magic commands which instead start with two %% are applied to the whole cell.
It is possible to print out all the available magic commands by using the following command:
%lsmagic
Originally published by Pier Paolo Ippolito at freecodecamp.org
============================================
Thanks for reading :heart: If you liked this post, share it with all of your programming buddies! Follow me on Facebook | Twitter
Learn More
☞ Jupyter Notebook for Data Science
☞ Data Science, Deep Learning, & Machine Learning with Python
☞ Deep Learning A-Z™: Hands-On Artificial Neural Networks
☞ Machine Learning A-Z™: Hands-On Python & R In Data Science
☞ Python for Data Science and Machine Learning Bootcamp
☞ Machine Learning, Data Science and Deep Learning with Python
☞ [2019] Machine Learning Classification Bootcamp in Python
☞ Introduction to Machine Learning & Deep Learning in Python
☞ Machine Learning Career Guide – Technical Interview
☞ Machine Learning Guide: Learn Machine Learning Algorithms
☞ Machine Learning Basics: Building Regression Model in Python
☞ Machine Learning using Python - A Beginner’s Guide
#python #machine-learning