How To Translate in Angular 8 Application
In this article, we will discuss Internationalization in Angular 8 using ngx-translate library.
NGX-Translate is an internationalization library for Angular. Internationalization is the process of translating an application into multiple languages. Using this library, we can translate our application language into multiple languages. This will work with not only static data, but dynamic data as well.
Prerequisites
- Basic knowledge of Angular.
- Node and NPM installed.
- Visual Studio Code.
If you’re new to Angular, then you can follow this tutorial on getting started.
Angular is a TypeScript-based, open source web application framework developed by Google. Angular is a platform for building mobile, desktop, and web applications.
You may also like: To Writing Clean code in Angular - What do you need to do?.
TypeScript
TypeScript is an open source programming language developed and maintained by Microsoft. TypeScript is a superset of JavaScript that compiles to plain JavaScript.
Development Environment Required Software,
- Node.js is an open source, cross-platform JavaScript runtime environment that executes JavaScript code outside of a browser. See Node.js’ website for download and installation.
- Angular CLI is a command line interface tool that we use to initialize, develop, and maintain Angular applications. Download this with the following command:
npm install -g @angular/cli - Visual Studio Code — optional download link here.
Step 1
Create a new Angular project by using the following command. First, we need to set a path for creating a new angular app.
ng new MultilanguageApp
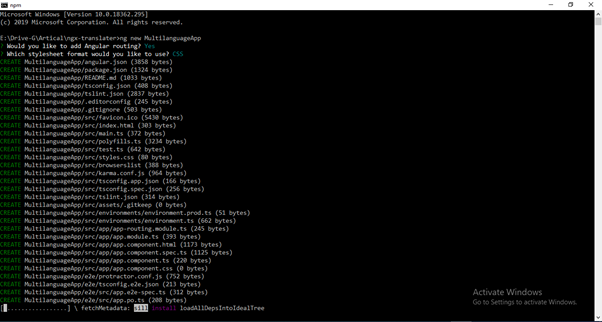
Creating a new Angular project
Now, open this project in Visual Studio Code. To open this in Visual Studio Code, choose the project path and run below command.
code .
Step 2
Now, install the ngx-translate library by using the following commands. We can install bootstrap and jquery for design.
npm install @ngx-translate/core --save

npm install @ngx-translate/http-loader --save

npm install bootstrap@4 jquery –save
Example of how to run the previous commands:
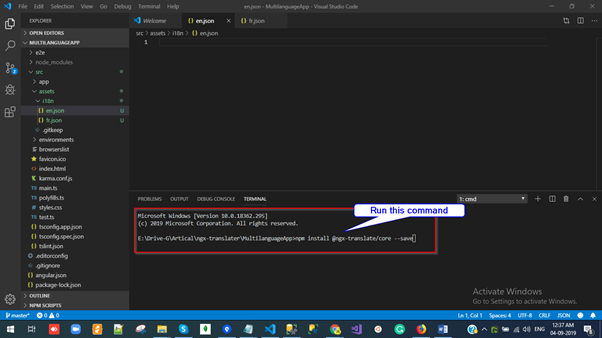
Output of previous commands
After installing the bootstrap package, we have to add reference of the CSS file on the styles.css file. To do this, fun the following command:
@import "~bootstrap/dist/css/bootstrap.css";
Step 3
Import the necessary modules into app.module.ts.
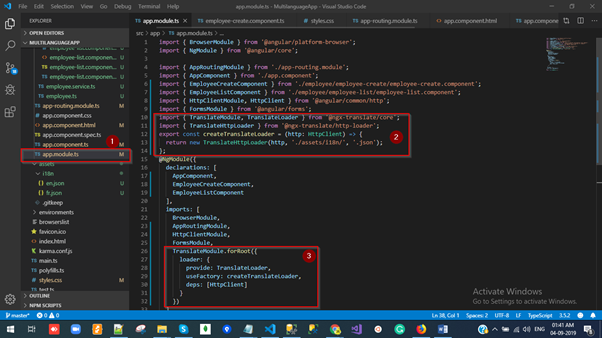
Installing necessary modules
Step 4
Now, expand the src folder and right-click on the Assets folder. Add a new folder under it and rename that to “i18” and add JSON files to this folder (based on how many languages you want to translate. I’m showing an example of two language English and French so I’m creating two files).
en.jsonfr.json
The JSON file is a combination of a key-value pair.
Examples:
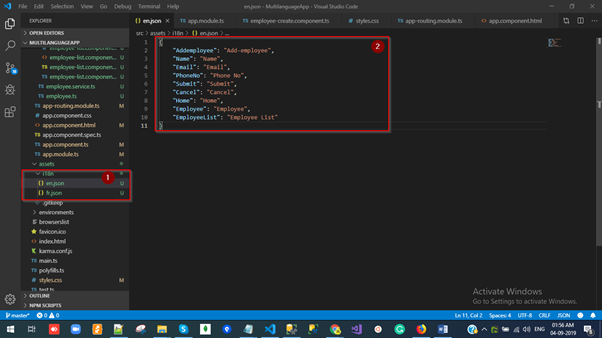
Example of JSON file
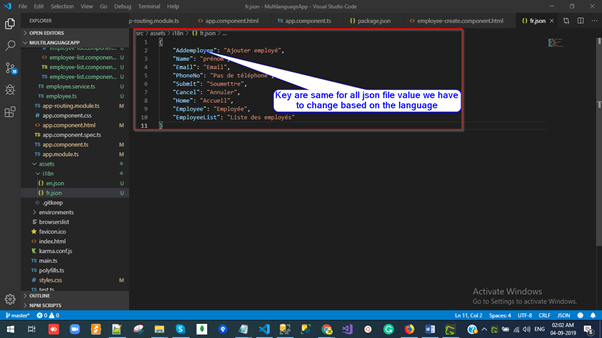
Example of key-value pairs
Step 5
Open the en.json file and paste the following code
{
    "Addemployee": "Add-employee",
    "Name": "Name",
    "Email": "Email",
    "PhoneNo": "Phone No",
    "Submit": "Submit",
    "Cancel": "Cancel",
    "Home": "Home",
    "Employee": "Employee",
    "EmployeeList": "Employee List"
}
Step 6
Open fr.json file and paste the following code.
{
    "Addemployee": "Ajouter employé",
    "Name": "prénom",
    "Email": "Email",
    "PhoneNo": "Pas de téléphone",
    "Submit": "Soumettre",
    "Cancel": "Annuler",
    "Home": "Accueil",
    "Employee": "Employée",
    "EmployeeList": "Liste des employés"
}
Step 7
Open the app.component.html file and paste the following code.
    Welcome to {{ title }}!


      {{ lang }}


      {{ 'Home' | translate }}
      {{ 'Employee' | translate }}
      {{ 'EmployeeList' | translate }}
      [EmployeeList(Reload)](employeelist "EmployeeList(Reload)") -->
Ex.
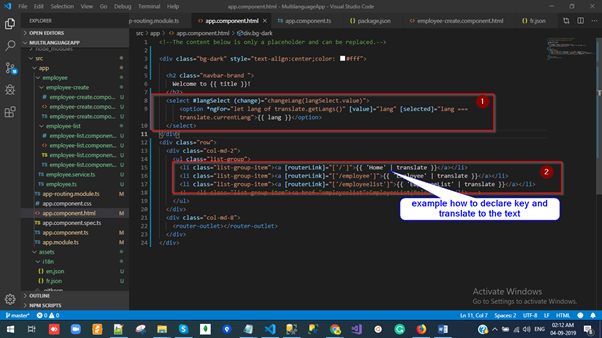
Declaring key and translating text
Step 8
Open the app.component.ts file and paste the following code.
import { Component } from '@angular/core';
import { TranslateService } from '@ngx-translate/core';

@Component({
  selector: 'app-root',
  templateUrl: './app.component.html',
  styleUrls: ['./app.component.css']
})
export class AppComponent {
  title = 'MultilanguageApp';

  constructor(
    public translate: TranslateService) {
    translate.addLangs(['en', 'fr']);
    if (localStorage.getItem('locale')) {
      const browserLang = localStorage.getItem('locale');
      translate.use(browserLang.match(/en|fr/) ? browserLang : 'en');
    } else {
      localStorage.setItem('locale', 'en');
      translate.setDefaultLang('en');
    }
  }
  changeLang(language: string) {
    localStorage.setItem('locale', language);
    this.translate.use(language);
  }
}
Ex.
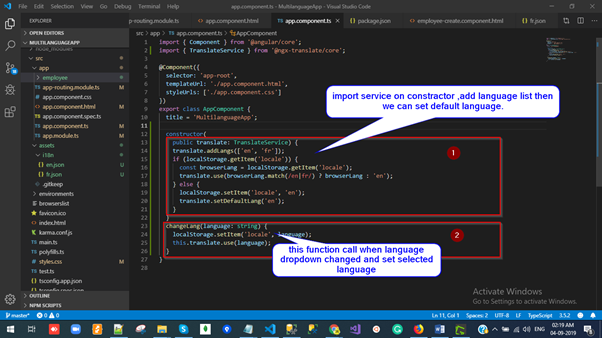
Import service on constructor
Step 9
Run this command for hosting the application with default port 4200.
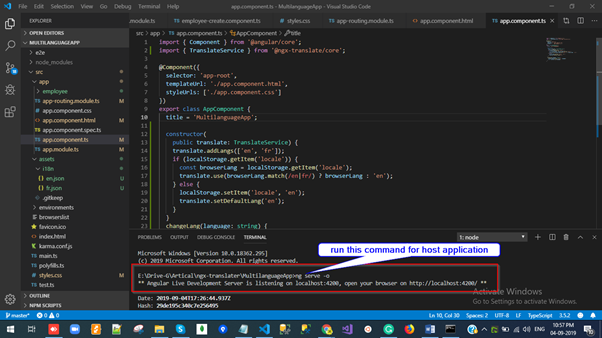
Running the command on port 4200
Output Window
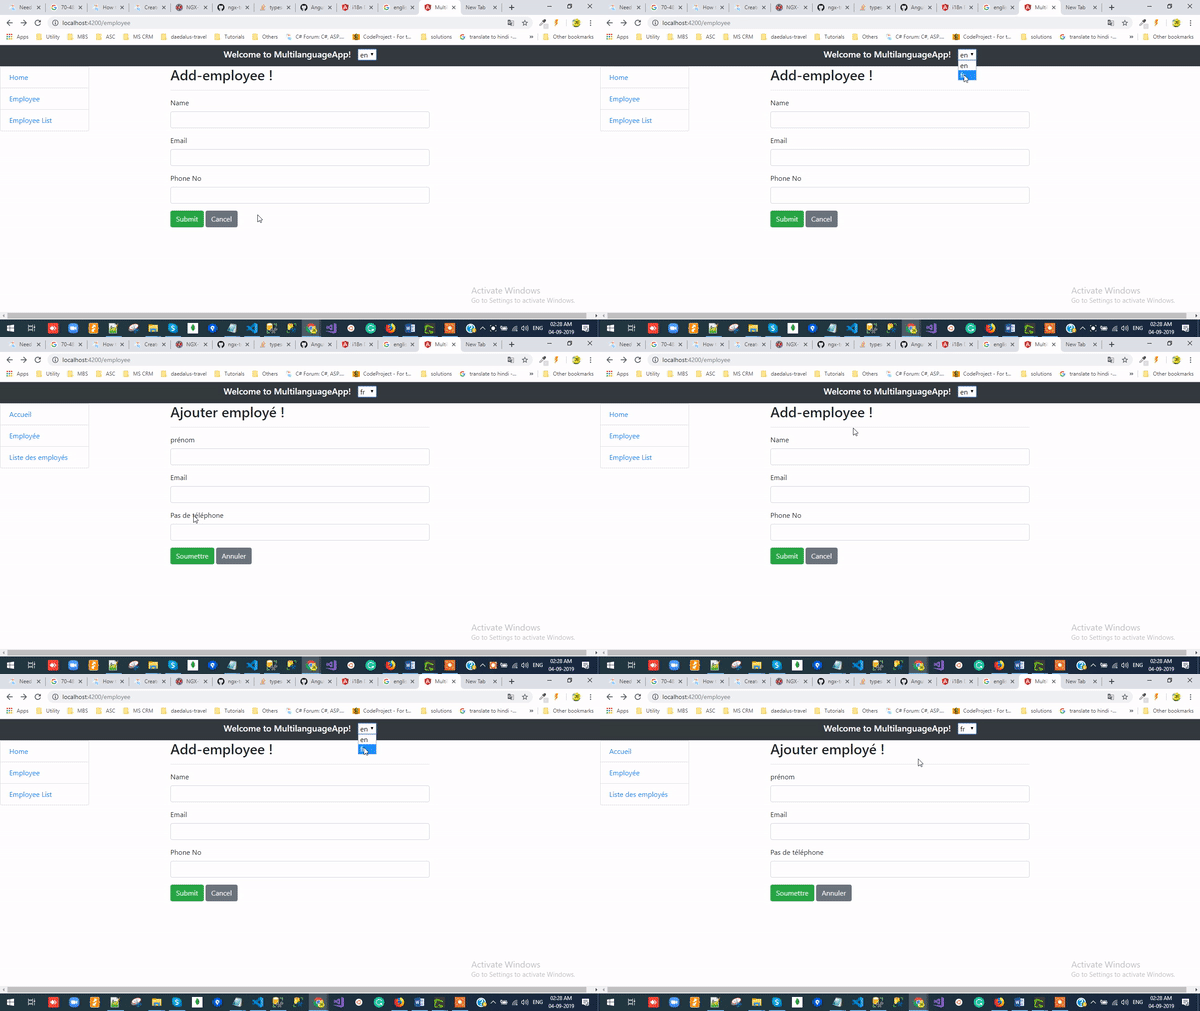
Final output
Summary
In this article, we discussed ngx-translate with a demo example.
NGX-Translate is an internationalization library for Angular. Internationalization is the process of translating our application into multiple languages. In my next article, I will discuss an Angular i18n language translator and Paypal subscription payment integration using Angular 8. Any feedback related to this article is most welcome!
Thank for reading! Please share if you liked it!
#angular #angular-js #web-development
