Step by step guide to creating a Web App in Angular 8
In this Angular 8 tutorial, we will show you a basic and quick way to create an Angular web app. This tutorial does not just show a simple Hello world or a default Angular generated the page, but more than that we will show using the interaction with the array of objects data in the separate file. Also, we will show you how to use a basic Angular Material, Routing, and Navigation with the parameters.
Table of Contents:
- Step #1. Preparation
- Step #2. Create an Angular 8 Web App
- Step #3. Create an Array of Objects File
- Step #4. Install Angular Material
- Step #5. Add Angular Routing and Navigation
- Step #6. Show List of Data
- Step #7. Show Data Details
- Step #8. Show Google Maps
- Step #9. Run and Test the Angular 8 Web App
The flow or this Angular web app is very simple. Display a list of Premier League teams like the shopping list which is clickable to the team details page. In the team details page, there’s a link to display the position of the Team stadium. The following tools, frameworks, and libraries or modules are required for this tutorial.
- Node.js
- Angular 8
- Terminal (Linux/Mac) or Node Command Line (Windows)
- Text Editor or IDE (We use VSCode)
For now, we will not show you how to set up or get Google Maps Javascript API key. You can find another tutorial in this site that covers about Google Maps and related.
Let’s get started with the main steps.
Step #1. Preparation
The preparation step means we will prepare all the required tools, frameworks, and modules to start creating Angular Web App from scratch. Now, we are creating an Angular 8 app using Angular CLI which needs Node.js and NPM to install or update it. Make sure you have to download and install Node.js (NPM included) before installing or updating Angular CLI. Check the installed Node.js and NPM using this command.
node -v
v10.15.1
npm -v
6.11.3
To install or update an Angular CLI type this command.
sudo npm install -g @angular/cli
Step #2. Create an Angular 8 Web App
We will create an Angular 8 web app using Angular CLI. Type this command to create the Angular 8 web app.
ng new angular-tutorial
That command will create a new Angular 8 app with the name angular-tutorial and pass all questions as ‘Y’ then the Angular CLI will automatically install the required NPM modules. After finished, go to the newly created Angular 8 folder then run the Angular 8 app for the first time.
cd ./angular-tutorial
ng serve --open
Using that “–open” parameters will automatically open the Angular 8 in your default web browser. Here’s the Angular 8 default page look like.

Step #3. Create an Array of Objects File
As we mention in the first paragraph, we will display the list of the Premier League team data. For that, create a new Typescript file in src/app/team.ts.
touch src/app/team.ts
Open and edit that file then add these lines of Typescript constant of that contain array of objects.
export const Team = [
  { id: 1, name: 'Arsenal',    image: 'assets/logos/arsenal.png', location: 'London (Holloway)', stadium:    'Emirates Stadium',
  capacity:    60704, manager: 'Unai Emery', captain: 'Pierre-Emerick Aubameyang', lat: 51.554929, lng: -0.108449 },
  { id: 2, name: 'Aston Villa',    image: 'assets/logos/aston-villa.png', location:    'Birmingham', stadium: 'Villa Park',
  capacity: 42785, manager: 'Dean Smith', captain: 'Jack Grealish', lat: 52.509131, lng: -1.884767 },
  { id: 3, name: 'Bournemouth',    image: 'assets/logos/bornemouth.png',    location:    'Bournemouth', stadium:    'Dean Court',
  capacity: 11364, manager: 'Eddie Howe', captain: 'Simon Francis', lat: 50.735278, lng: -1.838290 },
  { id: 4, name: 'Brighton & Hove Albion',    image: 'assets/logos/brighton.png', location: 'Brighton', stadium:    'Falmer Stadium',
  capacity: 30666, manager: 'Graham Potter', captain: 'Lewis Dunk', lat: 50.861606, lng: -0.083716 },
  { id: 5, name: 'Burnley',    image: 'assets/logos/burnley.png',    location:    'Burnley', stadium:    'Turf Moor',
  capacity: 21944, manager: 'Sean Dyche', captain: 'Ben Mee', lat: 53.789017, lng: -2.230187 },
  { id: 6, name: 'Chelsea',    image: 'assets/logos/chelsea.png',    location:    'London (Fulham)', stadium:    'Stamford Bridge',
  capacity: 41631, manager: 'Frank Lampard', captain: 'César Azpilicueta', lat: 51.481696, lng: -0.190957 },
  { id: 7, name: 'Crystal Palace',    image: 'assets/logos/crystal-palace.png', location: 'London (Selhurst)', stadium: 'Selhurst Park',
  capacity: 26047, manager: 'Roy Hodgson', captain: 'Luka Milivojević', lat: 51.398281, lng: -0.085489 },
  { id: 8, name: 'Everton',    image: 'assets/logos/everton.png',    location:    'Liverpool (Walton)', stadium: 'Goodison Park',
  capacity: 39221, manager: 'Marco Silva', captain: 'Séamus Coleman', lat: 53.438813, lng: -2.966331 },
  { id: 9, name: 'Leicester City',    image: 'assets/logos/leicester.png', location: 'Leicester', stadium: 'King Power Stadium',
  capacity:    32312, manager: 'Brendan Rodgers', captain: 'Wes Morgan', lat: 52.620399, lng: -1.142147 },
  { id: 10, name: 'Liverpool',    image: 'assets/logos/liverpool.png', location: 'Liverpool (Anfield)', stadium: 'Anfield',
  capacity: 54074, manager: 'Jürgen Klopp', captain: 'Jordan Henderson', lat: 53.430846, lng: -2.960844 },
  { id: 11, name:    'Manchester City',    image: 'assets/logos/manchester-city.png', location: 'Manchester',
  stadium: 'City of Manchester Stadium', capacity: 55017, manager: 'Pep Guardiola', captain: 'David Silva',
  lat: 53.483176, lng: -2.200427 },
  { id: 12, name:    'Manchester United',    image: 'assets/logos/manchester-united.png', location: 'Manchester', stadium: 'Old Trafford',
  capacity: 74879, manager: 'Ole Gunnar Solskjær', captain: 'Ashley Young', lat: 53.463077, lng: -2.291334 },
  { id: 13, name:    'Newcastle United',    image: 'assets/logos/newcastle-united.png', location: 'Newcastle', stadium: 'St James Park',
  capacity: 52354, manager: 'Steve Bruce', captain: 'Jamaal Lascelles', lat: 54.975581, lng: -1.621661 },
  { id: 14, name:    'Norwich City',    image: 'assets/logos/norwich-city.png', location: 'Norwich', stadium:    'Carrow Road',
  capacity: 27244, manager: 'Daniel Farke', captain: 'Grant Hanley', lat: 52.622219, lng: 1.309328 },
  { id: 15, name:    'Sheffield United',    image: 'assets/logos/sheffield-united.png', location: 'Sheffield', stadium: 'Bramall Lane',
  capacity: 32702, manager: 'Chris Wilder', captain: 'Billy Sharp', lat: 53.370374, lng:  -1.470880 },
  { id: 16, name:    'Southampton',    image: 'assets/logos/southampton.png', location: 'Southampton', stadium: 'St Marys Stadium',
  capacity: 32384, manager: 'Ralph Hasenhüttl', captain: 'Pierre-Emile Højbjerg', lat: 50.905860, lng: -1.390941 },
  { id: 17, name:    'Tottenham Hotspur',    image: 'assets/logos/tottenham-hotspur.png', location: 'London (Tottenham)',
  stadium:    'Tottenham Hotspur Stadium', capacity: 62214, manager: 'José Mourinho', captain: 'Hugo Lloris', lat: 51.604319, lng: -0.066381 },
  { id: 18, name:    'Watford',    image: 'assets/logos/watford.png', location: 'Watford', stadium: 'Vicarage Road',
  capacity: 20400, manager: 'Quique Sánchez Flores', captain: 'Troy Deeney', lat: 51.649959, lng: -0.401525 },
  { id: 19, name:    'West Ham United',    image: 'assets/logos/westham-united.png', location: 'London (Stratford)', stadium: 'London Stadium',
  capacity: 60000, manager: 'Manuel Pellegrini', captain: 'Mark Noble', lat: 51.538750, lng: -0.016625 },
  { id: 20, name:    'Wolverhampton Wanderers',    image: 'assets/logos/wolverhampton.png', location: 'Wolverhampton',
  stadium: 'Molineux Stadium', capacity: 32050, manager: 'Nuno Espírito Santo', captain: 'Conor Coady', lat: 52.590301, lng: -2.130418 }
];
That array of objects file will call by Angular component using import. On that array of objects, there are the fields of image. So, copy the image of the Premier League team logo to the src/assets/logos/ after creating a logos folder. Make sure the file name the same as the name in the image fields.
Step #4. Install Angular Material
For the user interface/user experience (UI/UX) we will use Angular 8 Material and CDK. There’s a CLI for generating a Material component like Table as a component, but we will create or add the Table component from scratch to the existing component. Type this command to install Angular 8 Material (@angular/material).
ng add @angular/material
If there are questions like below, just use the default answer.
? Choose a prebuilt theme name, or "custom" for a custom theme: Purple/Green       [ Preview: h
ttps://material.angular.io?theme=purple-green ]
? Set up HammerJS for gesture recognition? Yes
? Set up browser animations for Angular Material? Yes
We will register all required Angular 8 Material components or modules to src/app/app.module.ts. Open and edit that file then add these imports of required Angular Material Components.
import {
  MatInputModule,
  MatPaginatorModule,
  MatProgressSpinnerModule,
  MatSortModule,
  MatIconModule,
  MatButtonModule,
  MatCardModule,
  MatGridListModule } from '@angular/material';
Register the above modules to @NgModule imports.
imports: [
  BrowserModule,
  AppRoutingModule,
  BrowserAnimationsModule,
  MatInputModule,
  MatPaginatorModule,
  MatProgressSpinnerModule,
  MatSortModule,
  MatIconModule,
  MatButtonModule,
  MatCardModule,
  MatGridListModule
],
Now, the Angular Material is ready to use in the Angular Component.
Step #5. Add Angular Routing and Navigation
The Angular 8 routes already added when we create a new Angular 8 application in the previous step. Routes use to navigate between components. Before configuring the routes, type this command to create a new Angular 8 components.
ng g component list
ng g component details
ng g component maps
Open src/app/app.module.ts then you will see those components imported and declared in @NgModule declarations. Next, open and edit src/app/app-routing.module.ts then add these imports.
import { ListComponent } from './list/list.component';
import { DetailsComponent } from './details/details.component';
import { MapsComponent } from './maps/maps.component';
Add these arrays to the existing routes constant that contain route for above-added components.
const routes: Routes = [
  {
    path: 'list',
    component: ListComponent,
    data: { title: 'List of Teams' }
  },
  {
    path: 'details/:id',
    component: DetailsComponent,
    data: { title: 'Team Details' }
  },
  {
    path: 'maps/:lat/:lng',
    component: MapsComponent,
    data: { title: 'Team Position' }
  },
  { path: '',
    redirectTo: '/list',
    pathMatch: 'full'
  }
];
Open and edit src/app/app.component.html and you will see the existing router outlet. Next, modify this HTML page to fit the list, details, or maps page.
<div class="container">
  <router-outlet></router-outlet>
</div>
Open and edit src/app/app.component.scss then replace all SASS codes with this.
.container {
  padding: 20px;
}
Step #6. Show List of Data
We will show list of teams data using Angular Material and component. First, we will need to load data from the array of objects file. Open and edit src/app/list/list.component.ts then add this import of Team array.
import { Team } from '../team';
Add the variables before the constructor to handle an array of objects.
teams = Team;
Next, open and edit src/app/list/list.component.html then add these lines of HTML tags that display the grid list from the array of objects.
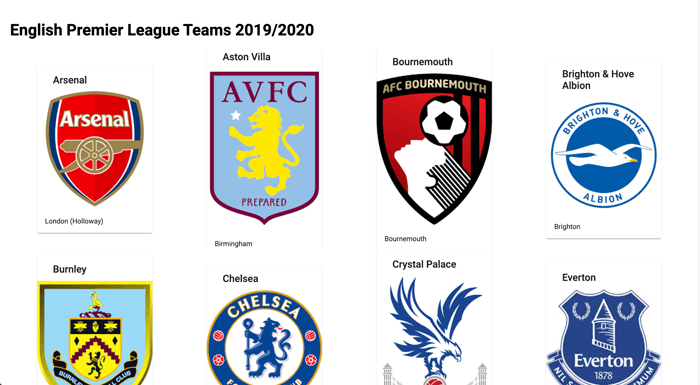
<h1>English Premier League Teams 2019/2020</h1>
<mat-grid-list cols="4" rowHeight="400">
  <mat-grid-tile *ngFor="let team of teams" [routerLink]="['/details/', team.id]">
      <mat-card class="example-card">
        <mat-card-header>
          <mat-card-title>{{team.name}}</mat-card-title>
        </mat-card-header>
        <img mat-card-image src="{{team.image}}" alt="{{team.name}}">
        <mat-card-content>
          <p>
            {{team.location}}
          </p>
        </mat-card-content>
      </mat-card>
  </mat-grid-tile>
</mat-grid-list>
As you can see, the teams array is iterate on and display the information and image using . Finally, add a little style to src/app/list/list.component.scss with these SCSS codes.
.example-card {
  width: 200px;
}
Step #7. Show Data Details
From the list of teams, users can click the item of the grid then navigate to the details page with the ID params. The ID should receive in the details page using Angular ActivatedRoute. Open and edit src/app/details/details.component.ts then add these imports of Angular ActivatedRoute, Router, and Team array.
import { ActivatedRoute, Router } from '@angular/router';
import { Team } from '../team';
Inject the Angular ActivatedRoute and Router to the constructor.
constructor(public route: ActivatedRoute, public router: Router) {}
Add the variables before the constructor that hold details object and Team array.
details = { id: null, name: '',    image: '', location: '', stadium:    '', capacity:    null, manager: '', captain: '', lat: null, lng: null };
teams = Team;
Add a function to the Angular ngOnInit that finds an object from the team array.
ngOnInit() {
  if (this.route.snapshot.paramMap.get('id') !== 'null') {
    const id = parseInt(this.route.snapshot.paramMap.get('id'), 0);
    this.details = this.teams.find(x => x.id === id);
  }
}
We use Angular ngOnInit because want to load the details from the array every detail component showed up. Next, add a function to navigate to the maps component to show the Google Maps with the latitude and longitude params.
showMap(lat: any, lng: any) {
  this.router.navigate(['/maps', lat, lng]);
}
Next, open and edit src/app/details/details.component.html then replace all Angular HTML templates with these.
<mat-card class="example-card">
  <mat-card-header>
    <mat-card-title>{{details.name}}</mat-card-title>
    <mat-card-subtitle>{{details.location}}</mat-card-subtitle>
  </mat-card-header>
  <img mat-card-image src="{{details.image}}" alt="{{details.name}}">
  <mat-card-content>
    <dl>
      <dt>Stadium</dt>
      <dd>{{details.stadium}}</dd>
      <dt>Stadium Capacity:</dt>
      <dd>{{details.capacity}}</dd>
      <dt>Manager</dt>
      <dd>{{details.manager}}</dd>
      <dt>Captain</dt>
      <dd>{{details.captain}}</dd>
    </dl>
  </mat-card-content>
  <mat-card-actions>
    <button mat-button (click)="showMap(details.lat, details.lng)">Show Location</button>
  </mat-card-actions>
</mat-card>
Finally, add a little style to src/app/details/details.component.scss with these SCSS codes.
.example-card {
  max-width: 400px;
}
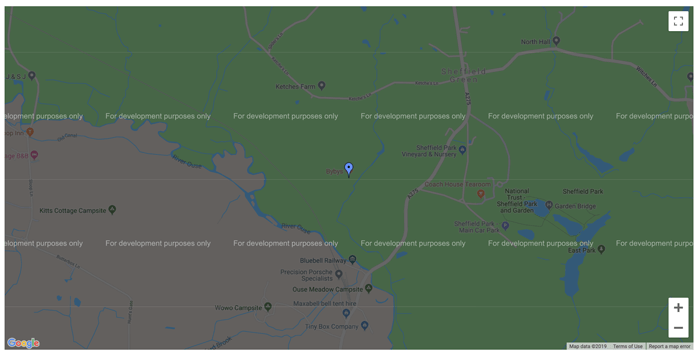
Step #8. Show Google Maps
You can use your own or someone else Google Maps API Key to implementing Google Maps on the web page. To display the Google Maps, first, we need to load the Google Maps Javascript API by open and edit src/index.html then add these lines of Google Maps Javascript before the closing of the Body tag.
<script src="https://maps.googleapis.com/maps/api/js?key=AIzaSyBgZZK8umUqJn8d5CoIZqWPJ_qtMfqD9q0"></script>
Next, open and edit src/app/maps/maps.component.html then add or modify these imports of Angular ViewChild, ElementRef, and ActivatedRoute.
import { Component, OnInit, ViewChild, ElementRef } from '@angular/core';
import { ActivatedRoute } from '@angular/router';
Inject the Angular ActivatedRoute to the constructor.
constructor(public route: ActivatedRoute) { }
Declare the basic required Google maps variables (map, marker, options) before the Angular @Component.
declare var google: any;
let map: any;
let marker: any;
const options = {
  enableHighAccuracy: true,
  timeout: 5000,
  maximumAge: 0
};
let infowindow: any;
const iconBase = 'http://maps.google.com/mapfiles/ms/icons/';
Load map element, after the title variable.
@ViewChild('map', {static: false}) mapElement: ElementRef;
Create a function to load Google Maps and set a default marker of the current browser location.
initMap(latitude: any, longitude: any) {
  navigator.geolocation.getCurrentPosition((location) => {
    map = new google.maps.Map(this.mapElement.nativeElement, {
      center: { lat: latitude, lng: longitude },
      zoom: 15
    });

    infowindow = new google.maps.InfoWindow();

    marker = new google.maps.Marker({
      position: { lat: latitude, lng: longitude },
      map,
      title: 'Click to zoom',
      icon: iconBase + 'blue-dot.png'
    });
  }, (error) => {
    console.log(error);
  }, options);
}
Call that function inside the constructor body with the params of latitude and longitude from the previous component.
constructor(public route: ActivatedRoute) {
  this.initMap(parseInt(this.route.snapshot.paramMap.get('lat'), 0), parseInt(this.route.snapshot.paramMap.get('lng'), 0));
}
Next, open and edit src/app/maps/maps.component.html then replace all HTML tags with just this map
<div #map id="map"></div>
Finally, to make Google Maps working in the Angular page, add a height of the
src/app/maps/maps.component.scss.
#map {
  height: 690px;
}
Step #9. Run and Test the Angular 8 Web App
As usual, to run the Angular 8 web app simply type this command.
ng serve --open
The Angular web app will open automatically in the default browser. The whole Angular web app will look like this.

That it’s, the Angular 8 Tutorial: How to Create an Angular Web App Quickly. You can find the full source code from our GitHub.
Thanks!
#Angular #webdev #webapp #javascript