Alrighty peeps lets get right into it. Let’s assume that you have an EC2 instance that you want to automatically look up the latest windows ami for.
Your EC2 instance code might look something like this
resource "aws_instance" "example" {
     ami = "some ami here"
     instance_type = "t2.micro"
     availability_zone = var.availability_zone
}
Creating the Data and Filter
Now what we are going to do is update it to use a data source for the ami, then that data source will use a filter. Here is what our data code will look like
data "aws_ami" "windows" {
     most_recent = true

filter {
       name   = "name"
       values = ["Windows_Server-2019-English-Full-Base-*"]
  }
filter {
       name   = "virtualization-type"
       values = ["hvm"]
  }
owners = ["801119661308"] ## Canonical
}
The argument most_recent is set to true. This means that it will grab the most recent AMI that fits the criteria that we specify in our filter.
Next you will notice that in the name we set the value to *Windows_Server-2019-English-Full-Base- **with the star at the end. This lets Terraform know we don’t care about what text comes after that point and it was done because the standard format puts the date there. If we set the date the ami was created and set the most_recent argument to true it would not do us any good.
After that we set the virtualization-type to hvm. I am not going to go into a lot of detail here. Just know this is a good idea and do some additional research on hvm vs pv.
Last we set **owners **to 801119661308.
Now I am sure you are asking… how the heck do I actually get this information? Well you are going to have to run a quick command with the AWS cli.
First, login to AWS and get the ami you want to grab the information for. Here is an example:


If you click on launch instance you can do a search.
After that you want to copy the ami id and run this command
aws ec2 describe-images — owners amazon — image-ids ami-0eb7fbcc77e5e6ec6
Make sure you replace my ami id with your own.
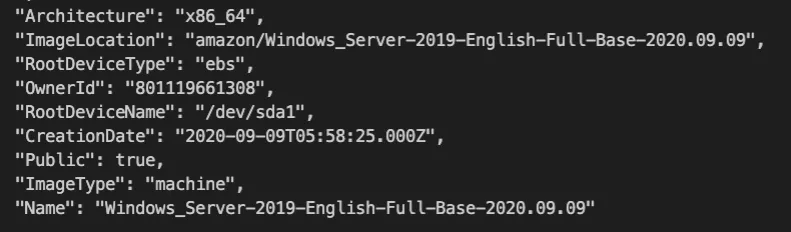
After running the command there will be a lot of output. In the last block you will see something that looks like this

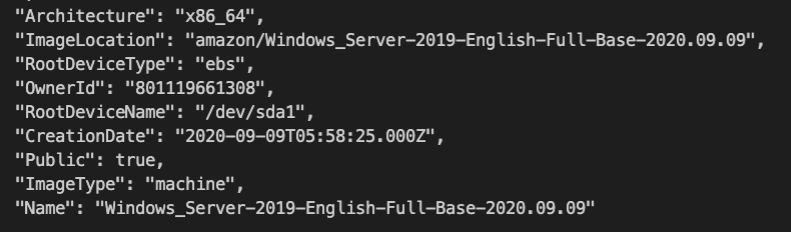
Here you can see the Name and the **Owner ID **(which we use for ‘owner’). You can copy these values to use in your own AMI filter!
Also, you can now see what I was talking about with the date. At the end of the Name you can see that the date is used. Make sure you remove that and add a * if you want the most recent ami to always be used.
Updating the Instance Code
As you remember our instance code looked something like this
resource "aws_instance" "example" {
     ami = "some ami here"
     instance_type = "t2.micro"
     availability_zone = var.availability_zone
}
Now we are just going to update the resource addressing to get the id of the ami from the data source. (changes in bold)
resource "aws_instance" "example" {
     ami = data.aws_ami.windows.id
     instance_type = "t2.micro"
     availability_zone = var.availability_zone
}
Now if you are in a scenario where you don’t want the ami changing you may want to add in an argument to ignore lifecycle changes, but for something more ephemeral this will do! Here is an example of how to ignore ami changes.
#terraform-modules #hashicorp #terraform #aws-ec2 #devops