If you’re a lover of SCSS, you’ll definitely want to make sure to use it in your Angular applications. Luckily the Angular CLI does all the setup for you!
Let’s first walk through the file changes that the Angular CLI handles for us and how you can modify existing projects to switch over to SCSS for styling. I’ll then go over how I like to set up my SCSS files and folder structure when working on Angular projects.
Let’s get into it!
New Project Setup Using Angular CLI
When creating a new Angular app using the ng new app-name command, the CLI will ask you “Which stylesheet format would you like to use?” — select SCSS.

CLI Default Stylesheet Prompt
When choosing this option when creating a new project, the main things the CLI does is the following:
- Adds the ``src/styles.scss
reference to theangular.json build/options/styles` section - Creates a
styles.scssfile and adds it to yoursrcfolder
The CLI will configure the testing files and references as well, but we won’t go into those here.
💁🏼 Tip: Run
_ng — version_in your terminal to check what @angular/cli version you are running, and update to the latest using_npm i -g @angular/cli@latest_.
Switching Existing Angular Project to SCSS
If you ever need to switch to the SCSS stylesheet format in an existing project, having the two items above should be all you need to get going!
Updating CLI Config
The other thing you need to do is update your CLI configuration to create SCSS files instead of CSS files when you create new components. There are two ways to do this — using the CLI command or adding the reference manually. To use the command type the following into your terminal:
ng config schematics.@schematics/angular:component.styleext scss
💁🏼 Tip: Sometimes this command modifies the
angular.jsonin the wrong place. Make sure it is modified in the top section of your file under your project (usually line 8 or so if you don’t have many configuration changes).
To make the change manually add the following schematics reference into your angular.json file:
"schematics":{
   "@schematics/angular:component": {
      "style": "scss" }
},
"schematics":{"@schematics/angular:component":{"style": "scss"}},
Using the SCSS-Scaffold NPM Package
A while back ago I created an Angular Schematic (you can read more about it here) that adds of all of the SCSS folder structure for you with the easy command npm add scss-scaffold, so you don’t have to 😊
You can check it out the post I wrote about it here:
Quick Guide to Angular Schematics: How I Built My First Schematic
Angular Schematics are great and here’s a basic quick guide to help you get started!
SCSS Structure
Global Styling Philosophy
You certainly can keep things simply by having one global styles.scss SCSS file, and you can also use styling on a component-by-component basis.
I like to keep my styles as global as possible avoiding component styling as I find that things can get very messy very quickly, especially when working on teams with multiple developers.
Having global styles keeps everyone using the same structure and system, and encourages discussions about patterns and use cases.
SCSS Folder Structure
Once you have your Angular project ready and set up to use SCSS, it’s time to move some things around.
To get things started:
- Create a folder in your
srcproject folder calledstyles. - Move your
styles.scssfile into the newly createdstylesfolder. - Update your
angular.jsonfile to point to the new location of yourstyles.scssfile
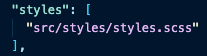
angular.json Styles Reference
Now, it’s time to build out our folder scaffold. I like to follow something similar to the 7–1 Pattern but modify some of the names.
Below is an example of how I lay out the style folders.
#scss #angular #angularjs #sass #css