How to Label Images for Object Detection, Step by Step
Labeling image is the first and most significant part of object detection. Labeling is indeed a very time-consuming process, but the more dedication you will give in labeling images, the more accurate your model can be. In this story, I will be discussing the complete approach of labeling in detail. Finally, with this article, you will have your labeled data ready for your object detection model.
Here you will need a tool that is open source to label your data. To download the tool follow the step below.
Downloading Labeling Tool
- If you have Git installed in your machine in open Command Prompt in your device and type
git clone https://github.com/pranjalAI/labelImg.git
- If you don’t have git installed then go to https://github.com/pranjalAI/labelImg.git and download the zipped directory.
- If you have downloaded directly via the link, then unzip your compressed .zip file.
Installing Dependencies
- You need to enter into the “labelImg” folder using command prompt.

- After that, you need to install a library called “pyqt5”. Type the below command in your command prompt.

Install pyqt5
Defining Custom Classes
- You need to go to the “labelImg\data” folder; there you will find predefined_classes.txt Here, you can define your custom classes.
Activating the “LabelImg” Tool
In your command prompt, type the following command

Launching The LabelImg Tool
- After typing the above command, you will see an interactive window, which is an open-source tool.

The “LabelImg” Tool
You will spend a fair amount of time here, As this will help you getting labeled images and make them ready for object detection.
How to Use this tool
- Click on “Open Dir” and select the folder where you have saved your images that you need to label.
- Then click on “Change Save Dir” here, you need to select the directory to save your label file. This directory should be different from the image directory.
- Now you can use “Create Rectbox” to draw boxes over the images.
- Click on the Save button. It will generate a file with the box coordinates.
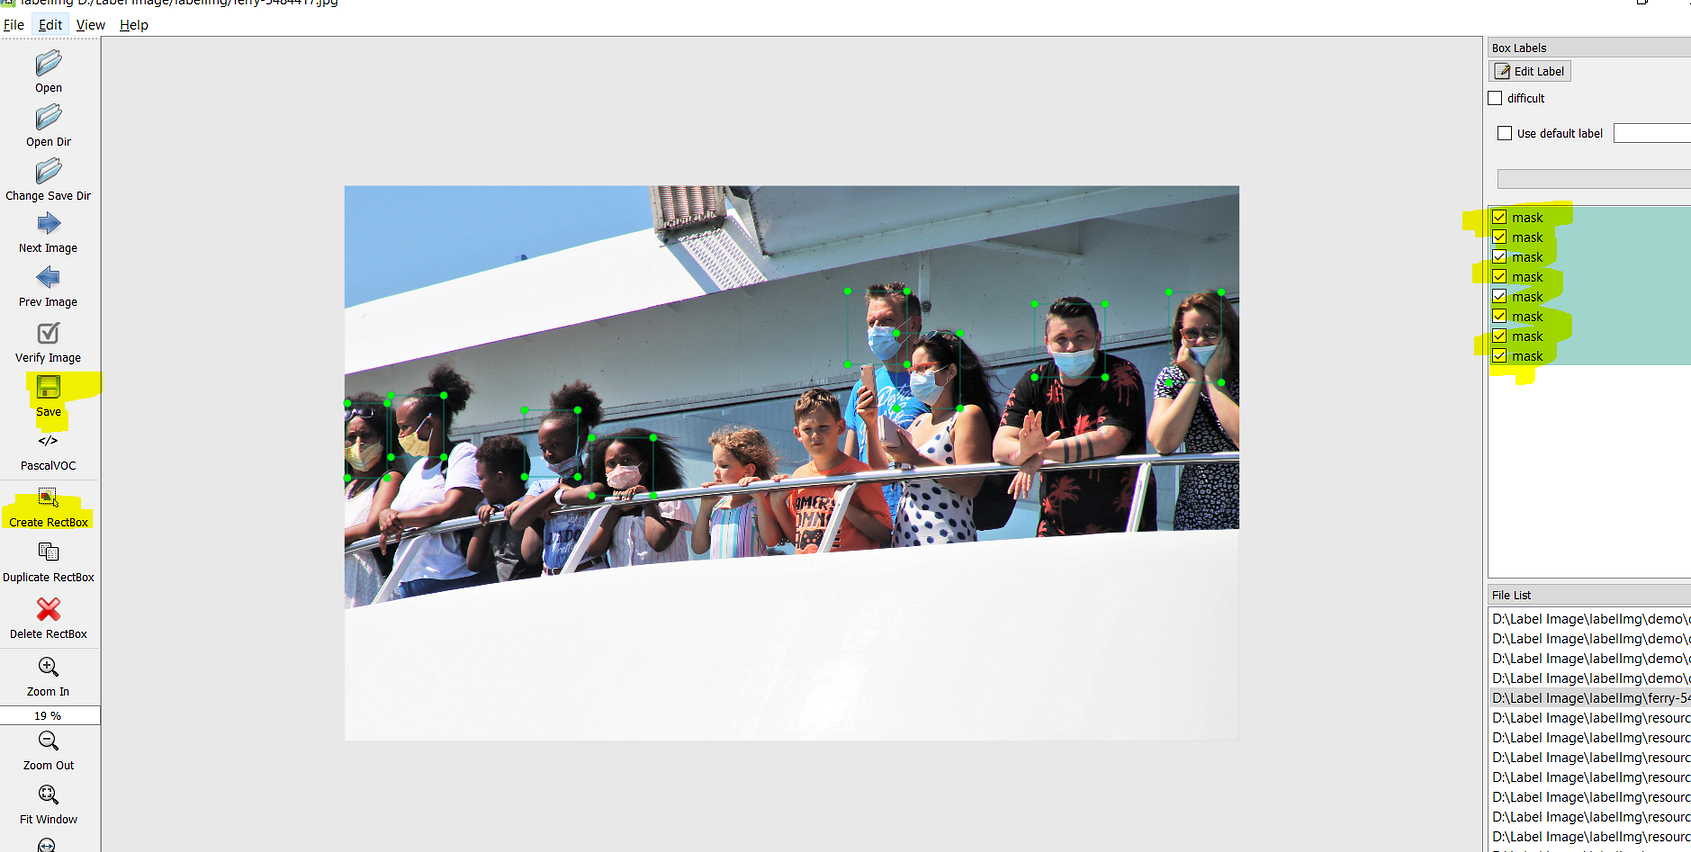
LabelImg Process
- You can draw multiple boxes in an image. It will ask for a class to assign; just select the category that you have defined in the above step.
Finally, you will now have a folder that will image label data with the same name as your image. Your data is now ready for object detection. Still, if you feel that you have less image count, then please follow my guide to Generate data for object detection. Here, I have shown different image and label augment techniques. If You want to know more about the next steps of object detection, then please do follow my other article Custom Object Detection In Python. Here, I have discussed how you can train your model and can deploy it to the localhost.
Some Closing Advice
Labeling data can be time consuming process but if you want to achieve good accuracy in your model then you must give a good amount of time in this step. Try to collect as much as variety of images from difference resources. The more variety of images you will have the more better your model will be.
Thank you for reading!
Originally published on Medium.com
#labeling-annotating #deep-learning #data-science #image-labeling
