In last week’s post, we covered taking our existing build pipeline and making it a multi-stage Pipeline with a build stage and a deploy stage. This week we are going to add another stage to our pipeline for production. Since we don’t want the production stage deployed before it has been through QA we will need to hold the stage until it is verified ready, which is what this post is going to be about. If you haven’t read last week’s post, Azure DevOps Pipelines: Multi-Stage Pipelines, you might want to start there before reading the rest of this post if you are new to multi-stage pipelines.

Add an Environment
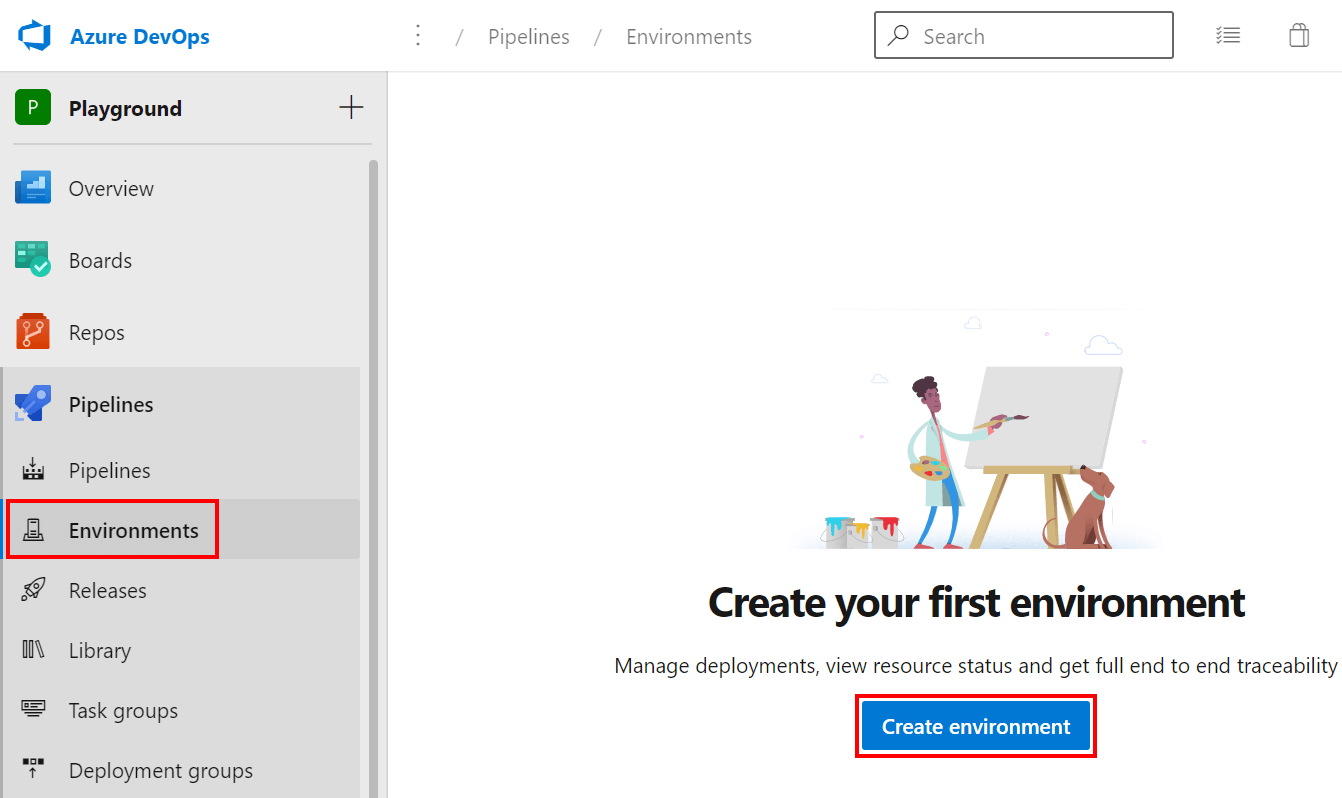
In order to require approval on a stage is to associate it with and environment and add the approval requirement to the environment. In Azure DevOps under Pipelines select Environments and then click the Create environment button.
On the New environment dialog fill in a Name. If you had actual resources associated with the environment they can be added to provide traceability, but in this example, we are going to stick with the None option.

Require Approval for an Environment
Now that the resource has been created on its details page we can use the three dots to open the menu and click Approvals and checks.

On the next screen click the **+**button in the upper right corner and then from the lists of check select Approvals and then click Next. As you can see from the partial list in the screenshot the range of check available for approvals is massive.
#azure-devops #azure #azure-pipelines #devops