Introduction
PyTorch is nowadays one of the fastest-growing Python frameworks for Deep Learning. This library was in fact first used mainly by researchers in order to create new models, but thanks to recent advancements is gaining lots of interests also from many companies. Some of the reasons for the interest in this framework are:
- GPU optimized tensor computation (matrix-like data structures) using an interface closely resembling Numpy in order to facilitate adoption.
- Neural Networks training using Automatic Differentiation (to keep track of all the operations which happened to a tensor and automatically calculate gradients).
- Dynamic Computation Graph (using PyTorch it is not necessary in order to run a model to define first the entire computational graph like in Tensorflow).
PyTorch is freely available to be installed on any operating system following the documentation instructions. Some of the main elements which compose this library are the:
- Autograd module: is used to record the operations performed on a tensor and perform them backwards to compute gradients (this property can be extremely useful to speed up neural networks operations and to allow PyTorch to follow the imperative programming paradigm).
- Optim module: is used in order to easily import and apply various optimization algorithms for neural networks training such as Adam, Stochastic Gradient Descent,etc…
- nn module: provides a set of functions which can help us to quickly design any type of neural network layer by layer.
Demonstration
In this article, I will walk you through a practical example in order to get started using PyTorch. All the code used throughout this article (and more!) is available on my GitHub and Kaggle accounts. For this example, we are going to use the Kaggle Rain in Australia dataset in order to predict if tomorrow is going to rain or not.
Importing Libraries
First of all, we need to import all the necessary libraries.
import numpy as np
	import pandas as pd
	from sklearn.preprocessing import StandardScaler
	from sklearn.model_selection import train_test_split
	from sklearn.preprocessing import LabelEncoder
	import torch
	from torch import nn
	from torch import optim
	import torch.nn.functional as F
	from torch.utils.data import DataLoader, TensorDataset
view raw
pytorch.py hosted with ❤ by GitHub
Data Preprocessing
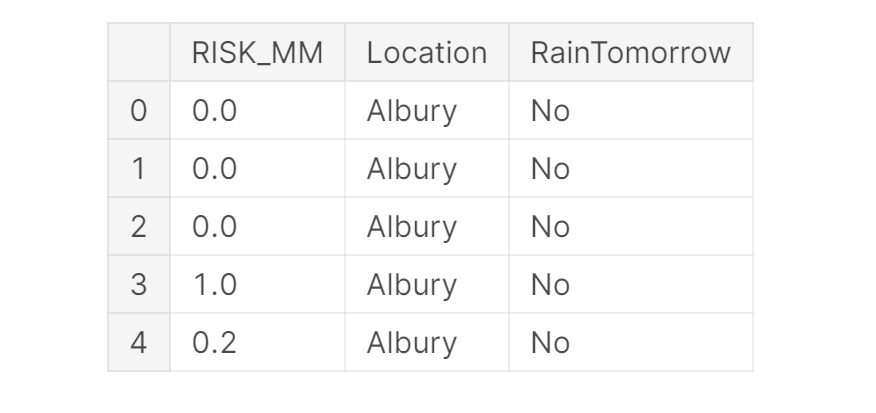
For this example, we will focus to just use the RISK_MM and Location indicators as our model features (Figure 1). Once divided our data into training and test sets, we can then convert our Numpy arrays into PyTorch tensors and create a training and test data-loader to use in order to fed in data to our neural network.
df2 = df[['RISK_MM','Location']]
	X = pd.get_dummies(df2).values
	X = StandardScaler().fit_transform(X)
	Y = df['RainTomorrow'].values
	Y = LabelEncoder().fit_transform(Y)
	X_Train, X_Test, Y_Train, Y_Test = train_test_split(X, Y, test_size = 0.30, random_state = 101)
	# Converting data from Numpy to Torch Tensors
	train = TensorDataset(torch.from_numpy(X_Train).float(), torch.from_numpy(Y_Train).float())
	test = TensorDataset(torch.from_numpy(X_Test).float(), torch.from_numpy(Y_Test).float())
	# Creating data loaders
	trainloader = DataLoader(train, batch_size=128, shuffle=True)
	testloader = DataLoader(test, batch_size=128, shuffle=True)
view raw
pytorch2.py hosted with ❤ by GitHub

Figure 1: Reduced Dataframe
Modelling
At this point, using PyTorch nn module, we can then design our Artificial Neural Network (ANN). In PyTorch, neural networks can be defined as classes constituted by two main functions: inti() and forward().
In the **_inti() _**function, we can set up our network layers while in the forward() function we decide how to stack the different elements of our network together. In this way, debugging and experimenting can take place relatively easily by just adding print statements in the forward() function to inspect any part of the network at any point in time.
Additionally, PyTorch provides also a Sequential Interface which can be used in order to create models in a similar way to how they are constructed using Keras Tensorflow API.
#machine-learning #programming #deep-learning #data analysis