Time to get your GAME FACE ON!

Going forward, we will perform the following actions:
- Getting started and Data Set up
- Work with Data in a popular Structure (Train, Validation, Test)
- Clean the Input Data Set — remove the images that are not images
- Apply concepts of** Data Bunch for Image Classification**
- Apply concepts of Normalization, Batch Size, Data Augmentation(GPU)
- Apply concepts of Learners, Architecture and Transfer Learning
- Fit Model on Training Data, Check results on Validation Data, Save Model
- Interpret Model Performance using loss function, Confusion Matrix
- Improve Model performance with Differential Learning Rate
- Improve model performance with Cleaning Labels
- Apply Data Augmentation to further improve performance
- Apply Model on Single Image(GPU/CPU)
- What can go wrong and how to fix it ?
- Use Model in Production
1. Getting started and Data Set up

Downloading from Google Images — Let’s get our hands dirty!
simple_image_download is a Python library that allows you to search URLs of images from google images using your tags, and download them to you computer.
The code to download images and more information can be found at my previous blog.
We will be classifying the following cricketers.
['AB de Villiers',
 'Brian Lara',
 'Other Cricketer',
 'Rahul Dravid',
 'Rohit Sharma',
 'Sachin Tendulkar',
 'Shane Warne',
 'Virat Kolhi']
_Other Cricketer _are images with all such cricketers who do not fall in any other category or images with more than one cricketer.
Using Magic Commands
As many of you may be aware, ‘%’ are special directives to Jupyter Notebook, and they are not Python code. They are called “magics.”
Magic commands act as convenient functions where Python syntax is not the most natural one. The commands below suggest:
- If somebody changes underlying library code while we are running this, please reload it automatically.
- If somebody asks to plot something, then please plot it here in this Jupyter Notebook.
%reload_ext autoreload
%autoreload 2
%matplotlib inline
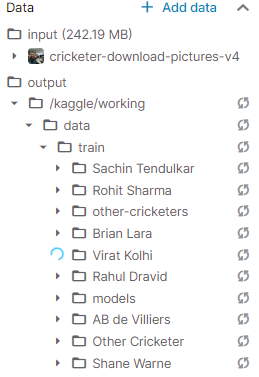
Moving Data from Input to working Directory
As we are working with the Kaggle Kernel , we start by moving the Training data from the input folder to the working folder. (We do not have write access to the input folder).
import shutil
src=”/kaggle/input/cricketer-download-pictures-v4"
dest = “/kaggle/working/data/”
destination = shutil.copytree(src, dest)
destination
'/kaggle/working/data/'
2. Work with Data in a popular Structure(Train, Validation, Test)
Input folder Structure
A common way for computer vision datasets is to use just one folder with a whole bunch of sub-folders in it. So then the question arises, how do we get the labels ?
In machine learning, the labels refer to the category we are trying to predict. If we just eyeball this, we could immediately see that the labels are actually part of the Folder Name. We need to somehow get a list of labels for each file.
Importing important Libraries
We are going to work with the fastai V1 library which sits on top of Pytorch 1.0. The fastai library provides many useful functions that enable us to easily build neural networks and train our models.
We will be using the libraries associated with Computer vision for fastai.
from fastai.vision import *
from fastai.metrics import error_rate
import warnings
import os
warnings.filterwarnings(“ignore”)
View the file names for creating the Data Set
Let us have a look at the image names. The function get_image_files will grab an array of all of the image files as shown below.
path=”/kaggle/working/data/train/”
fnames = get_image_files(path+”Virat Kolhi”)
fnames[:5]

('/kaggle/working/data/train/Virat Kolhi/Virat Kolhi face_239.jpg'),
('/kaggle/working/data/train/Virat Kolhi/Virat Kolhi face_46.jpg'),
('/kaggle/working/data/train/Virat Kolhi/Virat Kolhi face_100.jpg'),
('/kaggle/working/data/train/Virat Kolhi/Virat Kolhi face_27.jpg'),
('/kaggle/working/data/train/Virat Kolhi/Virat Kolhi face_6.jpg')
3. Clean the Input Data Set — remove the images that are not images
The next thing we needed to do is to remove the images that are not actually images at all. There are always a few images in each batch that are corrupt. In such cases, the URL usually had an image before but not after cleaning.
We will use verify_images to check all images in a path learn if there is a problem. If you set**_ delete=True_**, verify_images will actually delete corrupt files for us in order to get a clean Data set.
classes_dir=[‘other-cricketers’,’AB de Villiers’, ‘Brian Lara’, ‘Rahul Dravid’, ‘Rohit Sharma’, ‘Sachin Tendulkar’, ‘Shane Warne’, ‘Virat Kolhi’]

for cls in classes_dir:
 print(cls)
 verify_images(path + cls, delete=True)

Example output: cannot identify image file <_io.BufferedReader name='/kaggle/working/data/train/AB de Villiers/AB de Villiers face_80.jpg'>
4. Apply concepts of Data Bunch for Image Classification
In order to create a model in fastai, we need to create a DataBunch object, in our case the src variable (see code below).
In fastai, each thing that we model with, is going to be a DataBunch object. A DataBunch object contains 2 or 3 datasets:
- Training data;
- Validation data; and
- Optionally test data.
Each of the above contains images and labels, texts and labels, or tabular data and labels, and so forth. All of this sits together in the DataBunch.
While defining the DataBunch, we also need to create the Validation Data set to avoid over-fitting.
Over-fitting is a situation where the accuracy on the training data is high, but is on the lower end outside the training data. Over-fitting can be avoided by using a ‘validation set’.
A validation set is a set of images that your model is not trained on. We will print the error rate for validation set. When we defined our DataBunch, it automatically created a validation set for us. In this case, we randomly chose 20% pictures for validation Data set using **split_by_rand_pct **function.
#data-augmentation #deep learning