Building Chrome Extensions
Developing and building Chrome extensions from scratch is as cool and amazing as it sounds. And it’s not complicated as it may seem at a first view. In this post, we will be covering all the essentials required to create your own Chrome extensions and build a simple Chrome extension.
And the best part of developing these extensions is that you don’t need to be an expert web developer. Fundamental knowledge of HTML, CSS, and JS is enough to build your own extensions. So, without consuming any more of your time with this intro, let’s get started.
Chrome Extensions are built with four main ingredients -
- Manifest file
- Content Script
- Background Script
- Popup
There are more things needed but these are the most crucial ones.
Manifest file
It’s a JSON file. Think of it as package.json. It tells us about the version, configurations, name and all the details related while building an extension.
Create a directory named MyExtension(you can name anything you feel like, but in this post, I will refer to it by MyExtension) and inside it create a manifest.json file.
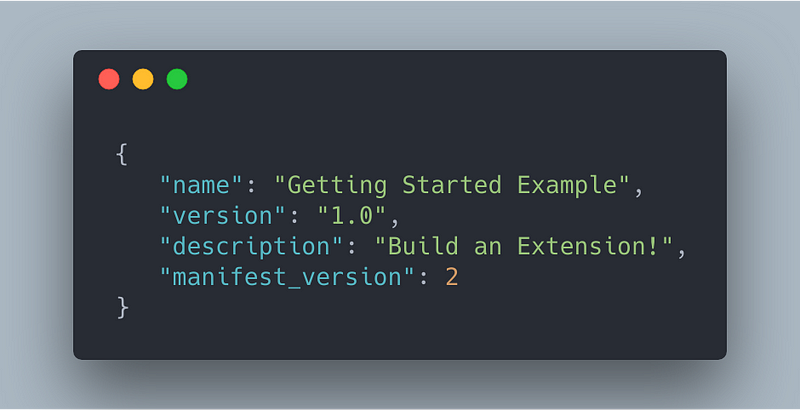
manifest.json
There are a lot more things to be added in this file, which we will see in a few minutes. For a deeper view into manifest file, feel free to look here.
Content Script
A content script bothers itself with the current web page’s content. So, if you want to access Document Object Model(DOM) of the current page from your Chrome extension then this script is where you do that. Any DOM manipulation code goes here.
But we want our manifest file to know where are our content scripts. For that, we have to modify our manifest file.
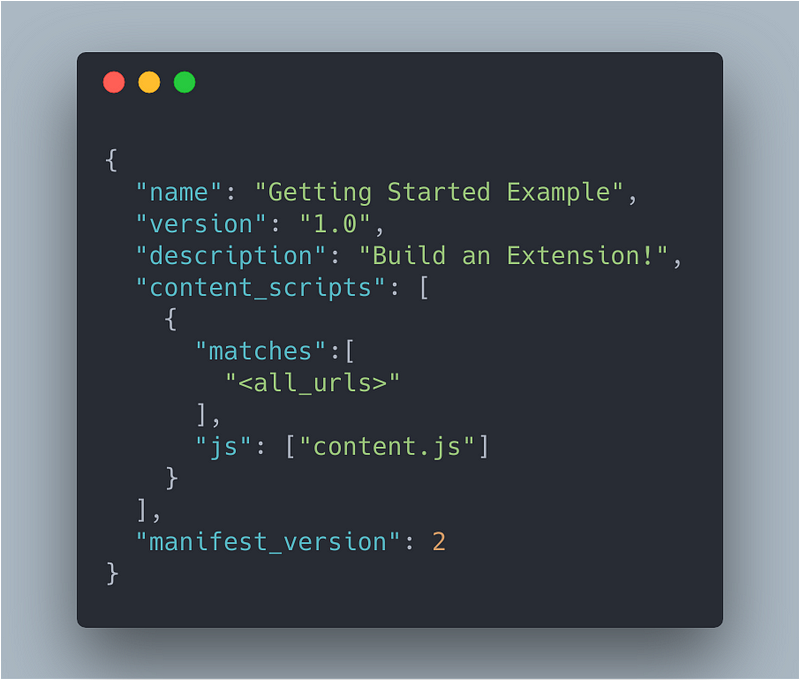
content_scripts added
Here, the ‘matches’ key is an array which can contain the URLs for which the content script is to be run. In the above example, we want to run the content script for every website so we use <all_urls>. Whenever the page loads, the content script runs.
Let’s create a file content.js in the same directory and write some code in it.
console.log(document);
Once we do that we are ready to put our extension on Chrome.
- Go to chrome://extensions/ .
- Activate the developer mode.
- Click on the ‘load unpacked’ button and add your MyExtension directory.
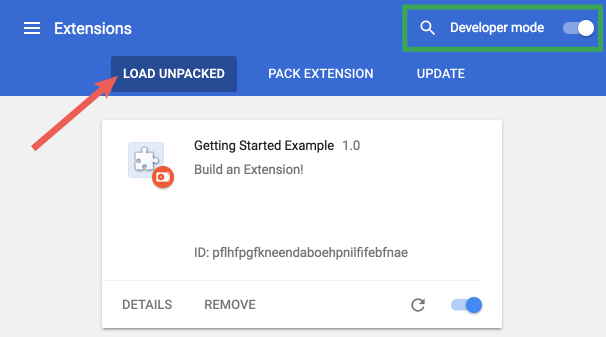
And that’s it, your extension will be activated on your browser and when you visit a page you can open your browser console and check that you have the respective site’s document object.
Since we now know how to use content scripts. Let’s do something cool with it.
Suppose, I wanna change the filter of all the images of every website I visit, It’s very easy. I have to only change the content script.
document.querySelectorAll('img').forEach((item)=>{
item.style.filter = “grayscale(100%)”;
});
Or I wanna speed up the video I watch
document.querySelectorAll(‘video’).forEach((item)=>{
item.playbackRate = 2.0;
});
Ah, it’s okay. But not very useful
True. We want our ‘extension users’ to be able to decide the playback rate so that they control the speed of the video according to their needs, and I’ll get back to it but before that let’s have a look at the background scripts.
Note: Whenever you make changes to any file of the MyExtension directory, you must refresh the extension OR you can download another extension(Extension reloader), this reloads all the unpacked extensions with a single click on a icon.
Background Script
Extensions are event-based programs used to modify or enhance the Chrome browsing experience. Events are browser triggers, such as navigating to a new page, removing a bookmark, or closing a tab. Extensions monitor these events in their background script, then react with specified instructions.
In layman terms, whenever the chrome browser is opened, the background scripts listens for events and responds to these events.
Again we have to make changes in the manifest file for the background scripts,
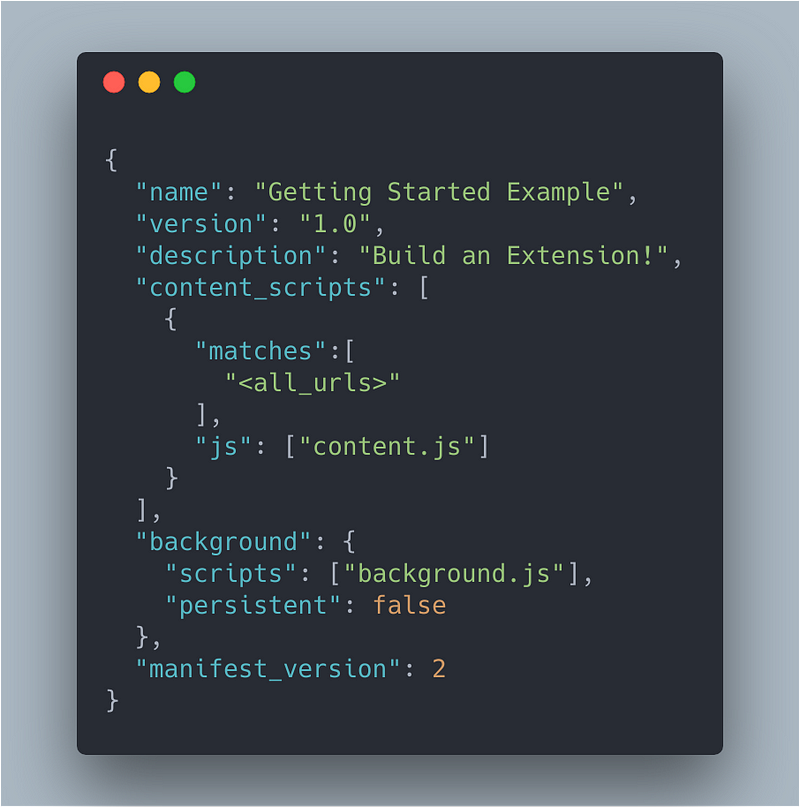
Now, let’s create a background.js file and write the following code:-
conosle.log(‘I am a background script’);
Now if you refresh and check again there is no message in Chrome console because background script is not a part of the web page.
Go to chrome://extensions, and there exists a ‘i_nspect background page_’ link. Just click on that and there will be a different console with the respective message.
Browser action
browser_actions is used to put icons in the main Google Chrome toolbar, to the right of the address bar. So again the manifest file is to be modified:-
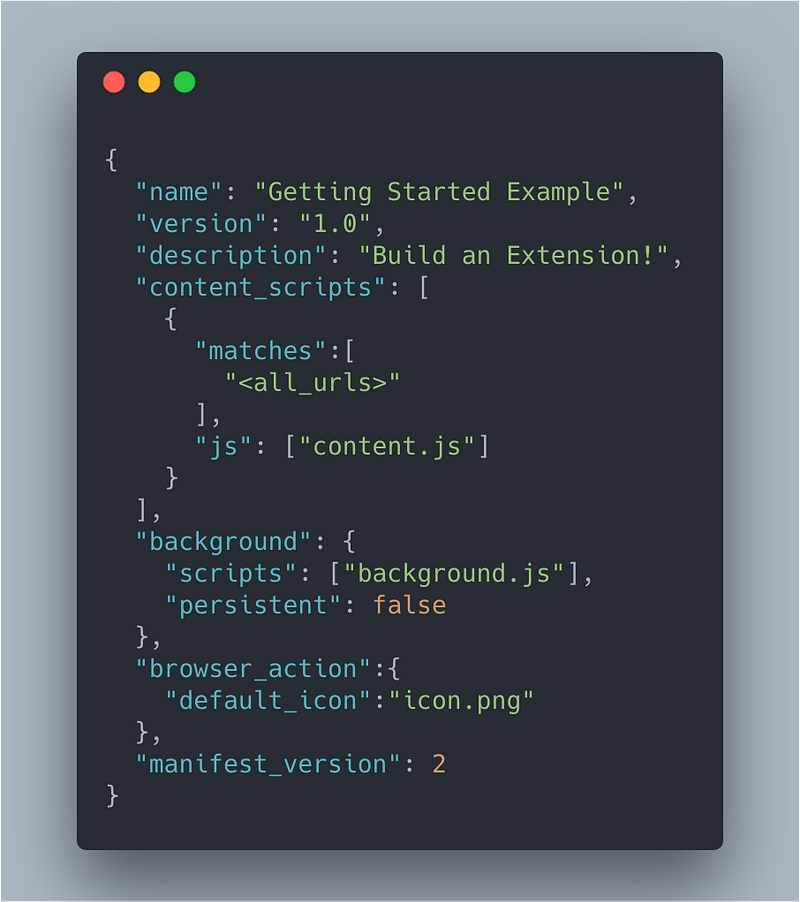
manifest.json
Now, this icon is clickable(fire browser actions) and our background script can listen to these actions.
Communication between the background and the content script
Chrome uses three APIs for the communication between the content and the background script.
Let’s make some changes in the background scripts.
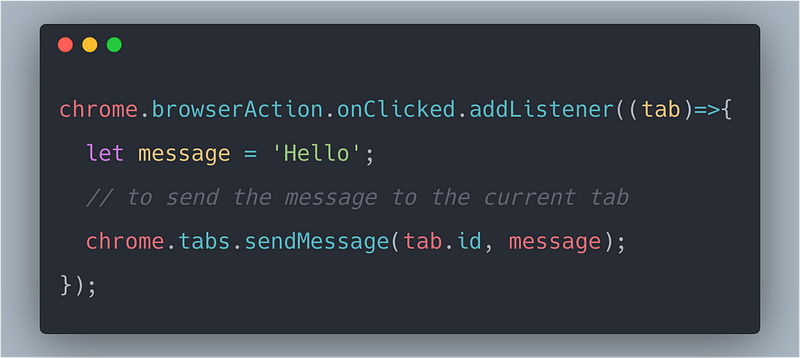
background.js
When we click the extension’s icon the background scripts sends the message using ‘sendMessage’ method. The callback function has a tab argument which is basically an object that has all the data for the current tab.
While the content script listens for the event and gets the data_._
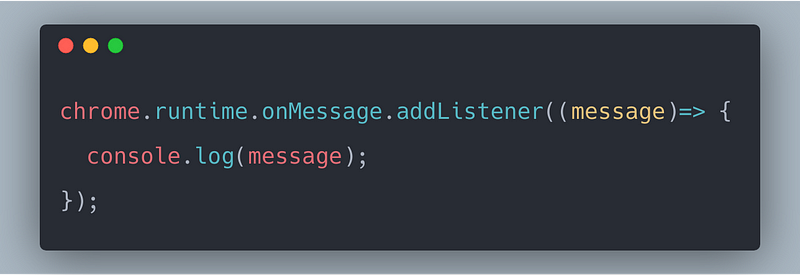
content.js
Once the icon is clicked, the background script sends the message to the content script.
Now let’s build a chrome extension that allows the user to control the playback speed of the video.
The aim of the extension -> The user clicks on the icon, a popup is created with a slider from which the user can control the speed of the video.
Popup’s
When a user clicks on the extension icon, we want to generate a popup. This popup is an HTML file. But first, we have to update our manifest.json file
“browser_action”:{
“default_icon”:“icon.png”,
“default_popup”:“popup.html”
}
We create a popup.html file in the ‘MyExtension’ directory.
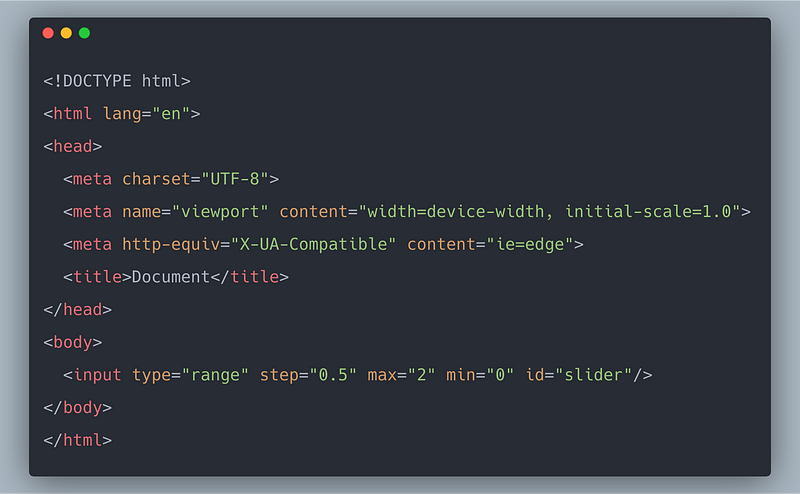
popup.html
Communication between popup & content script
We want to increase or decrease the playback speed of any video, based upon the user input. The best approach would be to take the input in the popup(using a slider) and then pass the slider value to modify the playback rate to the content script.
First, create a popup.js file and update the popup.html file by adding the script tag in it.

popup.html
While in the popup.js file, we’ll take the slider value and pass it to the content script.

popup.js
The content scripts get the slider value from the popup and modify the playback speed.
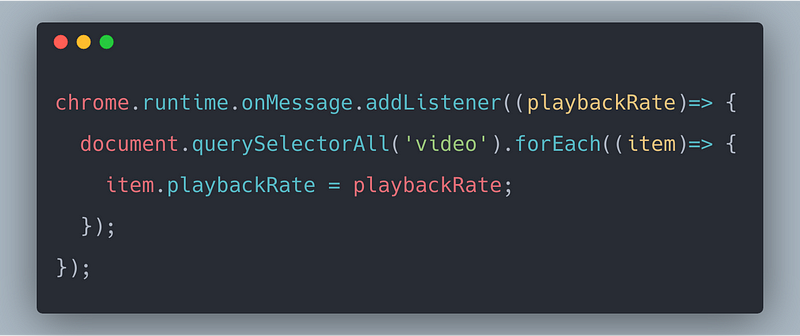
content.js
WOHOOO!! Created our first useful chrome extension. For the complete code, check here.
There is a lot more to when building chrome extensions and this post is just to get you started with it. If you want to take your skills to another level, just check out the docs.
Conclusion
In this article, we learned about some cool stuff related to Chrome Extensions. Hope you liked this article and learned something new, and if you did, clap your 💖 out and follow me for more content. Thanks for reading 🙏 Please feel free to comment and ask anything.
Learn more
☞ Learn HTML5 & CSS3 From Scratch - Make Responsive Websites
☞ Full Stack Web Development with Angular and Spring MVC
☞ Creating Web Sites using Python and Flask
☞ Full Stack Developers: Everything You Need to Know
☞ How to Perform Web-Scraping using Node.js
☞ Build a web scraper with Node
☞ Develop a basic website with .NET CORE 3.0 and pure JavaScript
☞ Angular 7 (formerly Angular 2) - The Complete Guide
☞ The Complete JavaScript Course 2019: Build Real Projects!
☞ Modern React with Redux [2019 Update]
☞ Vue JS 2 - The Complete Guide (incl. Vue Router & Vuex)
☞ Build Responsive Real World Websites with HTML5 and CSS3
☞ The Complete Web Developer Course 2.0
Originally published by Aayush Jaiswal at https://blog.bitsrc.io
#google-chrome #web-development