Learn how to implement Google login in Angular 17
In this tutorial, you will learn how to implement Google login in Angular 17 using Ngx Social Login package. You will also get the user profile data after login
Step for Login with Google in Angular 17
- Step 1: Create Google App
- Step 2: Create Angular 17 Project
- Step 3: Update Component TS File
- Step 4: Update Component HTML File
- Run Angular App
Let's follow the below steps:
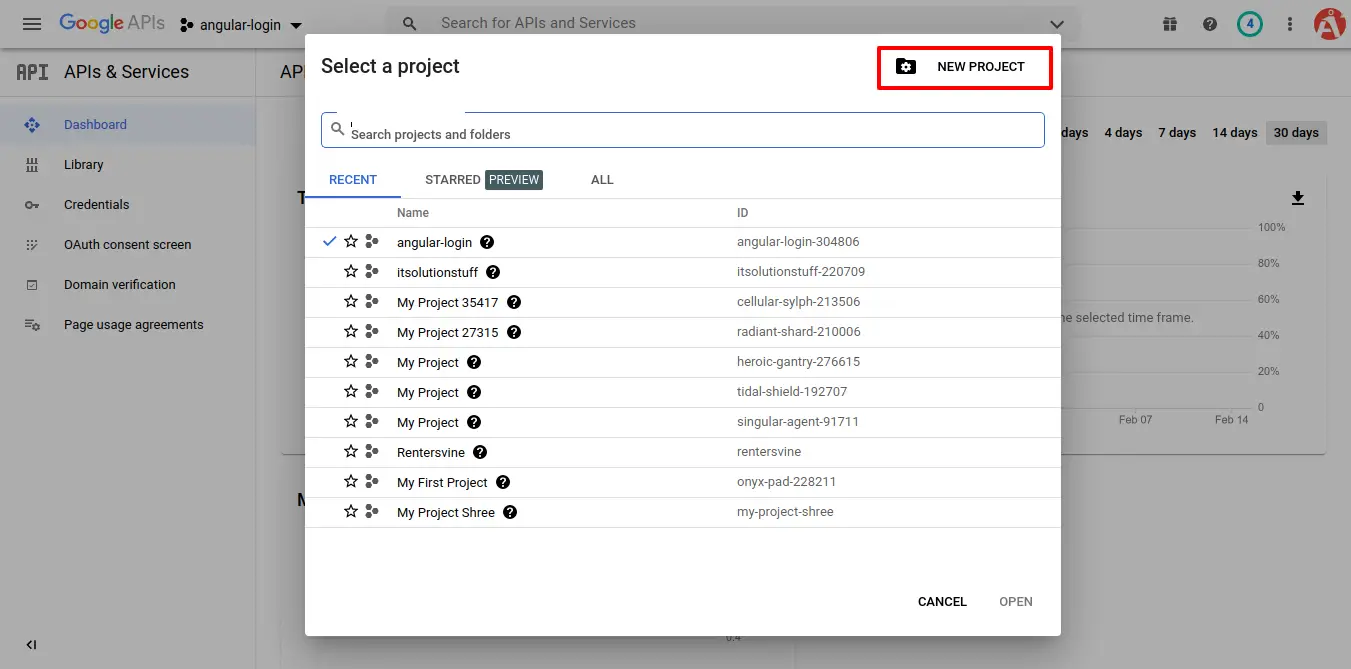
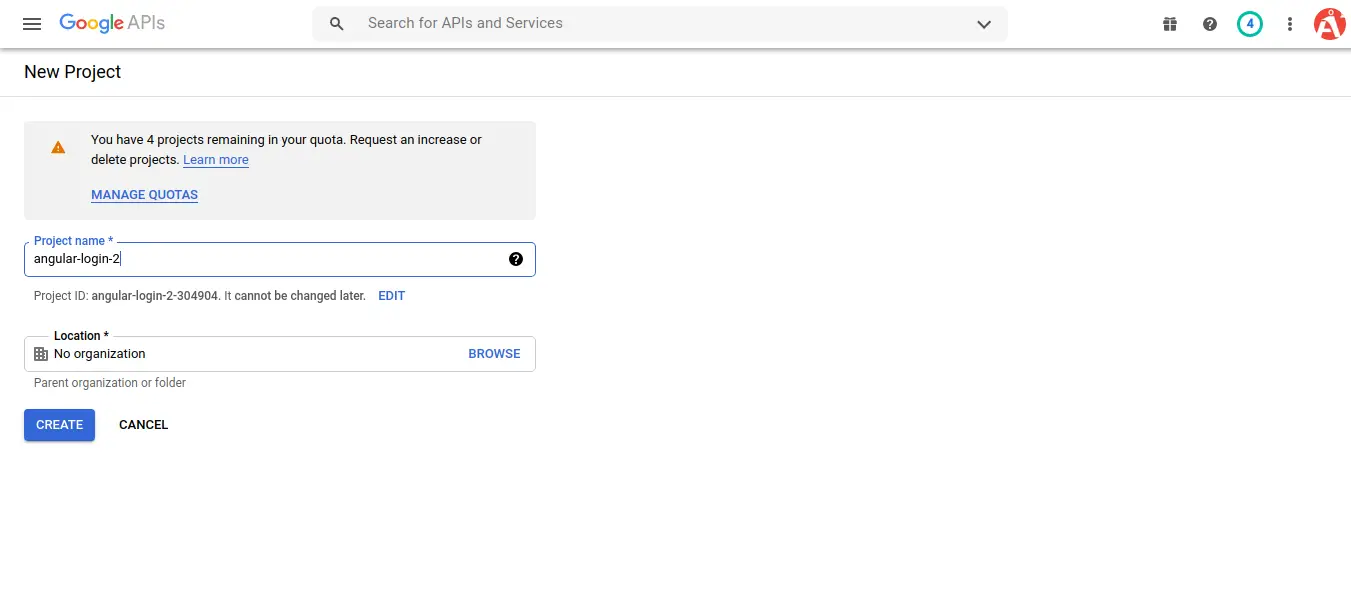
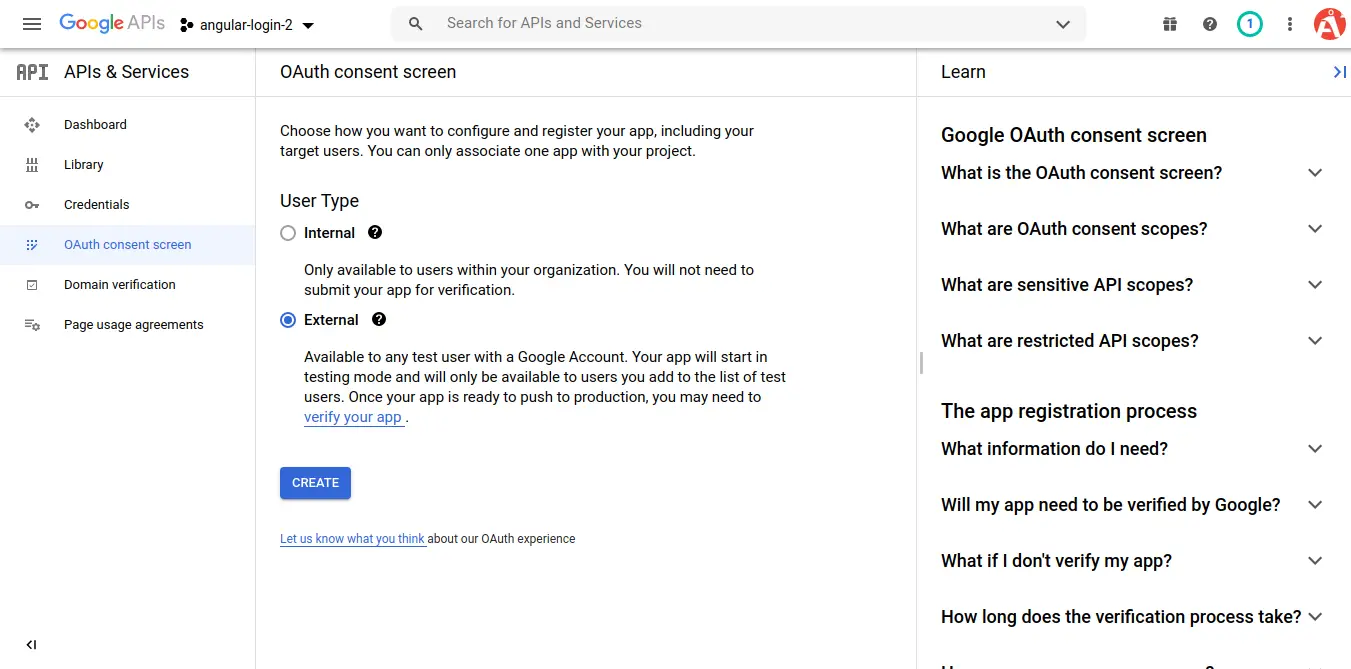
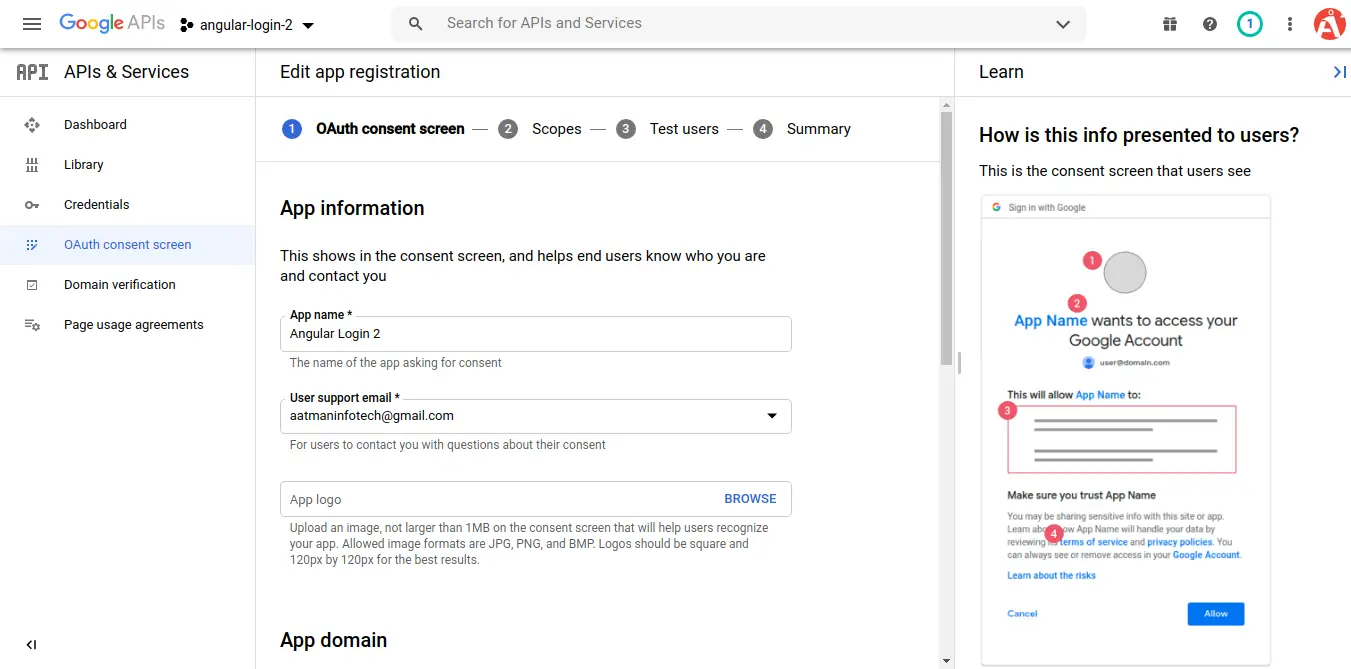
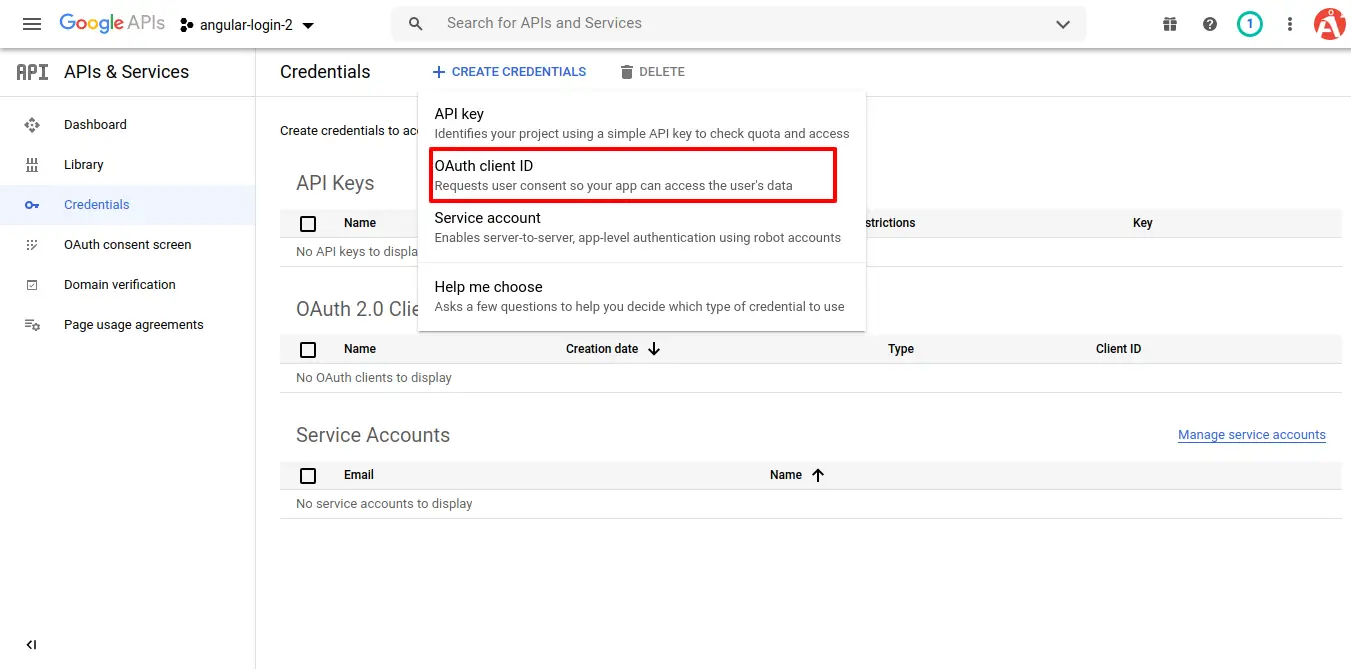
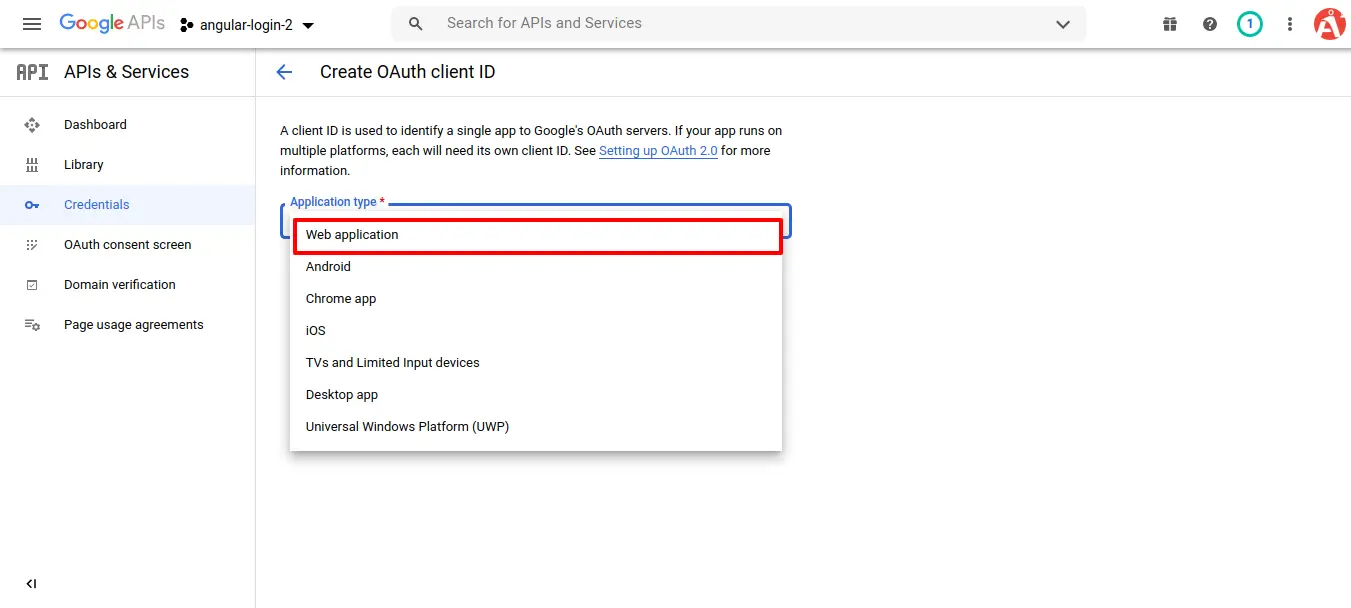
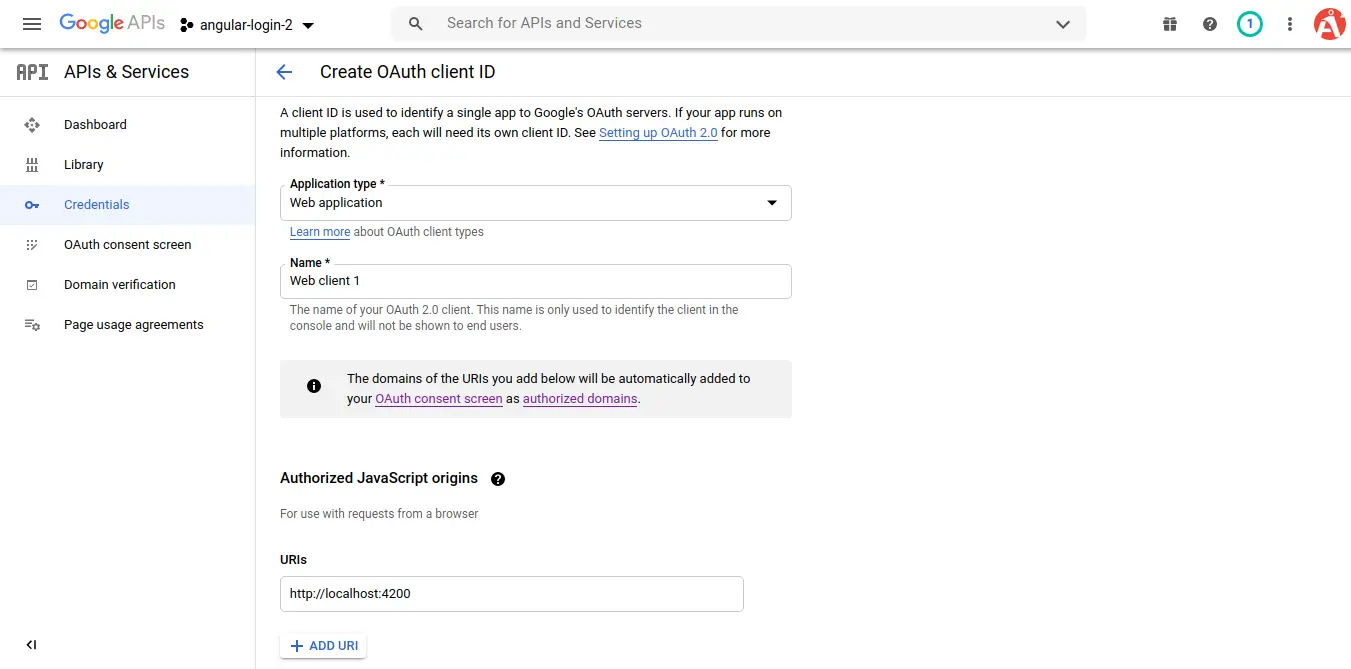
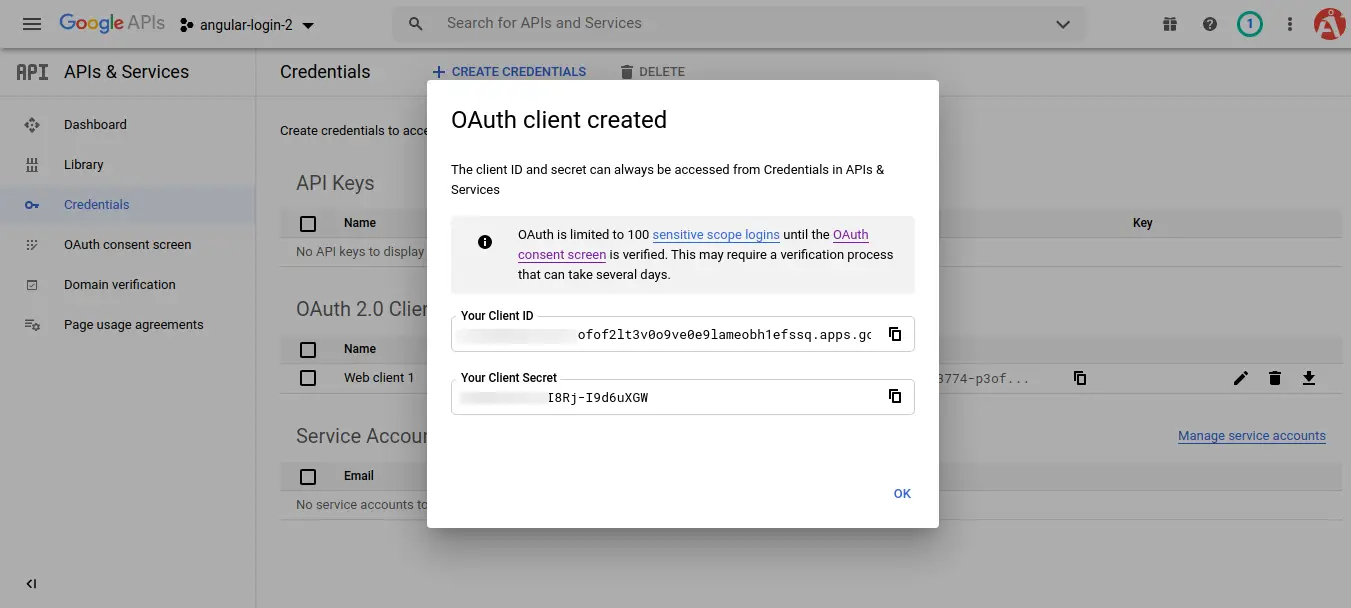
Step 1: Create Google App
Here you need to create a google app and get the client id and secret. so let's go to Google Console.
Now let's see one by one screenshot show you:
Step 2: Create Angular 17 Project
You can easily create your angular app using below command:
ng new my-new-appStep 3: Update Component TS File
Here, we will use ElementRef from "@angular/core" package. so, let's update "app.component.ts" file.
src/app/app.component.ts
import { Component, ViewChild, ElementRef } from '@angular/core';
import { CommonModule } from '@angular/common';
import { RouterOutlet } from '@angular/router';
@Component({
  selector: 'app-root',
  standalone: true,
  imports: [CommonModule, RouterOutlet],
  templateUrl: './app.component.html',
  styleUrls: ['./app.component.css']
})
export class AppComponent {

  title = 'loginGoogle';

  auth2: any;

  @ViewChild('loginRef', {static: true }) loginElement!: ElementRef;

  constructor() { }

  /*------------------------------------------
  --------------------------------------------
  About
  --------------------------------------------
  --------------------------------------------*/
  ngOnInit() {

    this.googleAuthSDK();
  }

  /**
   * Write code on Method
   *
   * @return response()
   */
  callLoginButton() {

    this.auth2.attachClickHandler(this.loginElement.nativeElement, {},
      (googleAuthUser:any) => {

        let profile = googleAuthUser.getBasicProfile();
        console.log('Token || ' + googleAuthUser.getAuthResponse().id_token);
        console.log('ID: ' + profile.getId());
        console.log('Name: ' + profile.getName());
        console.log('Image URL: ' + profile.getImageUrl());
        console.log('Email: ' + profile.getEmail());

       /* Write Your Code Here */

      }, (error:any) => {
        alert(JSON.stringify(error, undefined, 2));
      });

  }

  /**
   * Write code on Method
   *
   * @return response()
   */
  googleAuthSDK() {

    (window)['googleSDKLoaded'] = () => {

      (window)['gapi'].load('auth2', () => {

        this.auth2 = (window)['gapi'].auth2.init({

          client_id: 'GOOGLE_CLIENT_ID',
          cookiepolicy: 'single_host_origin',
          scope: 'profile email'
        });
        this.callLoginButton();
      });
    }

    (function(d, s, id){
      var js, fjs = d.getElementsByTagName(s)[0];
      if (d.getElementById(id)) {return;}
      js = d.createElement('script');
      js.id = id;
      js.src = "https://apis.google.com/js/platform.js?onload=googleSDKLoaded";
      fjs?.parentNode?.insertBefore(js, fjs);
    }(document, 'script', 'google-jssdk'));

  }

}
Step 4: Update Component HTML File
Let's update app.component.html file with following code:
src/app/app.component.html
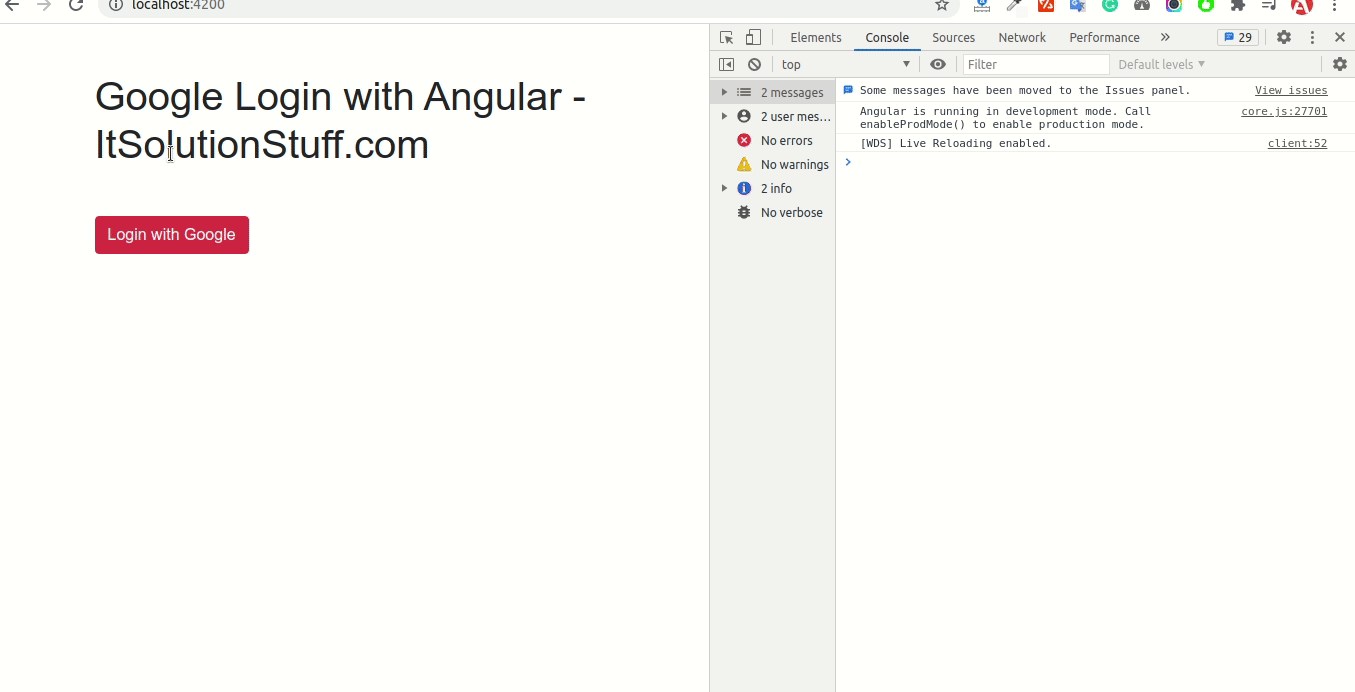
<div class="container mt-5">
  <h1>Google Login with Angular - ItSolutionStuff.com</h1>
  <div class="row mt-5">
    <div class="col-md-4 mt-2 m-auto ">
        <button class="btn btn-danger" #loginRef>
            Login with Google
          </button>
    </div>
  </div>
</div>
Run Angular App:
All the required steps have been done, now you have to type the given below command and hit enter to run the Angular app:
ng serveNow, Go to your web browser, type the given URL and view the app output:
http://localhost:4200Output: