In the previous tutorial, we've created authentication (login and register) forms with Angular 7/8 and a RESTful API server for handing authentication with Node and Express.js.
We've created the Login and Register components with the necessary forms to collect the user's credentials (name, email and password) and display them on the browser's console. In this tutorial, we'll add the code for actually submitting user's information to the authentication server in order to register or authenticate the user.
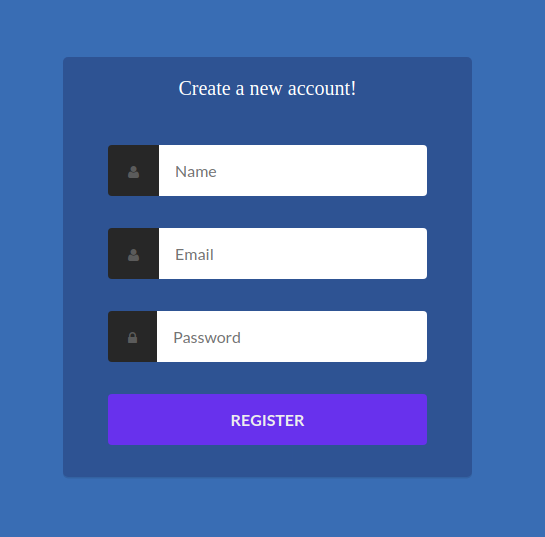
This is the screenshot of the registration component:
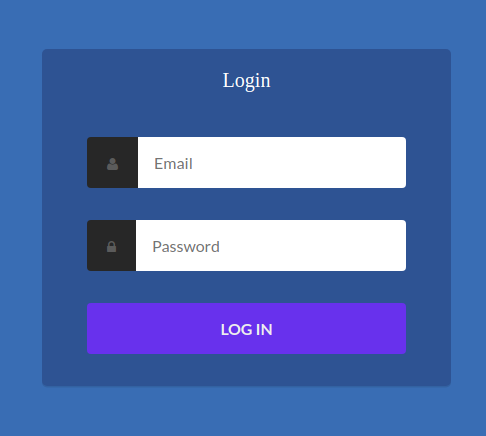
This is the screenshot of the login component:
When you click on the login and register buttons, the values your entered on the form will be only displayed on the console but in actual web applications these values need to be sent to the authentication server (in our case it's a Node and Express.js server that's running locally on the http://localhost:3000 address).
Let's change that!
Basically what you need to do it to change the register() and signIn() methods to send an HTTP POST request to the authentication server with Angular HttpClient.
But, we are not going to call the HttpClient methods directly from the register() and login() methods because that's usually considered bad practice in Angular. Instead we'll create an Angular service that encapsulates all the communication with the authentication server.
In nutshell, these are the steps that we are going to follow throughout this tutorial:
- First, we need to setup
HttpClientin our project (exactly in ourauthmodule), - Next, we generate an
AuthServiceand we implement methods such assignIn(),register()andsignOut()etc. - Finally, we inject
AuthServicein outLoginandRegistercomponents and we call the appropriates service methods to register and authenticate users.
So let's get started!
Prerequisites
As a prerequisite, this tutorial assumes you have followed the previous tutorial where we have created the authentication server with Node and Express.js and created the Angular 8 project with the necessary modules and components.
Setting up HttpClient
Previously we've created the auth module. This module encapsulate the authentication logic in our application. Let's import HttpClient in this module.
Open the src/app/auth/auth.module.ts file and add the following changes:
import { NgModule } from '@angular/core';
import { CommonModule } from '@angular/common';
import { FormsModule } from '@angular/forms';
import { HttpClientModule } from '@angular/common/http';
import { AuthRoutingModule } from ‘./auth-routing.module’;

import { RegisterComponent } from ‘./register/register.component’;

import { LoginComponent } from ‘./login/login.component’;
@NgModule({

declarations: [RegisterComponent, LoginComponent],

imports: [

CommonModule,

FormsModule,

HttpClientModule,

AuthRoutingModule

]

})

export class AuthModule { }
We simply import HttpClientModule from @angular/common/http and we add it in the imports array of AuthModule.
That’s it! You are ready to send HTTP requests in your application.
Creating AuthService and Injecting HttpClient
Next, let’s create an Angular service that’s responsible for sending authentication requests to the backend server.
In your terminal, navigate to your Angular project’s root folder and run the following command:
$ ng generate service auth/auth
Note: We add the auth/ path before the name of our service (which is also auth) to make the service a part of the auth module.
The command will generate two src/app/auth/auth.service.spec.ts and src/app/auth/auth.service.ts files.
Open the src/app/auth/auth.service.ts file, import HttpClient and inject it via the service’s constructor:
import { Injectable } from ‘@angular/core’;

import { HttpClient } from ‘@angular/common/http’;
@Injectable({

providedIn: ‘root’

})

export class AuthService {

constructor(private httpClient: HttpClient) { }

}
Implementing the Authentication Methods
After creating the AuthService and injecting HttpClient let’s now create the methods of the service i.e the register(), signIn(), signOut() and isAuthenticated() methods. The register() and signIn() methods work by sending POST requests to the /register and /login endpoints of the backend server with the user’s credentials. The server will process the POST requests and create or authenticate the user.
Adding User and JWTResponse Model(s)
We’ll be using two models:
- The
Usermodel that encapsulates information about a user such as name, email and password. - The
JWTResponsemodel that encapsulates information about the returned JWT response from the server which contains the JWT access token, the expiration date and the user’s information used to create the token.
In your terminal, run the following commands to generate the User and JWTResponse models:
$ ng generate interface auth/user

$ ng generate interface auth/jwt-response
Open the src/app/auth/user.ts file and update as follows:
export interface User {

id: number;

name: string;

email: string;

password: string;

}
Open the src/app/auth/jwt-response.ts file and update as follows:
export interface JwtResponse {

user: {

id: number,

name: string,

email: string,

access_token: string,

expires_in: number

}

}
Next, open the src/app/auth/auth.service.ts file and import the two models:
import { User } from  ‘./user’;

import { JwtResponse } from  ‘./jwt-response’;
Also, import Observable, BehaviorSubject and tap()
import { tap } from  ‘rxjs/operators’;

import { Observable, BehaviorSubject } from  ‘rxjs’;
Next add a variable that holds the address of the authentication server:
AUTH_SERVER = “http://localhost:3000”;
Finally, add a authSubject variable of type BehaviorSubject with initial value of false:
authSubject = new BehaviorSubject(false);
This variable tracks the user’s authentication state. false means the user is not authenticated yet.
Adding the register() method: Sending a POST Request with HttpClient
Let’s start with the implementation of the register() method. Open the src/app/auth/auth.service.ts file and add:
  register(user: User): Observable<JwtResponse> {

return this.httpClient.post<JwtResponse>(${this.AUTH_SERVER}/register, user).pipe(

tap((res:  JwtResponse ) => {
    if (res.user) {
      localStorage.set("ACCESS_TOKEN", res.user.access_token);
      localStorage.set("EXPIRES_IN", res.user.expires_in);
      this.authSubject.next(true);
    }
  })

);

}
Adding the signIn() Method: Sending a POST Request with HttpClient
Next, add the signIn() method:
  singIn(user: User): Observable<JwtResponse> {

return this.httpClient.post(${this.AUTH_SERVER}/login, user).pipe(

tap(async (res: JwtResponse) => {
    if (res.user) {
      localStorage.setItem("ACCESS_TOKEN", res.user.access_token);
      localStorage.setItem("EXPIRES_IN", res.user.expires_in);
      this.authSubject.next(true);
    }
  })
);

}
Adding the signOut() Method: Removing the JWT Token from Local Storage
Next, let’s implement the signOut() method:
  signOut() {

localStorage.removeItem(“ACCESS_TOKEN”);

localStorage.removeItem(“EXPIRES_IN”);

this.authSubject.next(false);

}
Adding the isAuthenticated() Method: Returning the authSubject as Observable
isAuthenticated() {

return  this.authSubject.asObservable();

}
Calling AuthService Methods in The Components
After fully implementing AuthService, let’s now call these methods in the Login and Register components.
Open the src/app/auth/login.component.ts file and update it as follows:
import { Component, OnInit } from ‘@angular/core’;

import { Router } from ‘@angular/router’;

import { AuthService } from ‘…/auth.service’;

import { User } from ‘…/user’;
@Component({

selector: ‘app-register’,

templateUrl: ‘./register.component.html’,

styleUrls: [‘./register.component.css’]

})

export class RegisterComponent implements OnInit {
constructor(private authService: AuthService, private router: Router) { }
ngOnInit() {}
register(form) {

console.log(form.value);

this.authService.register(form.value).subscribe((res) => {

this.router.navigateByUrl(‘home’);

});

}

}
First we import AuthService and Router and we inject them via the component’s constructor. Next, we call the register() method of AuthService and we pass in the form value.
Next, open the src/app/auth/register.component.ts file and update it as follows:
import { Component, OnInit } from ‘@angular/core’;

import { Router } from ‘@angular/router’;
import { AuthService } from ‘…/auth.service’;

import { User } from ‘…/user’;
@Component({

selector: ‘app-login’,

templateUrl: ‘./login.component.html’,

styleUrls: [‘./login.component.css’]

})

export class LoginComponent implements OnInit {
constructor(private authService: AuthService, private router: Router) { }
ngOnInit() {

}
login(form){

console.log(form.value);

this.authService.signIn(form.value).subscribe((res)=>{

console.log(“Logged in!”);

this.router.navigateByUrl(‘home’);

});

}
}
Again, we import and inject AuthService and Router via the component’s constructor then in the login() method we call the signIn() method of AuthService to authenticate the user.
In both the login() and register() methods we subscribe to the returned Observable and we use the Router navigateByUrl() method to navigate to a home page so you should also create a home page and map it to the home route.
Please note that we don’t do any error checking here. Subscribing to the Observable doesn’t guarantee that we get a successful response all the time so you should also do some basic error checking before navigating to the home page.
Originally published at techiediaries.com on 10 Sep 2019

#angular #node-js