Quickly Deploy your Web applications on the Cloud using Heroku

Heroku is a quick and easy to use Platform as a service (PaaS) that facilitates the deployment of web apps so that it is accessible to anyone with a URL. In other words, this will enable you to take your application from your local machine to the cloud. In this tutorial, We will discuss the steps to deploy apps built on Streamlit (Python) on Heroku. Heroku has been selected for deployment mainly because it provides free resource hours when you sign up for a new account.
Before we dive in further, some prerequisites for this would be a working streamlit app and some basic knowledge of the cloud. However, you can still deploy your application on the web even if you are not familiar with any cloud technology. It’s really that simple!
Let’s get straight to the point without wasting any more time. You need a host as a placeholder for your app and some setup files which are essential for Heroku to detect and run your app just as you would access locally. I have used GitHub to assemble all the required files for the app. Here is a screenshot below:
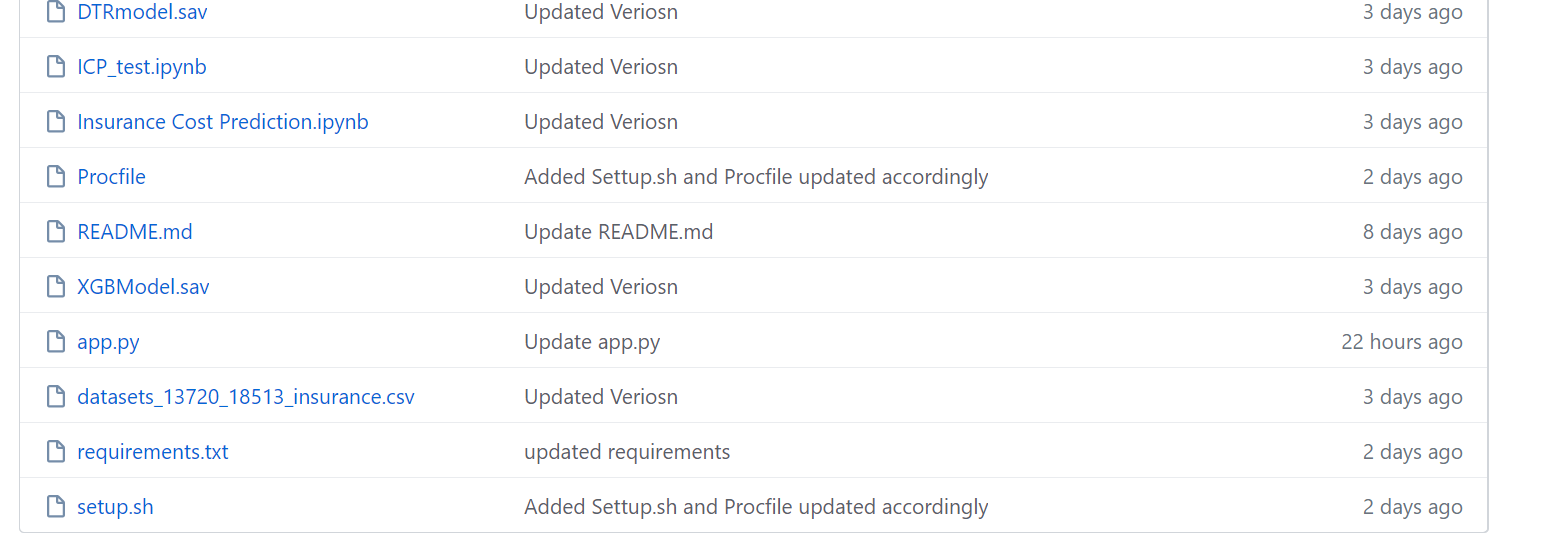
Add all your relevant files to your app repository.
Basically, We would need these three files for Heroku to detect our streamlit app and instructions to execute on run. These are as follows:
1. Process files (Proc file)
2. Requirement files (requirements.txt)
3. Set up files (setup.sh)
It is important to note that and shell files for Setup are mandatory for deployment else your app is likely to fail.

ProcFile
The Proc file contains information about how your app is supposed to run using the setup shell file and enables Heroku to detect the application file.
The next step is to add a requirement file which is nothing but a list of dependencies and the required version for the application to run smoothly. In this case, the requirement files contain below libraries:
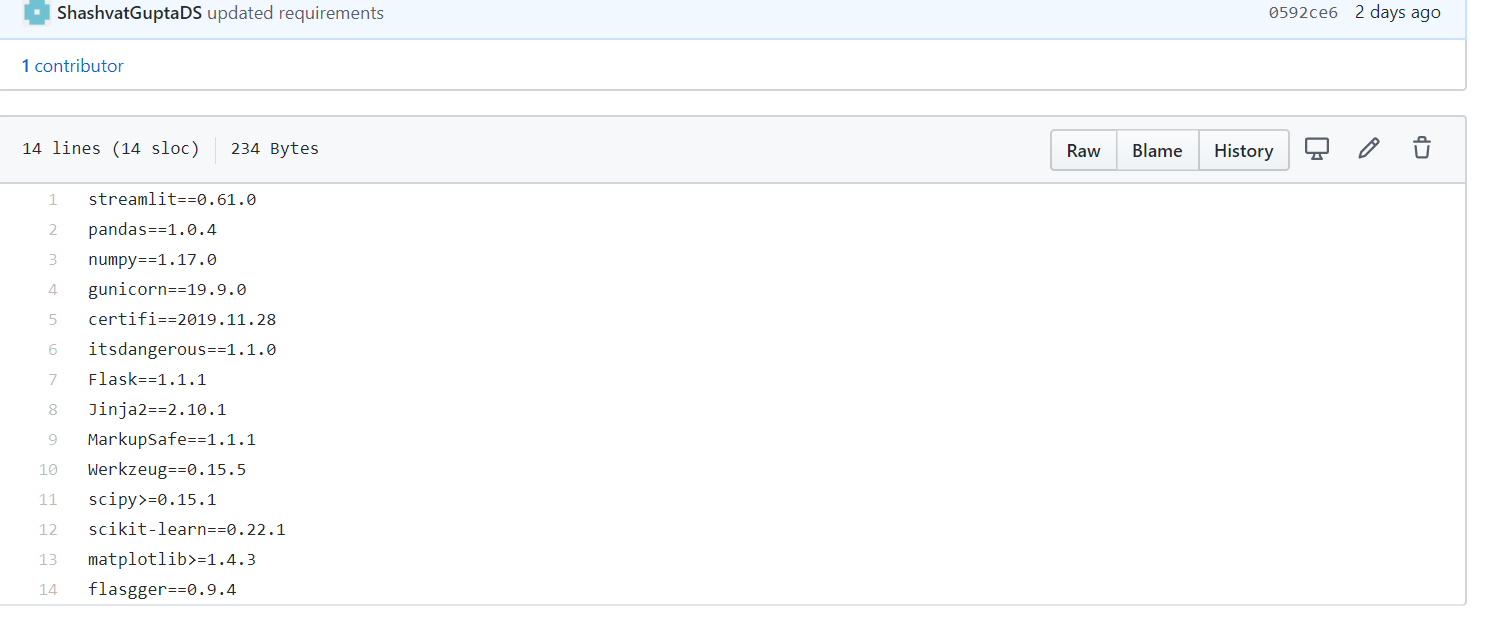
List of dependencies and their respective versions if applicable
It is worth mentioning that make sure you don’t add a library twice or incompatible versions. This might create issues during the build phase.
Now that we have our files ready, We can deploy our application on Heroku.
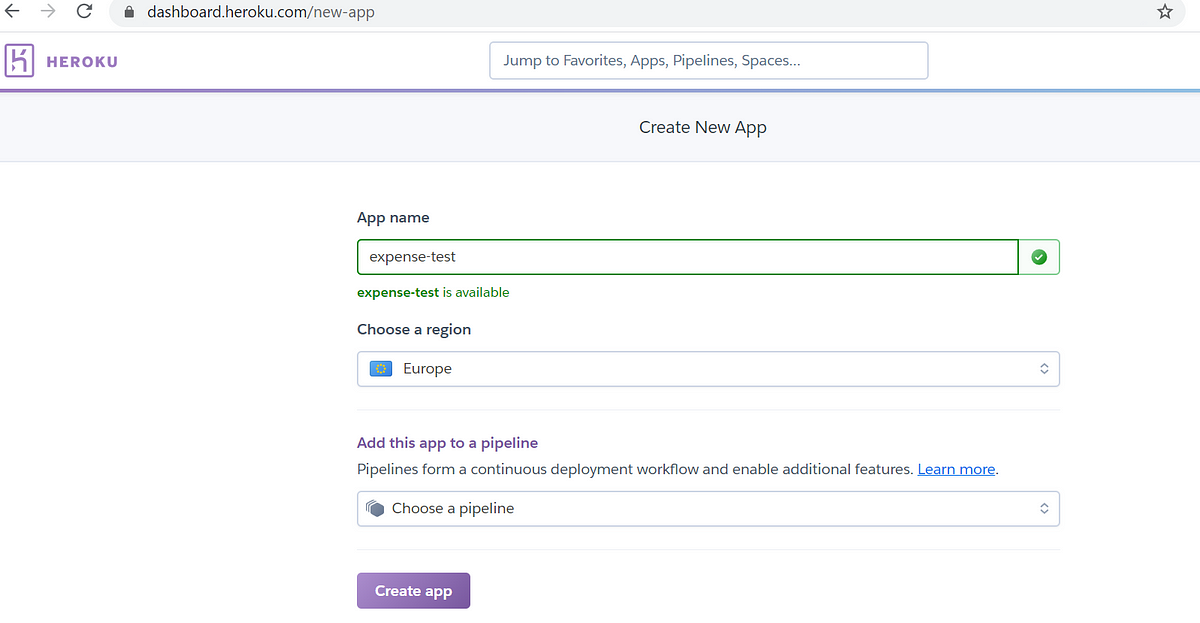
Head to the Heroku dashboard and create an account to get started. A quick note: Heroku does not charge you or need account details at the time of the creation of your account or even deployment is free. They only charge you if you need extra facilities for instance — metrics or you are a business. Moving on, once you have an account — create a new app and name your application and region you want to operate in. You can optionally add a pipeline to form a continuous deployment workflow and enable additional features.
#data-science #heroku #deployment #machine-learning #streamlit #deep learning