Designing the World’s Smallest Arduino!
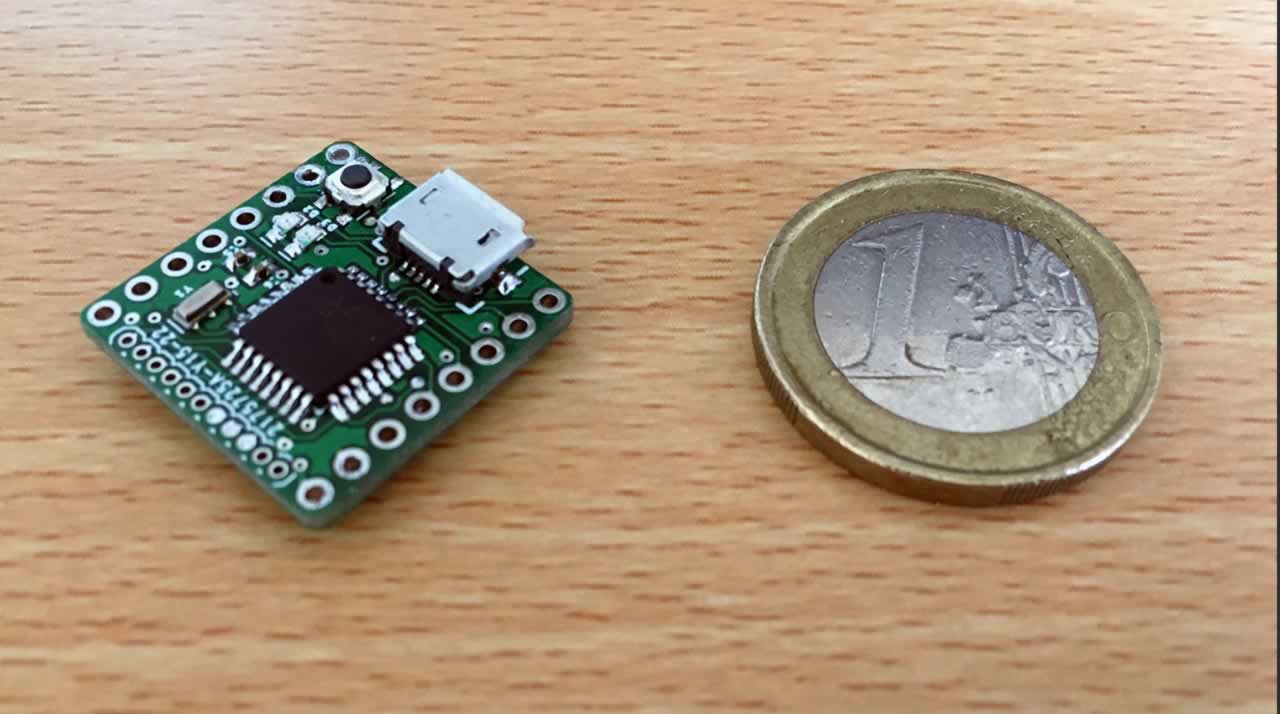
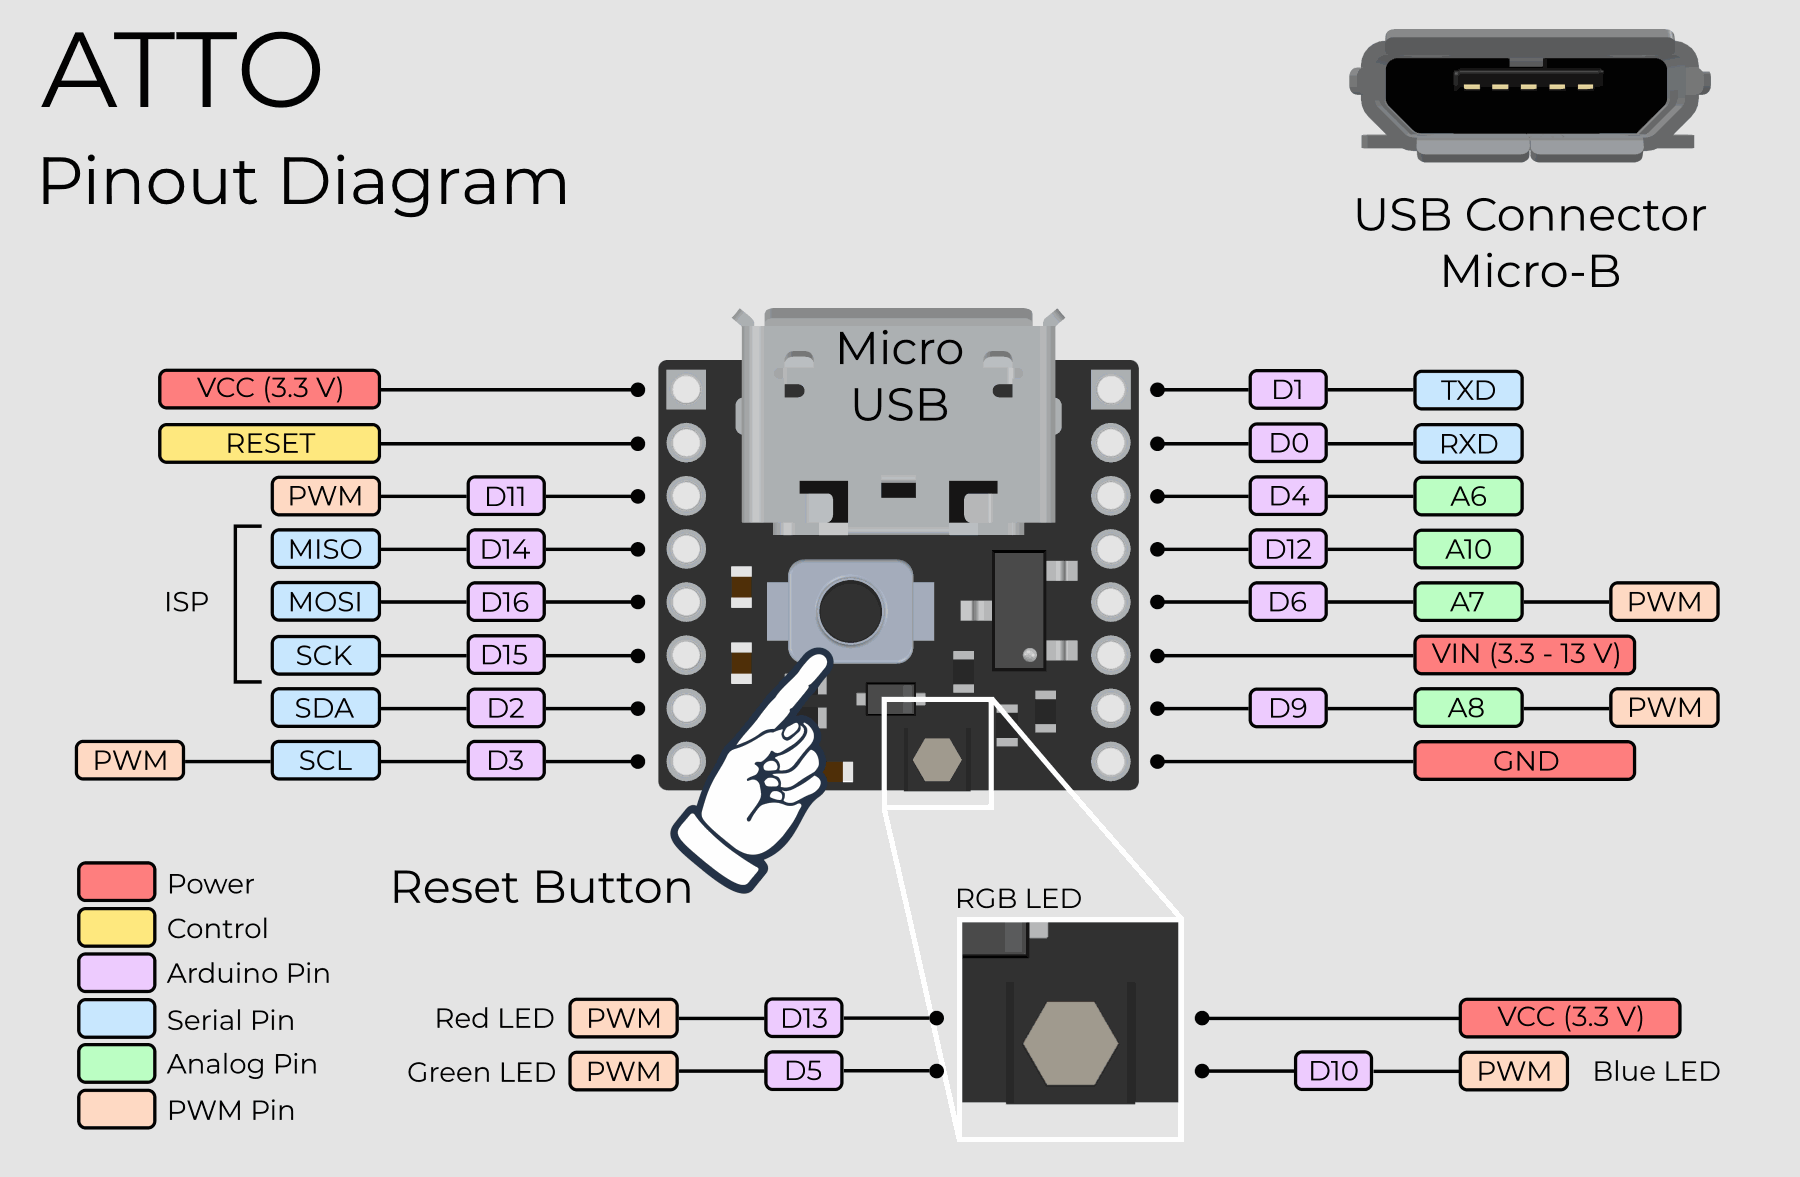
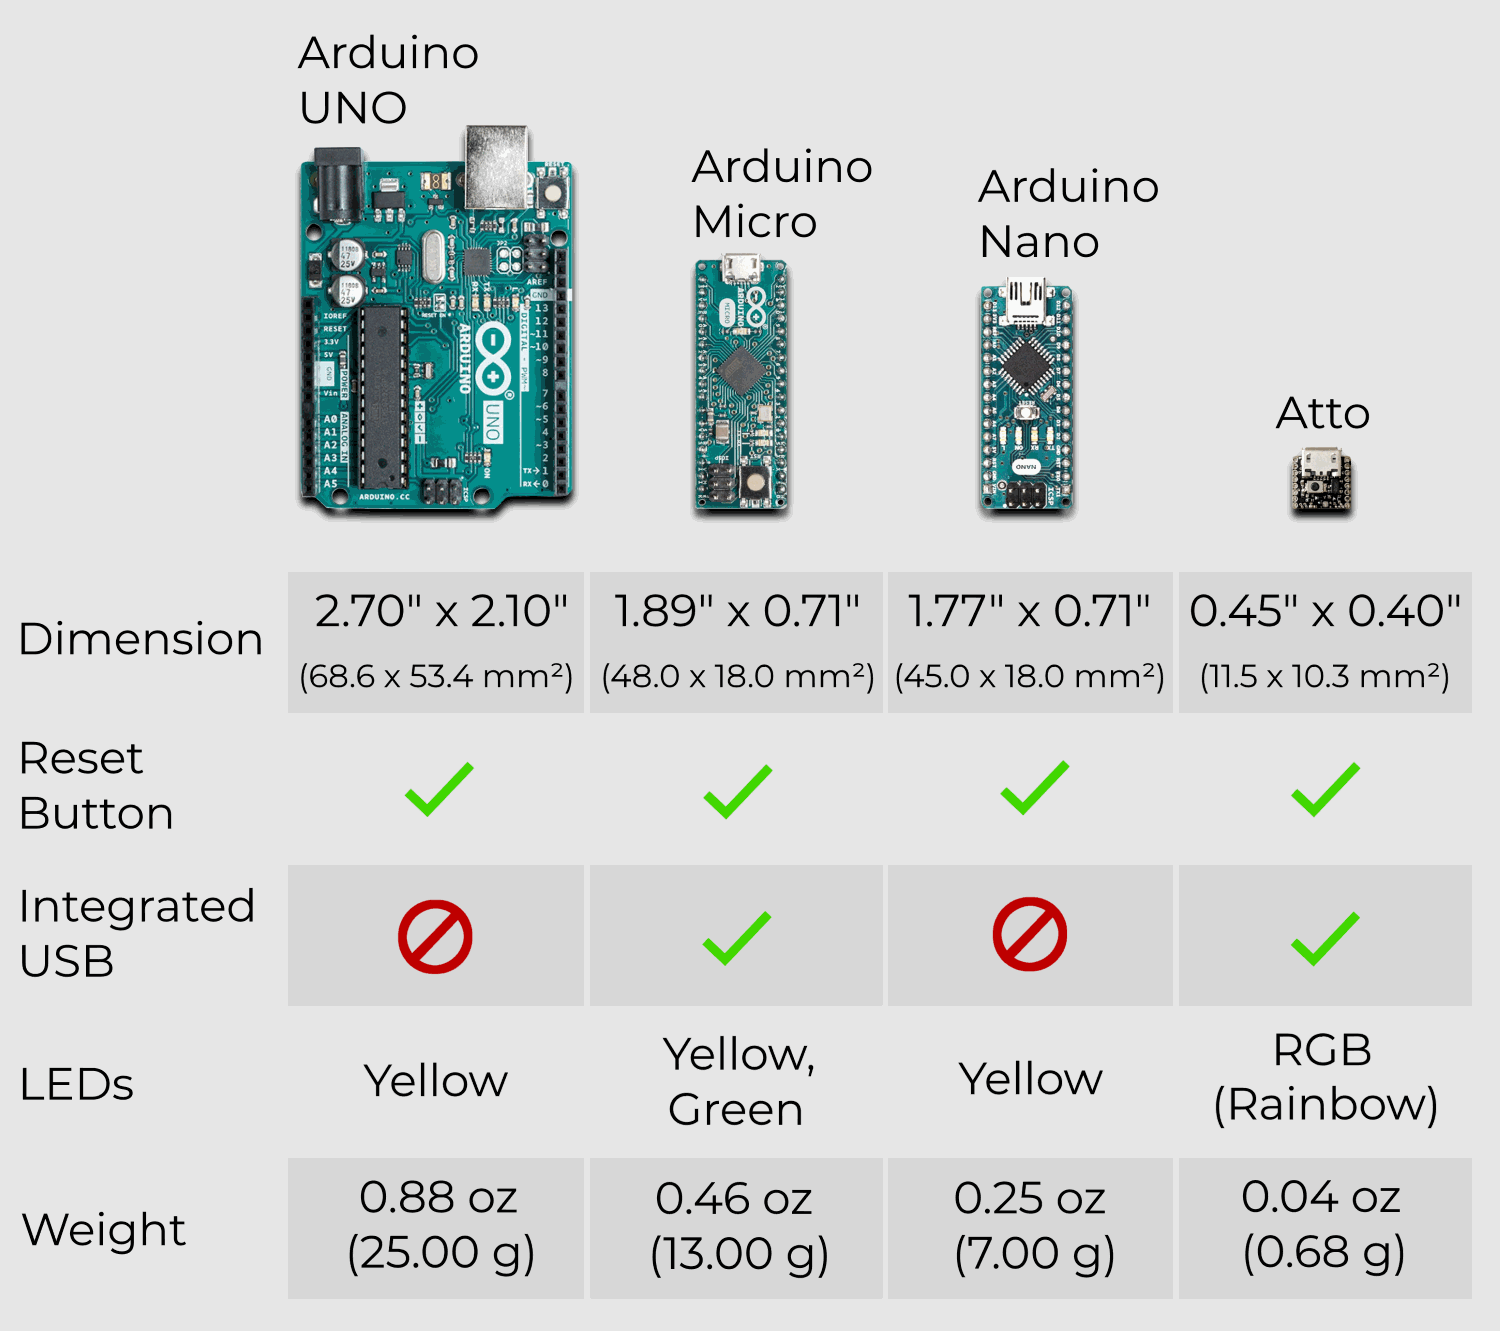
Wondering how small Atto is? How’s about 0.4” x 0.45” small? (10.3 mm x 11.5 mm for my fellow metric brothers and sisters).
For those of you who may be unfamiliar, Arduino is a general-purpose circuit board with a tiny processor that can be programmed to do pretty much whatever you want, and it has a huge community behind it. Having a huge community (for anything really) is great since you have support from all around the globe (kind of like Medium)! So, you may be wondering, what can you do with such a tiny device when you can barely hold or see the darn thing?

Well, a lot! Imagine you want to create a new tech for wearables where earrings or other jewelries change colors based on your body temperature or heartbeat. Or, how about a tiny robotics project where Atto acts as the brain of the robot? The possibilities are endless!

So, we now know what kind of hardware product we want to create but how do we actually make it? It starts with engineering specs or as I usually call it, the process of going from shower thoughts to scribbled thoughts on a paper. The specs tell us exactly what we want to achieve from our hardware which in turn gives us an idea what components will be needed to build the hardware.
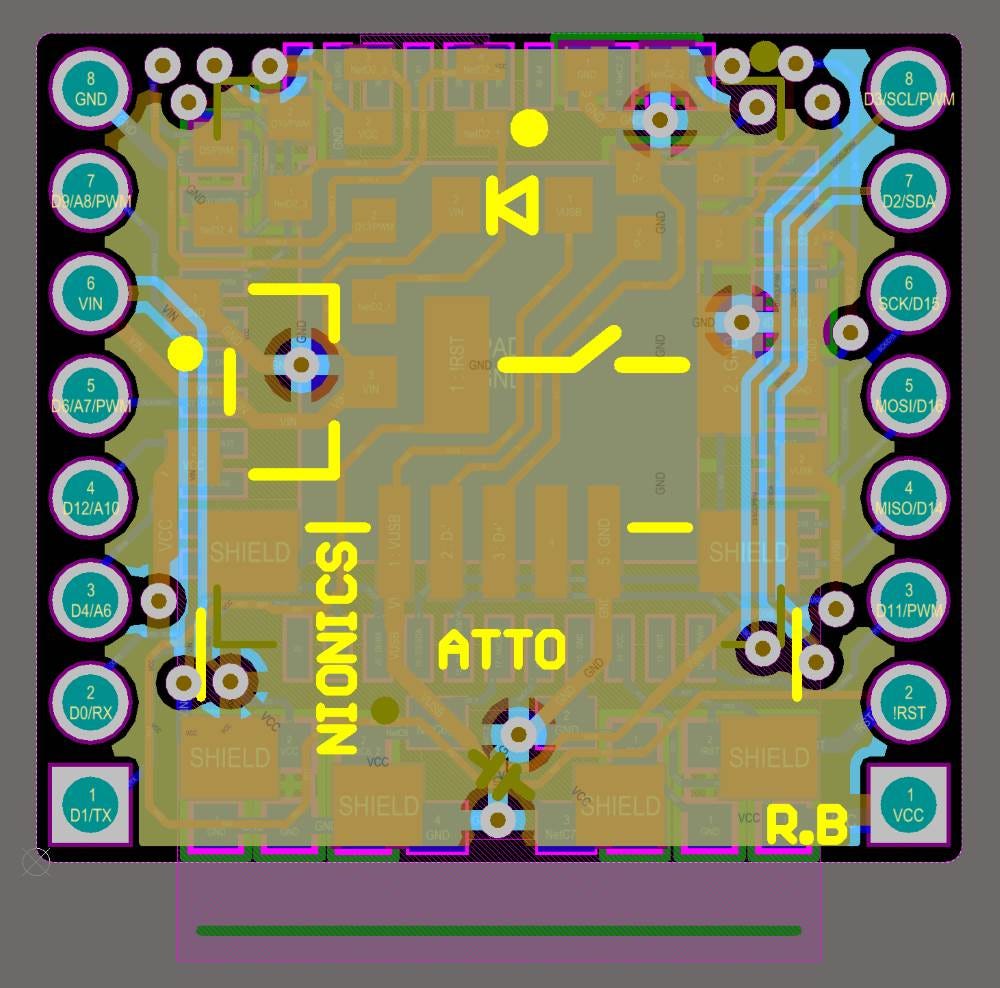
Once the specs are in place, we can begin our circuit design, specifically the schematic and layout. It’s tedious work but a good initial design will help us in the long run and save us a lot of development costs. So, it’s very important!
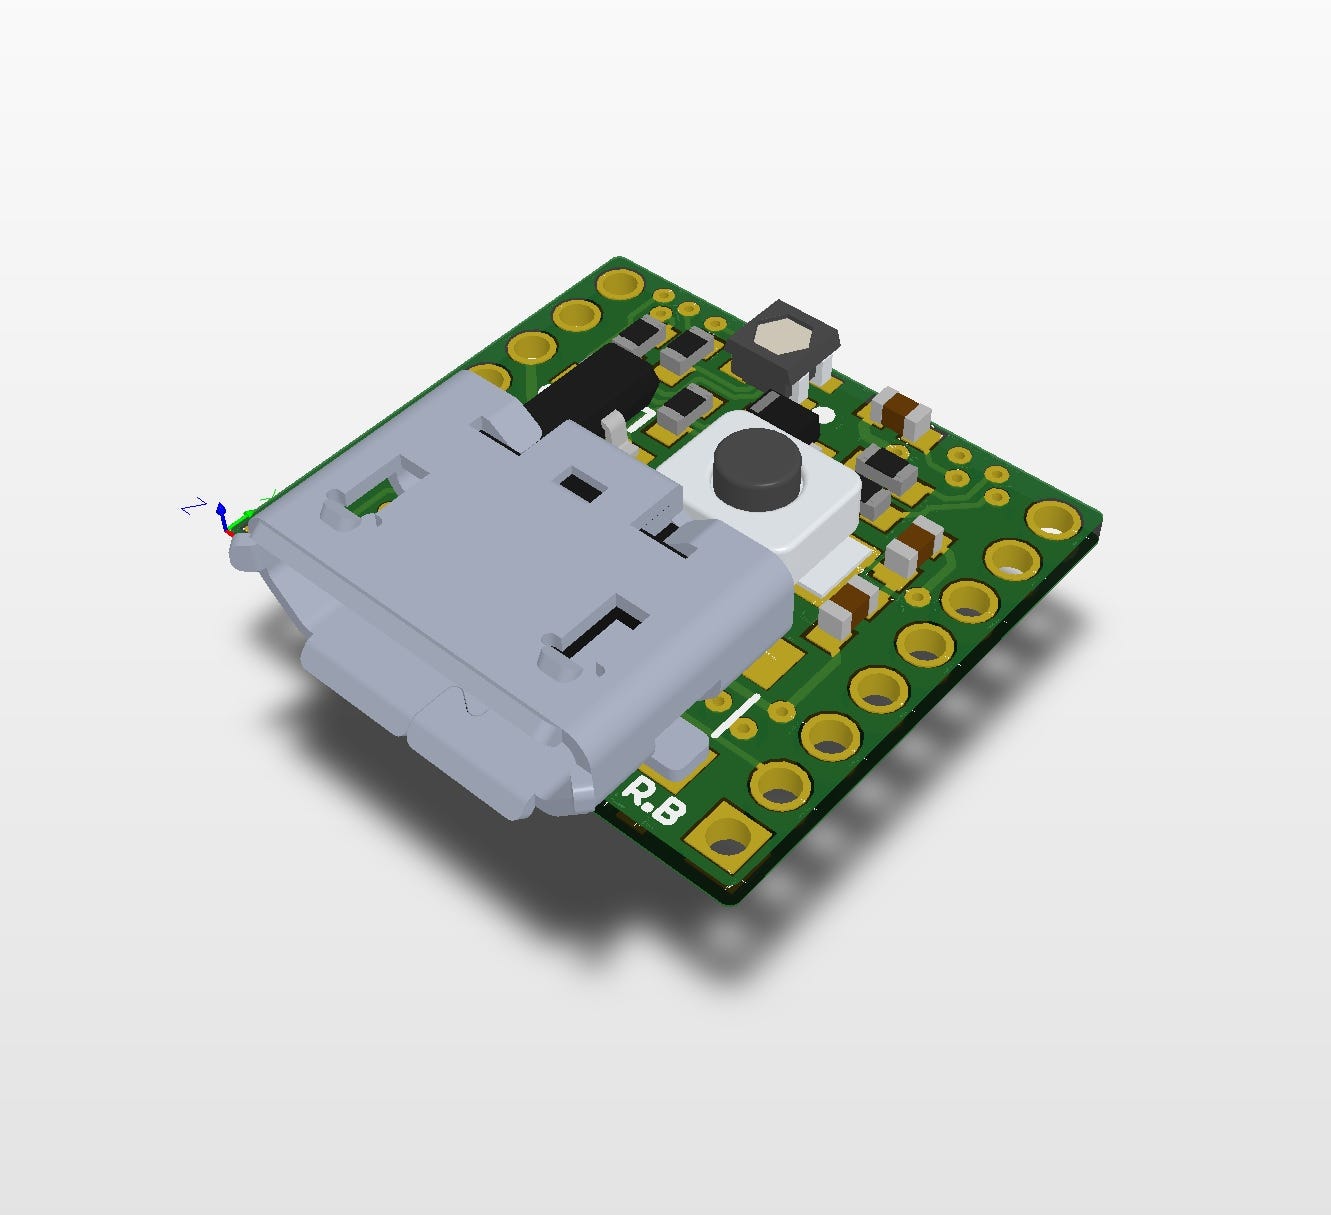
After we finish the schematic and layout, we want to ensure our component placements (the physical body shown above) is designed with manufacturing and maintenance in mind. The last thing we want is to struggle with assembling the products because of bad component placements!

The completed circuit design is sent to the magical land known as China to get it fabricated. Now, we have two choices here. First choice is to provide the circuit component list to the fabrication facility and have the prototypes fully assembled for us. Second choice is, as you may have guessed, we buy the parts and assemble it ourselves.
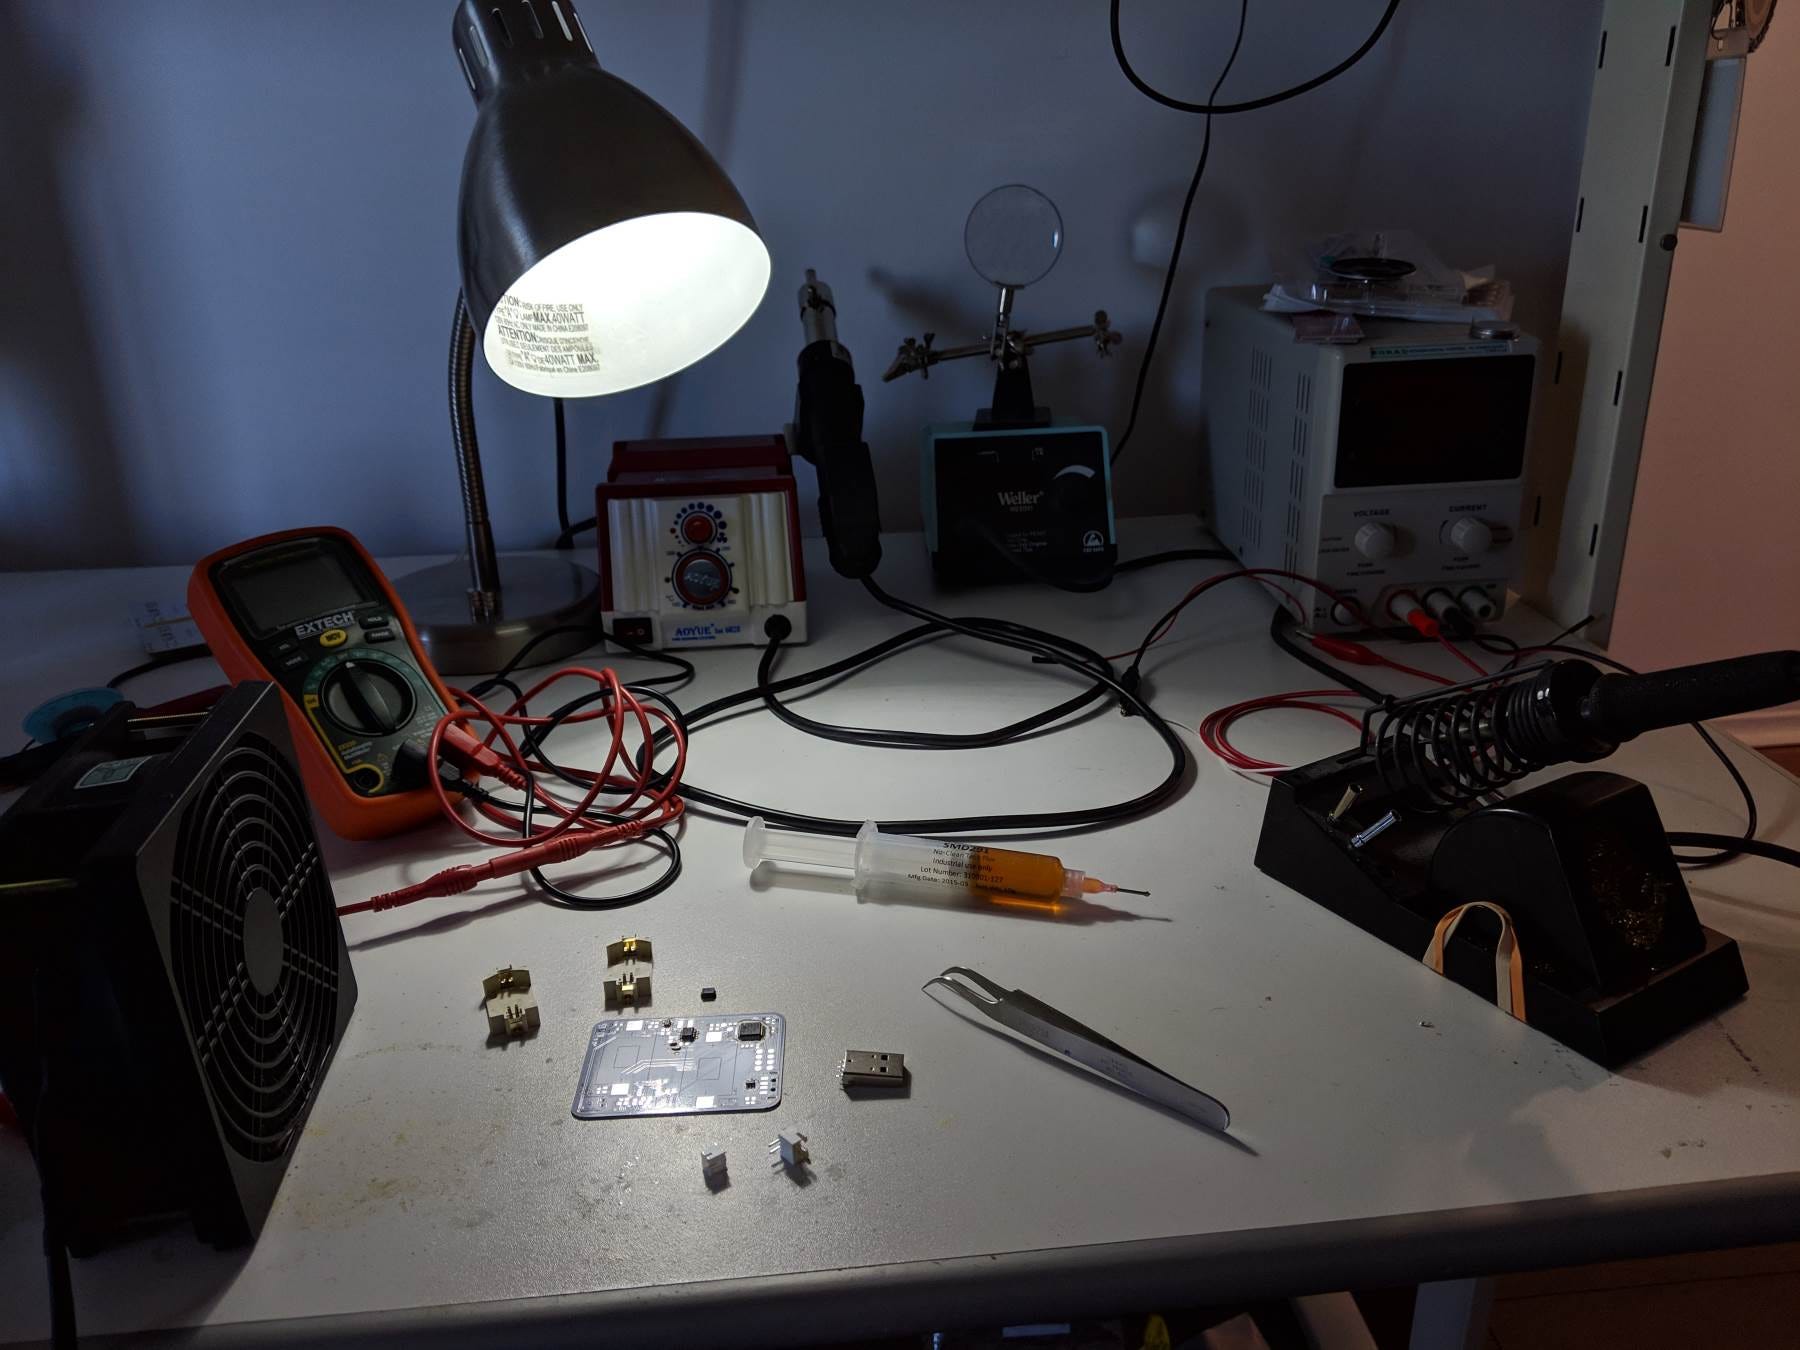
First choice is preferable but is costly whereas second choice is cheaper but requires a lot of manual labor. Being a poor grad student living off ramen and free lunches at school events, I opted out for the second choice. Above picture shows my soldering station and my hot air rework station that can blow at temperatures over 300 deg C (572 deg F) for assembling the boards. I named my hot air rework station, “The Manager” for obvious reasons.
After the circuits have been assembled, it’s time to program the initial test firmware on our prototype!

With the firmware programmed on Atto, we’re ready for testing (validation)! Our initial testing will be checking the input and output pin behaviours after powering it up. This is usually done by directly connecting the circuit board to the computer or by using a multimeter/oscilloscope. I personally use my trusty (a.k.a old and relatively cheap, but super reliable) Extech EX330. Not sponsored by Extech (… but I wish it was).
After validation is complete, you either have something working or something burnt to a crisp with magic smoke flying everywhere. Luckily, the latest revision of Atto survived and it’s ready to get lost somewhere in your room since it’s so darn small! (I may have lost one or two Attos already during the validation phase…).
Once we finish gathering our test data, we check to ensure that our initial specs were met, and we continue our testing to see if any necessary improvements are needed. And this, my friends, is the circle of l̶i̶f̶e̶ development.
Thanks for taking the time to read through my post and I hope you’ve enjoyed and learned something new! If you’re interested, you can check us out at https://nionics.com.
#arduino