In this first part of this tutorial series we will learn how to build a fullstack mobile application using cutting edge technologies like Ionic 4, Nest.js and Pusher Chatkit. Ionic will handle our front end, we will build the backend of the app using Nest.js and use Pusher Chatkit to handle messaging.
The application that you’ll be building is a group chat application that will allow users to register, login and then chat with a group of other users.
The aim of this tutorial is to show you how you can use Pusher’s Chatkit to easily add chat features in your mobile applications built with Ionic 4, Angular and Nest.js.
You can find the source code for the first part from this GitHub repository.
Since we are not going to create the mobile UI in this part, we’ll be using cURL to interact with our application. This is a GIF image that shows how to send to POST request to the /register endpoint to register a user in then send a POST request to the /login endpoint to get a JWT token:

Prerequisites
You need to have a basic understanding of TypeScript and Node.js to follow this tutorial. TypeScript is a superset of JavaScript that adds static types to the language.
Both Nest.js and Ionic 4 (based on Angular) requires TypeScript so you need to be familiar with it.
You also need to have a recent version of Node.js (v8.11.2) and NPM (v5.6.0) installed on your machine, if they are not installed on your system, you simply need to head to the official website and grab the binaries for your system or refer to your operating system instructions for installing Node.js via the official package manager of your system.
Why use Chatkit?
Chatkit is a Pusher hosted API that allows developers to build apps with chat features without re-inventing the wheel. The available features include:
- Group chat
- One-to-one chat
- Private chat
- Typing indicators
- “Who’s online” presence
- Read receipts
- Photo, video, and audio messages
The set of features covers the most needed chat features in most apps, which means you can focus on building the features that are specific to your app and let Pusher take care of the commonly needed chat features including managing chat state and data, scaling and infrastructure.
Configuring Chatkit
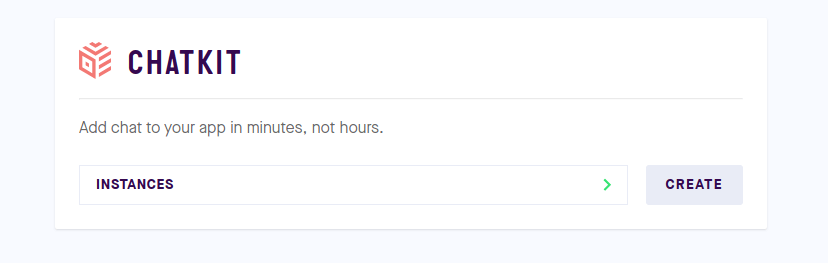
Setting up Chatkit is quite easy, first you need to have an account with Pusher, next, simply head to the dashboard. Under the CHATKIT box, click on the CREATE button to create your own Chatkit instance:
Enter a name for your instance and click on CREATE:

After creating your Chatkit instance, head to the Credentials tab and take note of your Instance Locator and Secret Key. You will need them later to connect your application to your Chatkit instance.
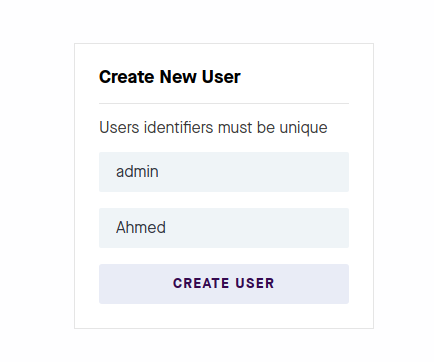
You also need to manually create a room where we’ll add new users once they sign up in our application but to interact with the instance you first need to create a user:

Add the required information and create you first Chatkit user:
You’ll be taken to this interface:
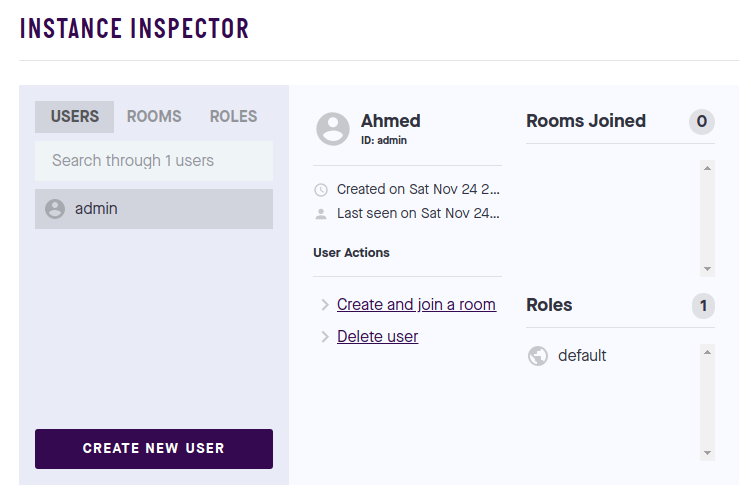
Under User Actions, click on Create and join a room. Give a name to your room and click on CREATE ROOM:

Take note of the room ID because we’ll need it later in this tutorial series.
Note: Please note that except for this first user that we manually created, all the other users will be created from the SDK and added to the room when new users register via our application interface.
Chatkit handles all the chat data and features but we need a server to create users and add authentication. For this matter, we’ll use Nest.js for setting up an authentication server.
Installing the Nest.js CLI
Before creating a Nest.js project we first need to install Nest.js CLI which makes it easy to create and manage Nest.js projects. The CLI helps you from the first step of creating a project to the final step of building a production version of your final app. It’s based on the @angular-devkit package and provides its own schematics for Nest.js development which is @nestjs/schematics.
You can install Nest.js CLI from npm via the following command:
$ npm install -g @nestjs/cli
Note: Please note that you may need to use sudo on Debian based system or macOS or an elevated administrator command prompt on Windows to install Node.js globally on your system depending on your npm configuration. As the time of this writing, Nest.js CLI v5.6.3 will be installed.
You can also create a Nest.js project by pulling thenestjs/cli[:version]Docker image or cloning the<a href="https://github.com/nestjs/nest-cli.git" target="_blank">https://github.com/nestjs/nest-cli.git</a>repository and installing dependencies. For more information, you can see the official repository.
Creating a new Nest.js project
After installing Nest.js CLI, you can now run the following command to easily create a new project:
    $ mkdir chatkit-nestjs-ionic
    $ cd chatkit-nestjs-ionic
    $ nest new server
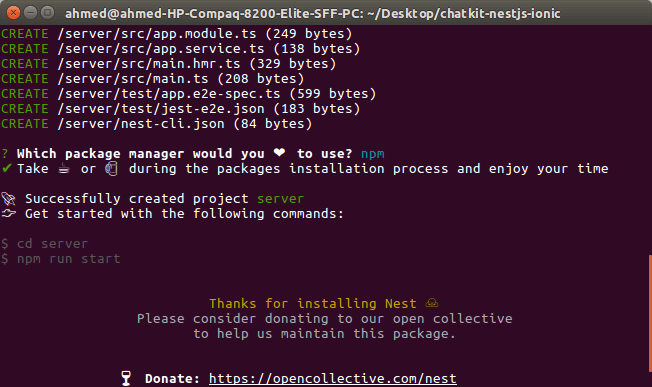
The CLI will ask you for a bunch of information like the description and author and which package manager to use for installing packages, either npm or Yarn, enter the required information then hit Enter to start generating your project files and installing dependencies:

Wait a little to finish the installation process:
Then you can navigate inside your project’s folder and run a local development server:
    $ cd server
    $ npm run start

As you can see from the screenshot, this command allows you to start a development server on the port configured inside the src/main.ts file.
Your server is now running, you can simply open your browser and navigate to localhost:3000. You should see the Hello world! message.
Since we use Chatkit for adding all chat features, we will not need to implement any feature in the server except for JWT authentication and user management.
Setting up TypeORM and creating a database
For storing and registering users we need a database.
Nest.js supports TypeORM which is considered the most mature Object Relational Mapper (ORM) available in TypeScript. It’s available from the @nestjs/typeorm package.
Let’s start by installing the required dependencies:
$ npm install --save @nestjs/typeorm typeorm sqlite3
For the sake of simplicity, we’ll use an SQLite database, but TypeORM supports all major databases like MySQL, PostgreSQL, MSSQL, Oracle, and MongoDB.
Note: Since an ORM abstracts away any direct operation with the underlying database system, you can later switch to use a fully fledged system like MySQL for production without changing anything in your code. But for now, let’s keep it simple and use SQLite.
After finishing up with installing the dependencies, you need to import theTypeOrmModuleinto the rootApplicationModulemodule. Open thesrc/app.module.tsfile and add the following changes:
    // server/src/app.module.ts
    import { Module } from '@nestjs/common';
    import { TypeOrmModule } from '@nestjs/typeorm';

    import { AppController } from './app.controller';
    import { AppService } from './app.service';

    @Module({
      imports: [
       TypeOrmModule.forRoot({
          type: 'sqlite',
          database: 'my.db',
          entities: [__dirname + '/**/*.entity{.ts,.js}'],
          synchronize: true,
       }),
    ],
      controllers: [AppController],
      providers: [AppService],
    })
    export class AppModule {}
We import TypeOrmModule and we call the forRoot() method which takes the same configuration object as the standard createConnection() method of TypeORM.
In the configuration object, we specify:
- The
sqlitestring for type so we can use SQLite as the database, - The
my.dbstring for the database file (SQLite uses files to store the database), - The
entitiesarray which refers to all files that end with.entity.tsor.entity.jsextensions. These files are created by developers and contain the ORM entities. - The
synchronizeoption which takestrueorfalseand allows you to automatically sync your database tables with the entities each time you run the app. In development, you can set it totruebut it’s not preferable in production.
Note: Now, you can inject the
ConnectionandEntityManagerservices anywhere you want to access them.
Next, let’s create aUserentity which corresponds to a user in the database. Create asrc/models/user.entity.tsfile and add the following class:
    // server/src/models/user.entity.ts
    import { Entity, Column, PrimaryGeneratedColumn } from 'typeorm';
    @Entity()
    export class User {
      @PrimaryGeneratedColumn()
      id: number;

      @Column()
      name: string;

      @Column()
      email: string;

      @Column()
      password: string;
    }
You need to import the User entity and add it in the imports array of the module using the forFeature method:
    // server/src/app.module.ts
    import { User } from './models/user.entity';
    ...

    @Module({
    imports: [
    ...
    TypeOrmModule.forFeature([User]),
Next, let’s create a UserService that encapsulates all database operations that we need to perform against the User model.
Head back to your terminal and run the following command to generate a service:
$ nest g s user
This command will create the src/user/user.service.ts file that contains the actual service code and the src/user/user.service.spec.ts file that contains the unit tests for the service. And also update the src/app.module.ts file by including UserService in the providers array.
Next, let’s add the create and findByEmail methods in the src/user/user.service.ts file which will be used respectively to persist a user and find a user by its email in the database.
    // server/src/user/user.service.ts
    import { Injectable } from '@nestjs/common';
    import { User } from '../models/user.entity';
    import { Repository } from 'typeorm';
    import { InjectRepository } from '@nestjs/typeorm';

    @Injectable()
    export class UserService {
        constructor(
            @InjectRepository(User)
            private userRepository: Repository<User>,
        ) { }

        async  findByEmail(email: string): Promise<User> {
            return await this.userRepository.findOne({
                where: {
                    email: email,
                }
            });
        }

        async  create(user: User): Promise<User> {
            return await this.userRepository.save(user);
        }
    }
First we import User, Repository and InjectRepository, next, inject the User repository via the service’s constructor and finally we define our methods.
The findByEmail method simply calls the findOne method of the injected repository to search for a user by the passed email in the database.
The create method calls the save method of the injected repository to save a user in the database.
Adding JWT authentication
Authentication is important for most web applications. You can follow different ways and approaches to implement user authentication. In this tutorial, we’ll implement authentication with JSON Web Tokens (JWTs).
First, you need to install the JWT utilities module for Nest.js using :
$ npm install --save @nestjs/jwt
Next, open the /src/app.module.ts file and include the module in the imports array:
    // server/src/app.module.ts
    import { JwtModule } from  '@nestjs/jwt';
    // [...]

    JwtModule.register({
        secretOrPrivateKey:  'secret123'
    })
We also provided a private secret key that will be used to sign the JWT payload.
To interact with Chatkit, you also need valid JWT tokens that will be obtained by the client by using a token provider and will be sent with every request that the client makes to Chatkit.
Chatkit provides a test token provider that can be used to quickly start testing the chat features but it should be only used for testing. For production, you need to create your own token provider which can be done in two ways:
- Either, by using the provided server SDKs.
- Or without the help of the server SDKs using a JWT library or your own custom JWT implementation. See this link for more information.
In this tutorial, we’ll use the Node.js SDK for Chatkit to add a token provider in our Nest.js project so head back to your terminal and run the following command from the root of your project to install it:
$ npm install @pusher/chatkit-server --save
Next, let’s create the AuthService class that will encapsulate the code for implementing JWT authentication in our application.
Using Nest.js CLI run the following command to generate a service:
$ nest g s auth
This command will add the /src/auth/auth.service.ts file that contains the service and the /src/auth/auth.service.spec.ts file that contains the tests for the service and will update the main app module contained in the /src/app.module.ts file to include the generated service.
If you open the main module file at this stage, you can see that the JwtauthService was imported and included in the providers array:
    // server/src/app.module.ts
    import { Module } from '@nestjs/common';
    import { AppController } from './app.controller';
    import { AppService } from './app.service';
    import { AuthService } from './auth/auth.service';
    // [...]

    @Module({
      imports: [/* [...] */],
      controllers: [AppController],
      providers: [AppService, UserService,AuthService],
    })
    export class AppModule {}
Now, after creating the service, you need to import the Chatkit server SDK, JwtService , UserService , the User entity and the AuthenticationResponse. Open the src/auth/auth.service.ts file and add the following import:
    // server/src/auth/auth.service.ts
    import Chatkit from '@pusher/chatkit-server';
    import { JwtService } from  '@nestjs/jwt';
    import { UserService } from  '../user/user.service';
    import { User } from  '../models/user.entity';
    import  Chatkit, { AuthenticationResponse } from  '@pusher/chatkit-server';
Next, you need to add the following code:
    // server/src/auth/auth.service.ts
    @Injectable()
    export class AuthService {
      chatkit: Chatkit;
      constructor(
        private readonly userService: UserService,
        private readonly jwtService: JwtService
      ) {
        this.chatkit = new Chatkit({
          instanceLocator: YOUR_INSTANCE_LOCATOR,
          key: YOUR_SECRET_KEY
        })
      }
We add a member variable to the service that holds the Chatkit instance. Next we inject UserService and JwtService via the constructor and inside it, we create the Chatkit instance.
Replace YOUR_INSTANCE_LOCATOR and YOUR_SECRET_KEY with the credentials from the dashboard. When a user connects to Chatkit, a request will be sent to a /token endpoint (that will be created later in this tutorial) to authenticate the user. Your server has to send a response that contains a token using the Chatkit.authenticate method if the request is valid.
Now, you need to define and implement the following methods:
getToken: It’s used to create and return a valid JWT token. This method will simply use theauthenticatemethod of the Chatkit instance to generate a valid token.validateUser: It’s used to validate the user. This method will use thefindByEmailmethod ofUserServiceto check if the user exists in the database.createUser: It’s used to create a user in the local database and then in the Chatkit instance.
Let’s start with the createUser method which takes a parameter of the User type:
    // server/src/auth/auth.service.ts
    private async createUser(userData: User): Promise<User>{
        return this.userService.create(userData).then(user =>{
          const userId = `${user.name}${user.id}`;
          const roomId = "YOUR_ROOM_ID";
          const avatarURL = "https://image.flaticon.com/icons/png/128/149/149071.png";

          return this.chatkit.createUser({id: userId,
             name: user.name,
             avatarURL: avatarURL
          }).then(()=>{

            return this.chatkit.addUsersToRoom({ roomId: roomId,
              userIds: [userId]}).then(()=>{
                return user;
            });

          })

        });
    }
Replace YOUR_ROOM_ID with the room id from the dashboard.
This method calls the create method of UserService to persist the user in the database then when the Promise successfully resolves with a user object that has a unique identifier in the database we use the id and name to create a corresponding user in the Chatkit instance by calling the createUser method of the instance and finally we add the user to the room by calling the addUsersToRoom method.
The createUser method of the Chatkit instance requires a unique user identifier and a user name. We construct the user id by concatenating the name with the database id of the user. This way we make sure the Chatkit user id is unique. We also provide a user avatar for testing using the <a href="https://image.flaticon.com/icons/png/128/149/149071.png" target="_blank">https://image.flaticon.com/icons/png/128/149/149071.png</a> URL.
Note: In a production application, you need to provide your users with a way to upload their avatars then associate them with the Chatkit user. You also need to hash passwords before storing them in the database using a tool like bcrypt.
Let’s now define thegetTokenmethod. It takes a user ID and returns anAuthenticationResponse:
    // server/src/auth/auth.service.ts
    public getToken(userId:  string): AuthenticationResponse {
        return this.chatkit.authenticate({ userId: userId });
    }
The getToken method is simply a wrapper around the authenticate method of the Chatkit instance which returns a valid JWT token that can be used by the client to access Chatkit APIs. The authenticate method takes a userId that we specify when we create the user in the Chatkit instance (a concatenation of the word name and the database identifier of the user).
Another method that we need to define is the validateUser method which takes a parameter of the User type:
    // server/src/auth/auth.service.ts
    private async validateUser(userData: User): Promise<User> {
        return await this.userService.findByEmail(userData.email);
    }
This method calls the findByEmail method of UserService which checks if the user with the email exists in the database. If it exists the user object is returned otherwise a null object is returned.
After defining these methods, we’ll use them to define two public methods in the same service which are:
registerfor registering users,loginfor login users.
This is the implementation of the two methods:
    // server/src/auth/auth.service.ts
    public async login(user: User): Promise<any | {status: number}>{
        return this.validateUser(user).then((userInfo)=>{
          if(!userInfo){
            return { status: 404 };
          }
          let userId = `${userInfo.name}${userInfo.id}`;
          const accessToken = this.jwtService.sign(userId);
          return {
             expires_in: 3600,
             access_token: accessToken,
             user_id: userId,
             status: 200
          };

        });
    }

    public async register(user: User): Promise<any>{
        return this.createUser(user)
    }
In the login method, we first use the validateUser method to make sure the user exists in the database then we call the sign method of JwtService to create an access token from the user id and name payload. Finally, we return an object containing the expires_in, access_token, user_id and status properties.
In the register method, we simply call the previously-defined createUser method to create a user in the database and then in the remote Chatkit instance.
Creating endpoints
After implementing the login and register methods, it’s time to create the corresponding endpoints in our application that handle user authentication. We also need to create a /token endpoint that will be used by the Chatkit client SDK to request JWT tokens from our server.
Open the existing src/app.controller.ts file and update it accordingly:
    // server/src/app.controller.ts
    import { Post, Body,Request, Controller} from '@nestjs/common';
    import { AuthService } from './auth/auth.service';
    import { User } from './models/user.entity';

    @Controller()
    export class AppController {
      constructor(private readonly authService: AuthService) {}

      @Post('token')
      async token(@Request() req): Promise<any> {
        return this.authService.getToken(req.query.user_id).body;
      }

      @Post('login')
      async login(@Body() userData: User): Promise<any> {
        return this.authService.login(userData);
      }

      @Post('register')
      async register(@Body() userData: User): Promise<any> {
        return this.authService.register(userData);
      }
    }
We start by importing the Post, Request and Body decorators, and also AuthService and the User entity. Next, we inject AuthService as an authService instance via the controller’s constructor.
Finally, we instruct Nest.js to create the three /token, /login and /register routes that accept a POST request by decorating their methods with the @Post decorator (the route is passed as a parameter).
For the login and register methods, we use the @Body() decorator to instruct Nest.js to inject the body of the received request in the endpoint handler as userData.
For the token method we need the full request so we use the @Request decorator instead.
Note: We could also create a controller for handling authentication using
nest g controller authbut since our Nest.js app has only one task which is to handle JWT auth we can simply use the existing application controller.## Testing our auth endpoints
After creating the authentication endpoints, let’s use cURL to test them before we create our front-end mobile application in the next tutorial.
First, run the following command from the root of your project to start the Nest.js development server:
$ npm start
Next, make sure you have cURL installed on your system and run the following command from your terminal:
curl -X POST -H 'content-type: application/json' -d '{ "email": "<a href="/cdn-cgi/l/email-protection" class="__cf_email__" data-cfemail="03626b6e666743646e626a6f2d606c6e">[email protected]</a>", "name": "ahmed", "password": "pass001" }' localhost:3000/register
This will create a user in your SQLite database and a Chatkit user that you can see from the Console/INSTANCE INSPECTOR tab in your Chatkit dashboard. The endpoint returns the created Chatkit user with the id, name, created_at and updated_at fields.
You can also test the /login endpoint using:
curl -X POST -H 'content-type: application/json' -d '{ "email": "<a href="/cdn-cgi/l/email-protection" class="__cf_email__" data-cfemail="52333a3f373612353f333b3e7c313d3f">[email protected]</a>", "password": "pass001"}' localhost:3000/login
This should return a response object with an access token and a user id.
Enabling CORS
Since we’ll be using Ionic for creating the mobile app that will interact with this server and we’ll do most Ionic development on the browser we need to setup CORS (Cross Origin Resource Sharing). Otherwise, the browsers will block the requests to the server due to the same origin policy.
You can easily enable CORS in Nest.js by opening the src/main.ts file and calling the app.enableCors method:
    // server/src/main.ts
    import { NestFactory } from '@nestjs/core';
    import { AppModule } from './app.module';

    async function bootstrap() {
      const app = await NestFactory.create(AppModule);
      app.enableCors();
      await app.listen(3000);
    }
    bootstrap();
Conclusion
In this tutorial, we’ve seen how to create a server for JWT authentication using Nest.js and Chatkit’s SDK for Node.js.
In the next tutorial, we’ll continue developing our mobile application that uses this server for authentication and Chatkit for implementing the chat features.
You can find the source code for the first part from this GitHub repository.
Building a mobile app with Nest.js, Ionic 4 and Chatkit - Part 2: Build the frontend
In the previous tutorial we have created the server side of our chat application that uses TypeScript, Nest.js and Chatkit. Now, in the second tutorial, we are going to create the frontend mobile application using Ionic 4 and Pusher Chatkit.
Chatkit provides developers with client and server side SDKs for working with the API. In the previous tutorial, we used the Node.js SDK. In this tutorial, we’ll be using the JavaScript SDK.
You can find the source code for this part in this GitHub repository.


Prerequisites
To follow along with this tutorial you need to have these prerequisites:
- Working knowledge of TypeScript,
- Working knowledge of Angular (we’ll be using Ionic with Angular),
- Recent versions of Node.js (v8.11.2) and npm (v5.6.0) installed on your system.
You can check the installed versions of Node.js and npm using the following commands from your terminal:
$ node --version
$ npm --version
What we’ll be building
In this part, we’ll build a chat mobile application with several chat features like:
- User registration and login with email and password,
- Listing users in a room with their online status,
- Group chatting.
Introducing Ionic 4
Ionic 4 is a mobile UI library built on top of modern web technologies like web components and CSS variables. It’s the latest version of the most popular UI framework (now just a library) for building hybrid mobile applications with JavaScript and the web.
Ionic 4 aims to become just a UI mobile library that can be used by developers with any preferred client side library or framework like for example Angular, Vue, or React. You can also use it with plain JavaScript to build mobile applications.
Being framework-agnostic doesn’t mean that support for Angular is dropped. In fact, the Ionic team is also working on the Ionic-Angular v4 package that could be seen as the next version of Ionic 3 (which could be only used with Angular).
Installing the Ionic CLI v4
Now if you have Node.js and npm installed, you can go ahead and install Ionic CLI v4 by running the following command from your terminal:
$ npm install -g ionic
Note: Please note that depending on how you configured npm in your system you may need to open an Admin command prompt on Windows or run the command with
sudoin macOS and Linux if you want to install packages globally. As the time of this writing, Ionic v4.5.0 is installed.## Creating an Ionic/Angular v4 project
You can create Ionic projects using the Ionic CLI and you can also specify which starter or base template you want to use for your project:
- The blank starter: it provides a base blank project with one page.
- The tabs starter: it provides a base project with tabs.
- The side menu starter: it provides a base project with a side menu.
Now head back to your terminal and run the ionic start command to generate your project based on the blank template:
$ cd chatkit-nestjs-ionic
$ ionic start frontend blank --type=angular
Note: You also need to specify the type of framework to use with the
--type=angularoption, which is new in Ionic CLI v4 (For now the CLI supports only Angular).
The Ionic CLI will prompt you if you want to integrate Cordova.
- Yes if you need to target native iOS and Android or,
- No if you only need the web version of your project. For example, to develop a Progressive Web App.
You can enter No for now since we’ll be using the browser for testing.
You can also enter No for Install the free Ionic Appflow SDK and connect your app? If you don’t want to install Ionic Appflow SDK.
Wait for your project to be generated and the dependencies to get installed then run the following command to serve your project locally:
$ cd frontend
$ ionic serve
Your application will be running from the localhost:8100 address.

Installing the Chatkit client side SDK
Let’s now start implementing Chatkit by installing the JavaScript client side SDK using the following command:
$ cd frontend
$ npm install @pusher/chatkit-client --save
We’ll be importing this library in our project in the next section.
Setting up HttpClient, Forms and Ionic Storage
We’ll be using Angular HttpClient for sending requests to Chatkit and to our Nest.js server so we need to set it up in the project. Open the src/app/app.module.ts file, import HttpClientModule and FormsModule then add them to the imports array:
// frontend/src/app/app.module.ts

import { NgModule } from '@angular/core';
import { BrowserModule } from '@angular/platform-browser';
import { RouteReuseStrategy } from '@angular/router';
import { IonicModule, IonicRouteStrategy } from '@ionic/angular';
import { SplashScreen } from '@ionic-native/splash-screen/ngx';
import { StatusBar } from '@ionic-native/status-bar/ngx';
import { AppComponent } from './app.component';
import { AppRoutingModule } from './app-routing.module';

import { HttpClientModule } from '@angular/common/http';
import { FormsModule } from '@angular/forms';

@NgModule({
  declarations: [AppComponent],
  entryComponents: [],
  imports: [BrowserModule, IonicModule.forRoot(), AppRoutingModule,
    HttpClientModule,FormsModule
  ],
  providers: [
    StatusBar,
    SplashScreen,
    { provide: RouteReuseStrategy, useClass: IonicRouteStrategy }
  ],
  bootstrap: [AppComponent]
})
export class AppModule {}
We’ll use the Ionic storage module for working with the browser’s local storage so we first need to install it via npm:
$ npm install --save @ionic/storage
Next, add IonicStorageModule.forRoot() in the imports array:
// frontend/src/app/app.module.ts
// [...]
import { IonicStorageModule } from '@ionic/storage';

@NgModule({
  // [...]
  imports: [/* [...] */,IonicStorageModule.forRoot()],
  providers: [
    // [...]
  ],
  bootstrap: [AppComponent]
})
export class AppModule {}
Note: At this point, you can start your development server with
ionic serveto make sure you don’t have any problems starting your app.## Creating the authentication service
After installing the client SDK, we’ll create an Angular service that handles authentication in the mobile application.
First, in you terminal, create a User interface using the following command:
$ ionic g interface user
This will create a src/app/user.ts file. Open it and update it as follows:
// frontend/src/app/user.ts
export interface User {
    id: number;
    name: string;
    email: string;
    password: string;
}
Again, in your terminal, run the following command to generate a service:
$ ionic g service auth
This will create the src/app/auth.service.ts and src/app/auth.service.spec.ts files. Open the src/app/auth.service.ts file and start by adding the following imports:
// frontend/src/app/auth.service.ts
import { HttpClient } from  '@angular/common/http';
import { tap } from  'rxjs/operators';
import { Observable } from  'rxjs';
import { Storage } from  '@ionic/storage';
import { User } from './user';
Next create the AUTH_SERVER variable:
// frontend/src/app/auth.service.ts
AUTH_SERVER:  string  =  'http://localhost:3000';
AUTH_SERVER holds the address of our authentication (Nest.js) server and authState.
Next, inject HttpClient and Storage via the service constructor:
// frontend/src/app/auth.service.ts
@Injectable({
  providedIn: 'root'
})
export class AuthService {

    constructor(private  httpClient:  HttpClient, private  storage:  Storage) {}
}
Next, add three methods to the src/app/auth.service.ts file for registration, and login:
// frontend/src/app/auth.service.ts
register(userInfo:  User):  Observable<User>{
    return  this.httpClient.post<User>(`${this.AUTH_SERVER}/register`,userInfo);
}

login(userInfo: User): Observable<any>{
    return this.httpClient.post(`${this.AUTH_SERVER}/login`,userInfo).pipe(
    tap( async (res: { status: number,  access_token, expires_in, user_id })=>{
      if(res.status !== 404){
        await this.storage.set("ACCESS_TOKEN", res.access_token);
        await this.storage.set("EXPIRES_IN", res.expires_in);
        await this.storage.set("USER_ID", res.user_id);
      }
      })
    );
}
At this point, here is how the complete src/app/auth.service.ts file looks like:
// frontend/src/app/auth.service.ts
import { Injectable } from '@angular/core';
import { HttpClient } from '@angular/common/http';
import { tap } from 'rxjs/operators';
import { Observable } from 'rxjs';
import { Storage } from '@ionic/storage';
import { User } from './user';
@Injectable({
  providedIn: 'root'
})
export class AuthService {
  AUTH_SERVER: string = 'http://localhost:3000';
  constructor(private httpClient: HttpClient, private storage: Storage) { }
  register(userInfo: User): Observable<User> {
    return this.httpClient.post<User>(`${this.AUTH_SERVER}/register`, userInfo);
  }
  login(userInfo: User): Observable<any> {
    return this.httpClient.post(`${this.AUTH_SERVER}/login`, userInfo).pipe(
      tap(async (res: { status: number, access_token, expires_in, user_id }) => {
        if (res.status !== 404) {
          await this.storage.set("ACCESS_TOKEN", res.access_token);
          await this.storage.set("EXPIRES_IN", res.expires_in);
          await this.storage.set("USER_ID", res.user_id);
        }
      })
    );
  }
}
That’s it, we’ve finished with the authentication service. In the next section, we’ll see how you can use this service for adding authentication to your application.
Creating the registration and login pages
After creating the authentication service we can now create the register and login pages that will allow the users to either register or login. In your terminal, run the following command:
$ ionic g page login
This will generate a src/app/login folder with the following files:
src/app/login/login.module.tssrc/app/login/login.page.scsssrc/app/login/login.page.htmlsrc/app/login/login.page.spec.tssrc/app/login/login.page.ts
And will update the src/app/app-routing.module.ts file that holds the routing information by adding the following route:
// frontend/src/app/app-routing.module.ts
{ path:  'login', loadChildren:  './login/login.module#LoginPageModule' }
That means we can access the login page from the /login path. You also need to generate a page for registering users using:
$ ionic g page register
This will generate a src/app/register folder with similar files to the login page and will add the following route:
// frontend/src/app/app-routing.module.ts
{ path:  'register', loadChildren:  './register/register.module#RegisterPageModule' }
That means we can access this page from the /register path.
Implementing the register page
Let’s start adding the code for registering users. Open the src/app/register/register.page.ts file then import and inject AuthService and Router:
// frontend/src/app/register/register.page.ts
import { Component, OnInit } from '@angular/core';
import { Router } from  "@angular/router";
import { AuthService } from '../auth.service';

@Component({
  selector: 'app-register',
  templateUrl: './register.page.html',
  styleUrls: ['./register.page.scss'],
})
export class RegisterPage implements OnInit {
  constructor(private  authService:  AuthService, private  router:  Router) { }
  ngOnInit() {
  }
}
Next, add the following method:
// frontend/src/app/register/register.page.ts
import { Component, OnInit } from '@angular/core';
import { Router } from "@angular/router";
import { AuthService } from '../auth.service';

@Component({
  selector: 'app-register',
  templateUrl: './register.page.html',
  styleUrls: ['./register.page.scss'],
})
export class RegisterPage implements OnInit {
  constructor(private authService: AuthService, private router: Router) { }
  ngOnInit() {
  }
  register(form) {
    this.authService.register(form.value).subscribe((res) => {
      this.router.navigateByUrl('login');
    });
  }
}
We simply call the register() method of the authentication service and we pass the form value then we subscribe to the returned observable. After registration is successfully done we navigate to the login page.
Next open the src/app/register/register.page.html and add a form inside <ion-content> to get the user’s information:
// frontend/src/app/register/register.page.html
<ion-header>
  <ion-toolbar color="primary">
    <ion-title>Chatkit Demo</ion-title>
  </ion-toolbar>
</ion-header>
<ion-content padding>
  <form #f="ngForm" (ngSubmit)="register(f)">
    <ion-grid>
      <ion-row justify-content-center>
        <ion-col align-self-center size-md="6" size-lg="5" size-xs="12">
          <div text-center>
            <h3>Register</h3>
          </div>
          <div padding>
            <ion-item>
              <ion-input name="name" type="text" placeholder="Name" ngModel required></ion-input>
            </ion-item>
            <ion-item>
              <ion-input name="email" type="email" placeholder="<a href="/cdn-cgi/l/email-protection" class="__cf_email__" data-cfemail="bdc4d2c8cffdd8d0dcd4d193ded2d0">[email protected]</a>" ngModel required></ion-input>
            </ion-item>
            <ion-item>
              <ion-input name="password" type="password" placeholder="Password" ngModel required></ion-input>
            </ion-item>
            <ion-item>
              <ion-input name="confirm" type="password" placeholder="Password again" ngModel required></ion-input>
            </ion-item>
          </div>
          <div padding>
            <ion-button size="large" type="submit" [disabled]="f.invalid" expand="block">Register</ion-button>
          </div>
        </ion-col>
      </ion-row>
    </ion-grid>
  </form>
</ion-content>
In the form, we bind the register method we created before with the ngSubmit event so the method gets called when the user submits the form.
If you run your application and go to the <a href="http://localhost:8100/register" target="_blank">http://localhost:8100/register</a> address, you should see this page:

Implementing the login page
Next, let’s implement the login page. Open the src/app/login/login.page.ts file then import AuthService and Router:
// frontend/src/app/login/login.page.ts
import { Router } from  "@angular/router";
import { AuthService } from  '../auth.service';
Next inject them via the service constructor:
// frontend/src/app/login/login.page.ts
constructor(private  authService:  AuthService, private  router:  Router) { }
Next, add a showError variable:
// frontend/src/app/login/login.page.ts
export  class  LoginPage  implements  OnInit {
    showError:  boolean  =  false;
Finally, add the login method:
// frontend/src/app/login/login.page.ts
login(form){
    this.authService.login(form.value).subscribe((res)=>{
      if(res.status == 200){
        this.showError = false;
        this.router.navigateByUrl(`home/${res.user_id}`);
      }
      else{
        this.showError = true;
      }
    });
}
In this method, we call the login() method of the authentication server and we pass the form data (email and password) using the .value member variable of the form instance. Next, we subscribe to the observable and check the status of the returned response. If the request is successful i.e res.status == 200 we navigate to the home page of the application and we pass user_id as a parameter to the home/ URL. Otherwise, we simply set showError to true.
At this point, this is how the complete src/app/login/login.page.ts looks like:
// frontend/src/app/login/login.page.ts
import { Component, OnInit } from '@angular/core';
import { Router } from "@angular/router";
import { AuthService } from '../auth.service';

@Component({
  selector: 'app-login',
  templateUrl: './login.page.html',
  styleUrls: ['./login.page.scss'],
})
export class LoginPage implements OnInit {
  showError: boolean = false;
  constructor(private authService: AuthService, private router: Router) { }
  ngOnInit() {
  }
  login(form) {
    this.authService.login(form.value).subscribe((res) => {
      if (res.status == 200) {
        this.showError = false;
        this.router.navigateByUrl(`home/${res.user_id}`);
      }
      else {
        this.showError = true;
      }
    });
  }
}
Let’s now add the form to get the user’s email and password in the login page. Open the src/app/login/login.page.html file and add a form inside <ion-content>:
// frontend/src/app/login/login.page.html
<ion-header>
  <ion-toolbar color="primary">
    <ion-title>Chatkit Demo</ion-title>
  </ion-toolbar>
</ion-header>
<ion-content padding>
  <form #f="ngForm" (ngSubmit)="login(f)">
    <ion-grid>
      <ion-row justify-content-center>
        <div *ngIf="showError">Error! Please try again</div>
      </ion-row>
      <ion-row justify-content-center>
        <ion-col align-self-center size-md="6" size-lg="5" size-xs="12">
          <div text-center>
            <h3>Login</h3>
          </div>
          <div padding>
            <ion-item>
              <ion-input name="email" type="email" placeholder="<a href="/cdn-cgi/l/email-protection" class="__cf_email__" data-cfemail="354c5a4047755058545c591b565a58">[email protected]</a>" ngModel required></ion-input>
            </ion-item>
            <ion-item>
              <ion-input name="password" type="password" placeholder="Password" ngModel required></ion-input>
            </ion-item>
          </div>
          <div padding>
            <ion-button size="large" type="submit" [disabled]="f.invalid" expand="block">Login</ion-button>
          </div>
        </ion-col>
      </ion-row>
    </ion-grid>
  </form>
</ion-content>
If you visit the <a href="http://localhost:8100/login" target="_blank">http://localhost:8100/login</a> address, you should see this page:

That’s it for the authentication part, next we’ll be working with Chatkit to add chat features to our application.
Creating the chat service and connecting to Chatkit
After implementing user authentication in our application, we’ll create an Angular service that will encapsulate all the code required to connect with Chatkit and call any chat features so head back to your terminal and run this command:
$ ionic g service chat
The command will create the src/app/chat.service.ts file that contains the actual code for the service and the src/app/chat.service.spec.ts file that contains the specifications or test units.
Now open the src/app/chat.service.ts file, and let’s add the code to link our application to Chatkit.
Start by importing ChatManager, TokenProvider and BehaviorSubject:
// frontend/src/app/chat.service.ts
import { Observable, BehaviorSubject } from  'rxjs';
import { ChatManager, TokenProvider } from  '@pusher/chatkit-client';
Next, add the following variables to the service:
// frontend/src/app/chat.service.ts
AUTH_URL = 'http://localhost:3000/token';
INSTANCE_LOCATOR = 'YOUR_INSTANCE_LOCATOR';
GENERAL_ROOM_ID = 'YOUR_ROOM_ID';
GENERAL_ROOM_INDEX = 0;

chatManager: ChatManager;
currentUser;
messages = [];

usersSubject = new BehaviorSubject([]);
messagesSubject = new BehaviorSubject([]);
Make sure you create a room in your dashboard then replace YOUR_INSTANCE_LOCATOR and YOUR_ROOM_ID with your own values. Next, add the following method that allows you to connect to your Chatkit instance and subscribe to your room:
// frontend/src/app/chat.service.ts
async connectToChatkit(userId: string){
    this.chatManager = new ChatManager({
      instanceLocator: this.INSTANCE_LOCATOR,
      userId: userId,
      tokenProvider: new TokenProvider({ url: this.AUTH_URL})
    })

    this.currentUser = await this.chatManager.connect();

    await this.currentUser.subscribeToRoom({
      roomId: this.GENERAL_ROOM_ID,
      hooks: {},
      messageLimit: 20
    });
}
We create an instance of [ChatManager](<a href="https://docs.pusher.com/chatkit/reference/javascript#chat-manager)" target="_blank">https://docs.pusher.com/chatkit/reference/javascript#chat-manager)</a> and we assign it to chatManager variable. We pass in an instance locator, a user ID and a token provider.
We then use its [connect](<a href="https://docs.pusher.com/chatkit/reference/javascript#connect)" target="_blank">https://docs.pusher.com/chatkit/reference/javascript#connect)</a> method to connect to Chatkit and retrieve a current user object that we’ll use to interact with our Chatkit instance, rooms, messages, and users. The connect method returns a promise that resolves with a Current User object.
Finally, we use the subscribeToRoom method to subscribe to our room. This will allow us to be notified when new messages or users are added to the room. We pass in the room ID, a hooks object and a message limit number.
In the hooks object of the subscribeToRoom method, we need to provide subscription hooks that will be called when a new message or a user is added to the room or an event like user typing is triggered:
// frontend/src/app/chat.service.ts
hooks: {
    onMessage: message => {
          this.messages.push(message);
          this.messagesSubject.next(this.messages);
    }
},
In our case, we are using the onMessage hook that gets called for new messages.
Next after calling the subscribeToRoom method add the following code:
// frontend/src/app/chat.service.ts
const  users  =  this.currentUser.rooms[this.GENERAL_ROOM_INDEX].users;
this.usersSubject.next(users);
This will allow us to get the list of users in the room.
Next, add the following methods which return the behavior subjects from the service:
// frontend/src/app/chat.service.ts
getUsers(){
    return  this.usersSubject;
}

getMessages(){
    return  this.messagesSubject;
}
Next, add the sendMessage that is used to send a message to the room:
// frontend/src/app/chat.service.ts
sendMessage(message){
    return this.currentUser.sendMessage({
      text: message.text,
      roomId: message.roomId || this.GENERAL_ROOM_ID
    })
}
Finally, we add a couple of other needed methods for checking the status of the user and return the current user:
// frontend/src/app/chat.service.ts
isUserOnline(user): boolean {
    return user.presence.state == 'online';
}

getCurrentUser(){
    return this.currentUser;
}
This is how the complete src/app/chat.service.ts file looks like:
// frontend/src/app/chat.service.ts
import { Injectable } from '@angular/core';
import { Observable, BehaviorSubject } from 'rxjs';
import { ChatManager, TokenProvider } from '@pusher/chatkit-client';

@Injectable({
  providedIn: 'root'
})
export class ChatService {
  AUTH_URL = 'http://localhost:3000/token';
  INSTANCE_LOCATOR = 'YOUR_INSTANCE_LOCATOR';
  GENERAL_ROOM_ID = 'YOUR_ROOM_ID';
  GENERAL_ROOM_INDEX = 0;
  chatManager: ChatManager;
  currentUser;
  messages = [];

  usersSubject = new BehaviorSubject([]);
  messagesSubject = new BehaviorSubject([]);
  constructor() { }
  async connectToChatkit(userId: string) {
    this.chatManager = new ChatManager({
      instanceLocator: this.INSTANCE_LOCATOR,
      userId: userId,
      tokenProvider: new TokenProvider({ url: this.AUTH_URL })
    })
    this.currentUser = await this.chatManager.connect();
    await this.currentUser.subscribeToRoom({
      roomId: this.GENERAL_ROOM_ID,
      hooks: {
        onMessage: message => {
          this.messages.push(message);
          this.messagesSubject.next(this.messages);
        }
      },
      messageLimit: 20
    });

    const users = this.currentUser.rooms[this.GENERAL_ROOM_INDEX].users;
    this.usersSubject.next(users);
  }

  getUsers() {
    return this.usersSubject;
  }
  getMessages() {
    return this.messagesSubject;
  }
  sendMessage(message) {
    return this.currentUser.sendMessage({
      text: message.text,
      roomId: message.roomId || this.GENERAL_ROOM_ID
    })
  }
  isUserOnline(user): boolean {
    return user.presence.state == 'online';
  }
  getCurrentUser() {
    return this.currentUser;
  }
}
That’s it for our chat service, next we’ll use this service to implement group chat in our mobile app.
Displaying room users on the home page
When a user registers in our application a Chatkit user is created behind the scenes. Open the src/app/home/home.page.ts file and start by adding the following imports:
// frontend/src/app/home/home.page.ts
import { OnInit } from '@angular/core';
import { Router, ActivatedRoute } from  '@angular/router';
import { ChatService } from  '../chat.service';
import { User } from  '../user';
Next, add the following variables to the component:
// frontend/src/app/home/home.page.ts
export  class  HomePage  implements  OnInit{
    userId:  string  =  '';
    userList:  any  = [];
Next inject ChatService and ActivatedRoute which is used to get route parameters:
// frontend/src/app/home/home.page.ts
constructor(private  chatService:  ChatService, private  route:  ActivatedRoute){}
Finally when the component is initialized we connect to our Chatkit instance and we retrieve the room users:
// frontend/src/app/home/home.page.ts
ngOnInit(){
    this.userId = this.route.snapshot.params.id;
    this.chatService.connectToChatkit(this.userId);
    this.chatService.getUsers().subscribe((users)=>{
        this.userList = users;
    });
}
On the ngOnInit life-cycle event of the component we first retrieve the user id from the route path then we call the connectToChatkit method of ChatServiceto connect the Chatkit.
Note:
HomePageneeds to implementOnIniti.eexport class HomePage implements OnInit.
Finally, we subscribe to thegetUsersmethod ofChatServiceto get the room’s users and add them touserList.
One more method that we need in our component is:
// frontend/src/app/home/home.page.ts
isOnline(user){
    return  this.chatService.isUserOnline(user);
}
This will allow us to check if the user is online.
This is the full content of the the src/app/home/home.page.ts:
// frontend/src/app/home/home.page.ts
import { Component } from '@angular/core';
import { OnInit } from '@angular/core';
import { Router, ActivatedRoute } from '@angular/router';
import { ChatService } from '../chat.service';
import { User } from '../user';

@Component({
  selector: 'app-home',
  templateUrl: 'home.page.html',
  styleUrls: ['home.page.scss'],
})
export class HomePage implements OnInit {
  userId: string = '';
  userList: any = [];
  constructor(private chatService: ChatService, private route: ActivatedRoute) { }
  ngOnInit() {
    this.userId = this.route.snapshot.params.id;
    this.chatService.connectToChatkit(this.userId);
    this.chatService.getUsers().subscribe((users) => {
      this.userList = users;
    });
  }
  isOnline(user) {
    return this.chatService.isUserOnline(user);
  }
}
Since we pass the user ID from the login page to the home page, we need to change the path of the home component to accept a parameter. Open the src/app/home/home.module.ts and change the path as follows:
// frontend/src/app/home/home.module.ts
RouterModule.forChild([
{
    path:  ':id',
    component:  HomePage
}
])
Now we need to display the list of users in the room and a button to start chatting. Open the src/app/home/home.page.html file, remove what’s inside <ion-content> and add:
// frontend/src/app/home/home.page.html
<div text-center>
    <ion-button  color="light" outline size="large" [routerLink]="'/chat'">
        <ion-icon name="chatbubbles"></ion-icon>
        Start chatting
    </ion-button>
</div>
This will add a button that takes the user to a chat page (that will be creating next). Next inside <ion-content>, add an Ionic spinner to create a loading animation:
// frontend/src/app/home/home.page.html
<h4>Users</h4>
<ion-spinner  name="dots" *ngIf="userList.length === 0"></ion-spinner>
Now, add the list to display users:
// frontend/src/app/home/home.page.html
<ion-list>
    <ion-item class="user-item" *ngFor="let user of userList">
        <div class="user-avatar">
            <img  [src]="user.avatarURL" alt="">
        </div>
        <ion-label class="user-name">
           {{ user.name }}
        </ion-label>
        <div class="user-presence">
            <ion-icon [class.user-online]="isOnline(user)" name="radio-button-on"></ion-icon>
        </div>
    </ion-item>
</ion-list>
We simply loop over userList and display each user’s name, avatar and online status.
Also change the title of the page and the color of the toolbar:
// frontend/src/app/home/home.page.html
<ion-header>
  <ion-toolbar color="primary">
    <ion-title>
      Chatkit Demo
    </ion-title>
  </ion-toolbar>
</ion-header>
This is how the complete src/app/home/home.page.html file looks like:
// frontend/src/app/home/home.page.html
<ion-header>
  <ion-toolbar color="primary">
    <ion-title>
      Chatkit Demo
    </ion-title>
  </ion-toolbar>
</ion-header>
<ion-content padding>
  <div text-center>
    <ion-button  color="light" outline size="large" [routerLink]="'/chat'">
        <ion-icon name="chatbubbles"></ion-icon>
        Start chatting
    </ion-button>
</div>
<h4>Users</h4>
<ion-spinner  name="dots" *ngIf="userList.length === 0"></ion-spinner>
<ion-list>
  <ion-item class="user-item" *ngFor="let user of userList">
      <div class="user-avatar">
          <img  [src]="user.avatarURL" alt="">
      </div>
      <ion-label class="user-name">
         {{ user.name }}
      </ion-label>
      <div class="user-presence">
          <ion-icon [class.user-online]="isOnline(user)" name="radio-button-on"></ion-icon>
      </div>
  </ion-item>
</ion-list>
</ion-content>
Finally let’s add some styling. Open the src/app/home/home.page.scss file and add the following styles:
// frontend/src/app/home/home.page.scss
.user-item {
    display: flex;
    .user-avatar{
        flex : 1;
        img{
            width: 30px;
            height: 30px;
        }
    }
    .user-name{
        flex: 2;
    }
    .user-presence{
        flex: 1;
    }
    .user-online{
        color: #32eb32;
    }
}
We use CSS Flex layout to style each list item.
Creating the chat page
When the user clicks on START CHATTING he will be taking to a chat page that we’re going to create in this section. Head back to your terminal and run the following command:
$ ng generate page chat
Open the src/app/chat/chat.page.ts file and first add the following imports:
// frontend/src/app/chat/chat.page.ts
import { Router } from  '@angular/router';
import { ChatService } from  '../chat.service';
import { User } from  '../user';
Next inject Router and ChatService:
// frontend/src/app/chat/chat.page.ts
constructor(private  router:  Router, private  chatService:  ChatService) { }
Next add the following variables to the component:
// frontend/src/app/chat/chat.page.ts
messageList:  any[] = [ ];
chatMessage:  string  ="";
Next on the ngOnInit life-cycle event get the messages and assign them to messageList:
// frontend/src/app/chat/chat.page.ts
ngOnInit() {
    this.chatService.getMessages().subscribe(messages  =>{
        this.messageList  =  messages;
    });
}
Finally, add the method to send a message to the room members:
// frontend/src/app/chat/chat.page.ts
sendMessage(){
    this.chatService.sendMessage({text:this.chatMessage}).then(()=>{
        this.chatMessage  =  "";
     });
}
This is the full content of the src/app/chat/chat.page.ts file:
// frontend/src/app/chat/chat.page.ts
import { Component, OnInit } from '@angular/core';
import { Router } from '@angular/router';
import { ChatService } from '../chat.service';
import { User } from '../user';

@Component({
  selector: 'app-chat',
  templateUrl: './chat.page.html',
  styleUrls: ['./chat.page.scss'],
})
export class ChatPage implements OnInit {
  messageList: any[] = [];
  chatMessage: string = "";
  constructor(private router: Router, private chatService: ChatService) { }

  ngOnInit() {
    this.chatService.getMessages().subscribe(messages => {
      this.messageList = messages;
    });
  }
  sendMessage() {
    this.chatService.sendMessage({ text: this.chatMessage }).then(() => {
      this.chatMessage = "";
    });
  }
}
Now, open the src/app/chat/chat.page.html file and let’s create a chat UI. First, add the list for displaying messages inside <ion-content>:
// frontend/src/app/chat/chat.page.html
<ion-content padding>
  <div class="container">
    <div *ngFor="let msg of messageList" class="message left">
      <img class="user-img" [src]="msg.sender.avatarURL" alt="" src="">
      <div class="msg-detail">
        <div class="msg-info">
          <p>
            {{msg.sender.name}}
          </p>
        </div>
        <div class="msg-content">
          <span class="triangle"></span>
          <p class="line-breaker ">{{msg.text}}</p>
        </div>
      </div>
    </div>
  </div>
</ion-content>
We loop through messageList using the *ngFor directive and display each message text, and sender information like name and avatar.
Next, add a textarea to enter the user’s message and a button to send it below <ion-content>:
// frontend/src/app/chat/chat.page.html
<ion-footer no-border>
      <div class="input-wrap">
        <textarea #messageInput
                  placeholder="Enter your message!"
                  [(ngModel)]="chatMessage"
                  (keyup.enter)="sendMessage()">
        </textarea>
        <button ion-button clear icon-only item-right (click)="sendMessage()">
          <ion-icon name="ios-send" ios="ios-send" md="md-send"></ion-icon>
        </button>
      </div>
</ion-footer>
We bind the sendMessage method to both the text-area enter and the button click events which allows users to send a message by either pressing Enter or clicking on the button.
Also change the text of the title and the color of the toolbar:
// frontend/src/app/chat/chat.page.html
<ion-header>
  <ion-toolbar color="primary">
    <ion-title>Chat Room</ion-title>
  </ion-toolbar>
</ion-header>
This is the full content of the src/app/chat/chat.page.html file:
// frontend/src/app/chat/chat.page.html
<ion-header>
  <ion-toolbar color="primary">
    <ion-title>Chat Room</ion-title>
  </ion-toolbar>
</ion-header>
<ion-content padding>
  <div class="container">
    <div *ngFor="let msg of messageList" class="message left">
      <img class="user-img" [src]="msg.sender.avatarURL" alt="" src="">
      <div class="msg-detail">
        <div class="msg-info">
          <p>
            {{msg.sender.name}}
          </p>
        </div>
        <div class="msg-content">
          <span class="triangle"></span>
          <p class="line-breaker ">{{msg.text}}</p>
        </div>
      </div>
    </div>
  </div>
</ion-content>
<ion-footer no-border>
  <div class="input-wrap">
    <textarea #messageInput placeholder="Enter your message!" [(ngModel)]="chatMessage" (keyup.enter)="sendMessage()">
    </textarea>
    <button ion-button clear icon-only item-right (click)="sendMessage()">
      <ion-icon name="ios-send" ios="ios-send" md="md-send"></ion-icon>
    </button>
  </div>
</ion-footer>
Next, open the src/app/chat/chat.page.scss file and add the following styles:
// frontend/src/app/chat/chat.page.scss
.input-wrap {
    padding: 5px;
    display: flex;
    textarea {
      flex: 3;
      border: 0;
      border-bottom: 1px #000;
      border-style: solid;
    }
    button {
        flex: 1;
    }
}
ion-footer {
    box-shadow: 0 0 4px rgba(0, 0, 0, 0.11);
    background-color: #fff;
}
ion-content .scroll-content {
    background-color: #f5f5f5;
}
.line-breaker {
    white-space: pre-line;
}
.container {
  .message {
    position: relative;
    padding: 7px 0;
    .msg-content {
        color: #343434;
        background-color: #ddd;
        float: left;
    }
    .user-img {
        position: absolute;
        border-radius: 45px;
        width: 45px;
        height: 45px;
        box-shadow: 0 0 2px rgba(0, 0, 0, 0.36);
    }
    .msg-detail {
        width: 100%;
        padding-left: 60px;
        display: inline-block;
        p {
          margin: 0;
        }
        .msg-info {
          p {
            font-size: .8em;
            color: #888;
          }
        }
    }
  }
}
This is a screenshot of the chat UI:

Note: Please note that you first need to register by visiting
localhost:8100/registerwhere you need to enter your name, email and password. After registering you’ll be redirected to the/loginpage where you need to enter your email and password. If login is successful, you’ll be redirected to the home page where you have the START CHATTING button that you need to click on in order to navigate to the chat page.## Conclusion
In this tutorial, we’ve created a simple group chat app using Nest.js, Ionic 4 and Chatkit. You can also leverage Chatkit to allow private and direct chats between users by creating rooms that have only two members and you can allow users to create their own chat rooms and invite users they want and other features that you can read about from the docs.
You can find the source code for this part in this GitHub repository.
*Originally published by Ahmed Bouchefra at *https://pusher.com
Learn More
☞ Learn Swift 4: From Beginner to Advanced
☞ Build a Basic App with Spring Boot and JPA using PostgreSQL
☞ Build a Video Chat App with ASP.NET Core, Angular
☞ 5 ways to build real-time apps with JavaScript
☞ Full Stack Developers: Everything You Need to Know
☞ Android Studio for beginners
☞ Create and use private rooms in an Angular 7 chat app with Chatkit
#mobile-apps #angular #cordova #android #ios #javascript #typescript