Build a Real-time Voting App with Pusher, Node and Bootstrap
Real-time apps usually use WebSockets, a relatively new type of transfer protocol, as opposed to HTTP, which is a single-way communication that happens only when the user requests it. WebSockets allow for persistent communication between the server and the user, and all those users connected with the application, as long as the connection is kept open.
A real-time web application is one where information is transmitted (almost) instantaneously between users and the server (and, by extension, between users and other users). This is in contrast with traditional web apps where the client has to ask for information from the server. — Quora
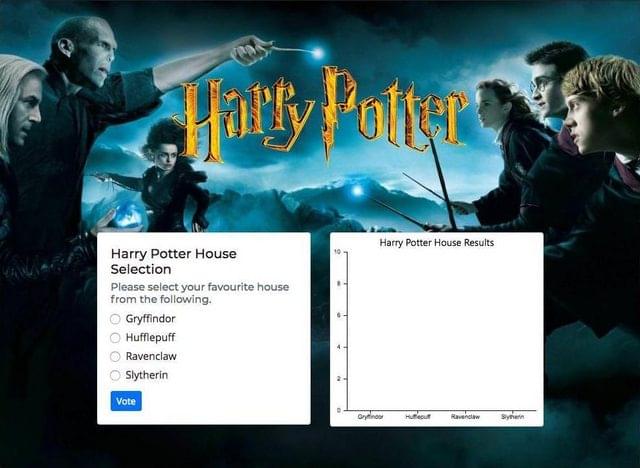
Our Harry Potter voting web app will show options (all the four houses) and a chart on the right side that updates itself when a connected user votes.
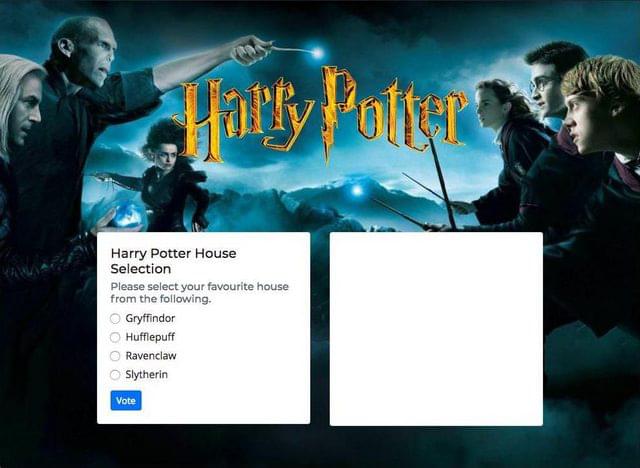
To give you a brief idea of look and feel, the final application is going to look like this:

Here’s a small preview of how the real-time application works:
To make our application real-time, we’re going to use Pusher and WebSockets. Pusher sits as a real-time layer between your servers and your clients. It maintains persistent connections to the clients — over a WebSocket if possible, and falling back to HTTP-based connectivity — so that, as soon as your servers have new data to push to the clients, they can do so instantly via Pusher.
Building our Application
Let’s create our fresh application using the command npm init. You’ll be interactively asked a few questions on the details of your application. Here’s what I had:
praveen@praveen.science ➜ Harry-Potter-Pusher $ npm init
{
  "name": "harry-potter-pusher",
  "version": "1.0.0",
  "description": "A real-time voting application using Harry Potter's house selection for my article for Pusher.",
  "main": "index.js",
  "scripts": {
    "test": "echo \"Error: no test specified\" && exit 1"
  },
  "repository": {
    "type": "git",
    "url": "git+https://github.com/praveenscience/Harry-Potter-Pusher.git"
  },
  "keywords": [
    "Harry_Potter",
    "Pusher",
    "Voting",
    "Real_Time",
    "Web_Application"
  ],
  "author": "Praveen Kumar Purushothaman",
  "license": "ISC",
  "bugs": {
    "url": "https://github.com/praveenscience/Harry-Potter-Pusher/issues"
  },
  "homepage": "https://github.com/praveenscience/Harry-Potter-Pusher#readme"
}

Is this OK? (yes)
So, I left most settings with default values. Now it’s time to install dependencies.
Installing Dependencies
We need Express, body-parser, Cross Origin Resource Sharing (CORS), Mongoose and Pusher installed as dependencies. To install everything in a single command, use the following. You can also have a glance of what this command outputs.
praveen@praveen.science ➜ Harry-Potter-Pusher $ npm i express body-parser cors pusher mongoose
npm notice created a lockfile as package-lock.json. You should commit this file.
npm WARN ajv-keywords@3.2.0 requires a peer of ajv@^6.0.0 but none is installed. You must install peer dependencies yourself.

+ pusher@2.1.2
+ body-parser@1.18.3
+ mongoose@5.2.6
+ cors@2.8.4
+ express@4.16.3
added 264 packages in 40.000s
Requiring Our Modules
Since this is an Express application, we need to include express() as the first thing. While doing it, we also need some accompanying modules. So, initially, let’s start with this:
const express = require("express");
const path = require("path");
const bodyParser = require("body-parser");
const cors = require("cors");
Creating the Express App
Let’s start with building our Express application now. To start with, we need to get the returned object of the express() function assigned to a new variable app:
const app = express();
Serving Static Assets
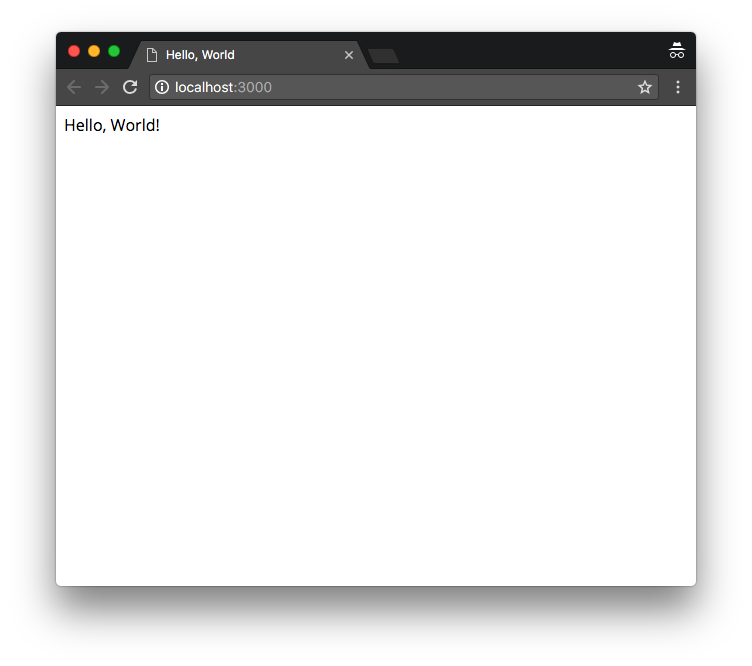
Adding the above line after the initial set of includes will initialize our app as an Express application. The next thing we need to do is to set up the static resources. Let’s create a new directory in our current project called public and let’s use Express’s static middleware to serve the static files. Inside the directory, let’s create a simple index.html file that says “Hello, World”:
<!DOCTYPE html>
<html>
  <head>
    <meta charset="utf-8" />
    <meta name="viewport" content="width=device-width" />
    <title>Hello, World</title>
  </head>
  <body>
    Hello, World!
  </body>
</html>
To serve the static files, we have a built-in .use() function with express.static() in Express. The syntax is as follows:
app.use( express.static( path.join(__dirname, "public") ) );
We also need to use the body parser middleware for getting the HTTP POST content as JSON to access within the req.body. We’ll also use urlencoded to get the middleware that only parses urlencoded bodies and only looks at requests where the Content-Type header matches the type option. This parser accepts only UTF-8 encoding of the body and supports automatic inflation of gzip and deflate encodings:
app.use( bodyParser.json() );
app.use( bodyParser.urlencoded( { extended: false } ) );
To allow cross-domain requests, we need to enable CORS. Let’s enable the CORS module by using the following code:
app.use( cors() );
Now all the initial configuration has been set. All we need to do now is to set a port and listen to the incoming connections on the specific port:
const port = 3000;
app.listen(port, () => {
  console.log(`Server started on port ${port}.`);
});
Make sure your final app.js looks like this:
const express = require("express");
const path = require("path");
const bodyParser = require("body-parser");
const cors = require("cors");

// Create an App.
const app = express();

// Serve the static files from public.
app.use( express.static( path.join(__dirname, "public") ) );

// Include the body-parser middleware.
app.use( bodyParser.json() );
app.use( bodyParser.urlencoded( { extended: false } ) );

// Enable CORS.
app.use( cors() );

// Set the port.
const port = 3000;
// Listen to incoming connections.
app.listen(port, () => {
  console.log(`Server started on port ${port}.`);
});
Run the command to start the server:
$ npm run dev
Open your http://localhost:3000/ on a new tab and see the magic. You should be seeing a new page with “Hello, World”.
Building the App’s Back End
First thing, let’s create a directory called routes and create a file in there, say vote.js. We need to connect this file with our app.js file, so let’s go back to it and include it under our express() initialization:
const app = express();

// Vote route.
const vote = require("./routes/vote")
Since the routes directory is in the same directory as the app.js, we’ll start with ./. To be able to use this one with the router, let’s go to the bottom and add the router middleware code shown below before the port definition:
app.use("/vote", vote);
Anything that goes through the /vote URL is going to be handled by the vote.js file, provided by the vote variable.
Handling GET and POST Requests
Using Express’s Router instance, we can handle the GET and POST methods through our /vote path. Let’s create a default GET route now and send a default text say, "You are in /vote".
const express = require("express");
const router = express.Router();

// Default get route.
router.get("/", (req, res) => {
  res.send("You are in /vote");
});
The code above routes all the requests to the path /vote to our newly formed routes/vote.js.
Handling POST Requests
We also need a POST handler, where we can trigger the Pusher API. It’s going to be Router.post() for the POST requests to the / so that all the requests will go to /vote because of our middleware. We’ll be giving the same type of arrow functions here, and let’s give a message like "You have POSTed to /vote.":
// Default POST route.
router.post("/", (req, res) => {
  res.send("You have POSTed to /vote.");
});
The res.send() function will be replaced by Pusher API calls in the future.
Exporting the Router
Finally, we have to export the router as a module. Use the module.exports like this at the end. This should be the end of the file, although you can have it any where. Remember, JavaScript is event oriented and not procedural:
// Export the router.
module.exports = router;
At this point, when you see the full vote.js file, it should look something like this:
const express = require("express");
const router = express.Router();

// Default GET route.
router.get("/", (req, res) => {
  res.send("You are in /vote.");
});

// Default POST route.
router.post("/", (req, res) => {
  res.send("You have POSTed to /vote.");
});

// Export the router.
module.exports = router;
Make sure you save everything and now try to run both the URLs in our web browser.
You should see output in your web browsers.
Integrating with the Pusher API
Let’s start by modifying the code we wrote for the POST handler — the one we wrote in the vote.js file. Here’s what we actually want to trigger Pusher. Let’s quickly go to our Pusher Dashboard, and select your Pusher App (praveen-science-app, in my case) and click on the Getting Started tab. You’ll see the code to kickstart.
In our vote.js we need to define (or require) the Pusher library. Then we need to create a new instance (an object) of the Pusher class, and then finally trigger the pusher service inside the POST. I’m changing the vote.js file as shown below:
Note: make sure you change your *appId*, *key*, *secret* to the one given in the dashboard.
const express = require("express");
const router = express.Router();

// ///// Step 1: Include Pusher ///// //
const Pusher = require('pusher');

// ///// Step 2: Instantiate an Object ///// //
const pusher = new Pusher({
  appId: 'appId',
  key: 'key',
  secret: 'secret',
  cluster: 'eu',
  encrypted: true
});

// Default GET route.
router.get("/", (req, res) => {
  res.send("You are in /vote.");
});

// Default POST route.
router.post("/", (req, res) => {
  // ///// Step 3: Trigger the Pusher service ///// //
  pusher.trigger('my-channel', 'my-event', {
    "message": "hello world"
  });
});

// Export the router.
module.exports = router;
The moment a user submits the form, our application fires a POST request to this route, which is going to hit the Pusher API and trigger the Pusher service using the pusher.trigger() function call. Also, we don’t want to use the default values of my-channel and my-event, so let’s change them to hp-voting and hp-house. We also don’t need to send a message, but instead, we’d like to give points and the house information:
router.post("/", (req, res) => {
  pusher.trigger('hp-voting', 'hp-house', {
    "points": 1,
    "house": req.body.house
  });

});
For now, we’re going to assign a value of 1 to the points (I’ll explain why shortly), and we’re using req.body.house for the house, because the value is going to come from the form data, and that is provided using req.body as we’re using body-parser.
Finally, we’ll return a JSON to the browser as response using the res.json() function and pass an object with a boolean success and a message thanking the user for voting and that it has been received successfully:
router.post("/", (req, res) => {
  pusher.trigger('hp-voting', 'hp-house', {
    "points": 1,
    "house": req.body.house
  });

  return res.json({
    "success": true,
    "message": "Thanks for voting."
  });
});
Building the App’s Front End
I’ve used jQuery and Bootstrap to do the front end. Here’s the part where we allow the users to vote.
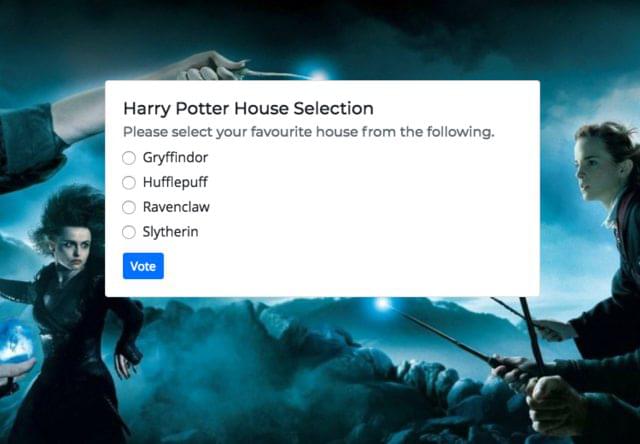
I’m also going to add a chart container that will chart real-time as the votes are received.
Integrating Everything
We already have the back end done. Now we’ll see how to send the request to the Pusher service when the vote button is clicked, thanks to the front-end JavaScript. We’ll trigger the submit event of the form when the user clicks the button, and it needs to make a POST request to our back end to the route /vote.
Event Listener, User Data and Ajax
Let’s add an event listener for our form submission, code for capturing the user data, and the Ajax call:
// Execute only after the whole document is fetched and assets are loaded.
$(document).ready(function () {
  // Form submission event listener (event handler)
  $("#voteForm").submit(function (e) {
      e.preventDefault();
      // Get the checked input element's value.
      var house = $(".form-check-input:checked").val();
      // Construct the data to be sent as a payload to the AJAX call.
      var data = {
          "house": house
      };
      $.post("/vote", data, function (res) {
          // Log the output in the console.
          console.log(res);
        });
    });
});
Working with Pusher and Charts
When the form is submitted, the Ajax call triggers the /vote endpoint, and the back-end Node app will also trigger the Pusher service using the code below in routes/vote.js:
pusher.trigger('hp-voting', 'hp-house', {
  "points": 1,
  "house": req.body.house
});
When the code above is hit (or run), Pusher service will trigger an event with hp-voting and hp-house. We’re not catching the event or subscribing it yet. So we’re going to implement CanvasJS to build our chart, and we’re going to subscribe to the above event and will be adding the data points by the trigger, specified by the form’s submit event listener.
Adding CanvasJS
Once you add all the bits correctly, your client-side script.js should be similar to this:
// Execute only after the whole document is fetched and assets are loaded.
$(document).ready(function () {
  // Form submission event listener (event handler)
  $("#voteForm").submit(function (e) {
    // Prevent the default event.
    e.preventDefault();
    // Get the checked input element's value.
    var house = $(".form-check-input:checked").val();
    // Construct the data to be sent as a payload to the Ajax call.
    var data = {
      "house": house
    };
    // Fire the POST request Ajax call to our /vote end point.
    $.post("/vote", data, function (res) {
      // Log the output in the console.
      console.log(res);
    });
  });
  // Create the base data points.
  var dataPoints = [
    {
      label: "Gryffindor",
      y: 0
    }, {
      label: "Hufflepuff",
      y: 0
    }, {
      label: "Ravenclaw",
      y: 0
    }, {
      label: "Slytherin",
      y: 0
    }
  ];
  // Initialize Chart using jQuery selector.
  // Get the chart container element.
  var chartContainer = $("#chartContainer");
  // Check if the element exists in the DOM.
  if (chartContainer.length === 1) {
    // Construct the options for the chart.
    var options = {
      "animationEnabled": true,
      "theme": "light1",
      "title": {
        "text": "Harry Potter House Results"
      },
      "data": [
        {
          "type": "column",
          "dataPoints": dataPoints
        }
      ]
    };
    // Initialize the chart.
    $("#chartContainer").CanvasJSChart(options);
  }
});
Now save the file, and when you reload the page, you should be able to see a placeholder chart. It is definitely a real chart but without any values. You should be able to see something like this:
Now we have implemented our CanvasJS chart on the right side.
Initialization of Pusher on the Client Side
After the Pusher Logging, we have to initialize the Pusher object. Since we already have a client-side config.js, we’ll be leveraging that code in this part:
// Initialise a Pusher Object.
var pusher = new Pusher(PusherConfig.key, {
  cluster: PusherConfig.cluster,
  forceTLS: PusherConfigforceTLS.
});
After initialization of the Pusher object, we need to subscribe to our channel, where our messages get published by the server side. We’ll be copying the code from the Pusher Dashboard but changing a little bit to subscribe to our hp-voting channel and hp-house event. The default values of my-channel and my-event need to be updated like this in relation with our back-end code:
// Subscribe to the channel.
var channel = pusher.subscribe('hp-voting');
// Bind to a particular event and listen to the event data.
channel.bind('hp-house', function(data) {
  alert(JSON.stringify(data));
});
Instead of alert-ing a data message, we want to basically add the data to the chart. The way we can do that is by taking our dataPoints and manipulating the array with respect to the server’s response. With the already existing dataPoints variable (remember that we’ve used var instead of const as we should be able to change it at a later stage), we’ll be using a higher-order Array.map() function as follows:
// Bind to a particular event and listen to the event data.
channel.bind('hp-house', function(data) {
  // Use a higher order Array map.
  dataPoints = dataPoints.map(function (d) {
    // Check if the current label is the updated value.
    if (d.label == data.house) {
      // Increment the house's value by the number of new points.
      d.y += data.points;
    }
    // Return the original value as this is a map function.
    return d;
  });
});
We’re looping through all the dataPoints labels, and when a particular label matches the current label, we’ll be incrementing the value of the current label with the number of points updated. Since we’re using a JavaScript Array.map() function, we have to return the original value, d, back to the function call. Once we’ve updated the dataPoints, we have to re-render the chart.
After the map() function, we’ll do the following:
channel.bind('hp-house', function(data) {
  // Use a higher order Array map.
  dataPoints = dataPoints.map(function (d) {
    // Check if the current label is the updated value.
    if (d.label == data.house) {
      // Increment the house's value by the number of new points.
      d.y += data.points;
    }
    // Return the original value as this is a map function.
    return d;
  });

  // Re-render the chart.
  $("#chartContainer").CanvasJSChart(options);
});
Once you write all the above code, save and run the application in your browser, fire up your web developer tools and check out the console. You should see that Pusher Service is communicating with your application. I was able to see the following in my console (I’ve hidden my appId and secret, so other than those sensitive bits of information, everything else is shown):

Conclusion
At this point of time, when you try to open two windows of the same application and vote on one screen, you can see all the screens updating at the same time. This is basically how you use the Pusher service to create real-time applications.
Our Harry Potter voting web app now shows options (all the four houses) and a chart on the right side that updates itself when a connected user votes. The next obvious step would be to use a database, such as MongoDB, to store all the information to make sure it persists even when we reload the pages of the application.
Recommended Reading
☞ Build a Slack Polling App with Airtable, Standard Library, and Node.js
☞ Node.js and MongoDB Slack Bot Example
☞ 3 Ways to Convert an Array to an Object in NodeJS
#node-js #bootstrap