Things You Should Know When Android Development
It’s been more than two years since I first became interested in Android development. Today, after several projects and many exceptions, I want to share with you seven lessons I learned in this short journey.
1. Choose the Right Architecture and Use It From the Beginning
Have you ever heard all those acronyms like MVC, MVP, MVVM, etc.? They are different software architectures and you should know them.
Many beginners write all their code in the activity class and this may seem OK in the beginning. But believe me, it’s not so.
As the project grows, your code will be increasingly confusing and strongly coupled, making testing, maintenance, and development of new features very difficult.
That’s why you should adopt a clear software architecture from the beginning. As I said before, there are several and each one has pros and cons. To date, this is the recommended app architecture by Google:
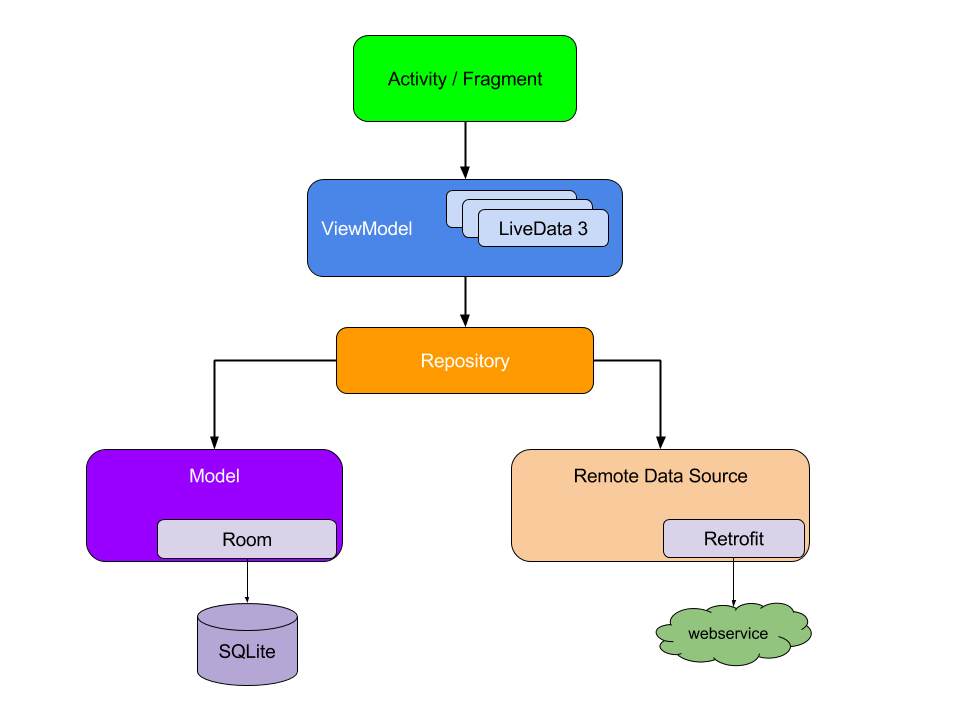
As you can see from the image above, each component depends only on the component one level below it.
This design creates a consistent UX, respects the separation of concerns and is optimized for testing and scalability. Obviously, there is no single perfect structure for any situation, as Google says:
It’s impossible to have one way of writing apps that works best for every scenario. That being said, this recommended architecture is a good starting point for most situations and workflows.
Resources
Since this is not the purpose of this article, I will not explain the details of this architecture but I will list all the useful resources:
2. Third-Party Libraries: Find the Right Balance
When I started my first project, I wanted to do everything from scratch. I almost refused to use third-party libraries. I probably thought I could learn more.
While this may be fine for the first project, it is generally wrong. With this approach, you end up wasting a lot of time trying to reinvent the wheel. Don’t do it.
After the first experience, I started using open-source libraries. It was great, there was a free library for every situation. So, I started adding a library, then another, then another one.
And guess what? In the end, my project was nothing more than a great jumble of third-party libraries. Don’t do it. Choose libraries carefully. Not all of them are well-written and reliable.
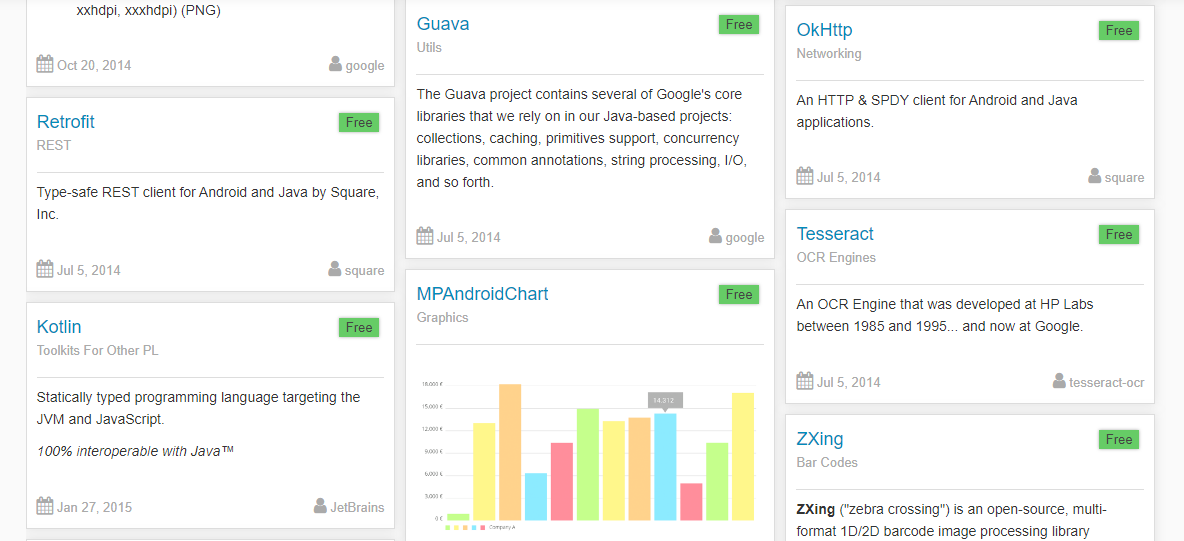
So, my advice is to find the right balance. If you have a problem during development and someone has already solved it with a great library, use it. If you need an HTTP client, you can use Retrofit.
If you need to download and manage many images you can use Glide. These are excellent libraries, very well-known and stable.
At the same time, know that not all libraries are like these. Always check who the author is and if you have time, explore the source code and try to understand how the problem was solved.
Resources
Android Arsenal maintains a huge database with almost all the available Android libraries.
3. Start With a Simple and Clean UI
If you work in a big company as an Android developer, the UI/UX design of the app is left to designers, so you won’t have to worry about it.
Instead, if you work at a startup or even for personal projects, you will probably have to take care of UI/UX design. And trust me, just as a good interface can be the icing on the cake for a good product, a bad interface can completely ruin a great product.
“User interface is like a joke, if you have to explain it, it’s not that good.” — Martin LeBlanc
A mistake I often made in the past was to put too much into interfaces. Too many elements create confusion for users and often create a bad aesthetic sense. My advice is to start simple. Very simple and clean.
Especially if you don’t have great design skills. Try to make very basic and user-friendly interfaces. When you have it, you can try to improve the aesthetics to leave a more memorable impression on your users.
Remember to test your UI on displays of different sizes and DPI. Never use a fixed unit of measure such as px, always use dynamic units like dp _(_or spfor text).
Resources
- Dribbble: When you don’t know where to start, you can look for inspiration in this fantastic community of designers.
- Google Material Design: An adaptable system of guidelines, components, and tools that support the best practices of user interface design.
- The Psychology Of Everyday Things: A good book on usability in everyday life, by Don Norman.
4. Test, Test, Test
How many times have you thought: “I tested the app on my smartphone and it works!”
We both know it’s not enough. Maybe a reduced testing phase will save you a few days during development but it will cost you weeks in production!
A good testing phase helps you to check the robustness, operation, and usability of your app before the launch.
How should I test my app? This is a very broad topic. There are different types of testing and each has a specific purpose.
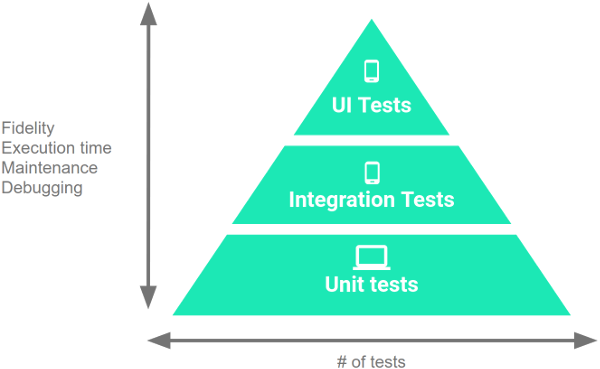
As you can see from the illustration, we can identify three levels of testing:
- Unit tests: To validate your app’s behavior one class at a time.
- Integration tests: To validate either interaction between levels of the stack within a module or interactions between related modules.
- UI tests: To validate UI behavior and user flow.
Based on the use case of your app, you will need to decide how much to perform the different types of tests.
A rule of thumb suggested by Google is to split your tests into 70% small tests (unit tests), 20% medium tests (integration tests), 10% large tests (UI tests and end-to-end tests).
Resources
- Test apps on Android: Here’s all you need to start testing your apps.
- TDD on Android: Video session on TDD from Google I/O 2017.
5. Android Studio Is Your Friend
Certainly, you already use this IDE but are you exploiting all of its potential?
There are many tools built into Android Studio that can help you develop an app. Here are the ones I use most often:
- Device Emulator to test the behavior of your app on various devices with different Android versions.
- APK Analyzer to analyze the size of the app by inspecting the APK content.
- Realtime Profilers to analyze real-time statistics on CPU, memory, and network usage.
- Firebase Assistant to connect the app to Firebase and add all the Firebase services you need with just a few clicks.
- Vector Asset Studio makes it easy to create a new image asset for every density size.
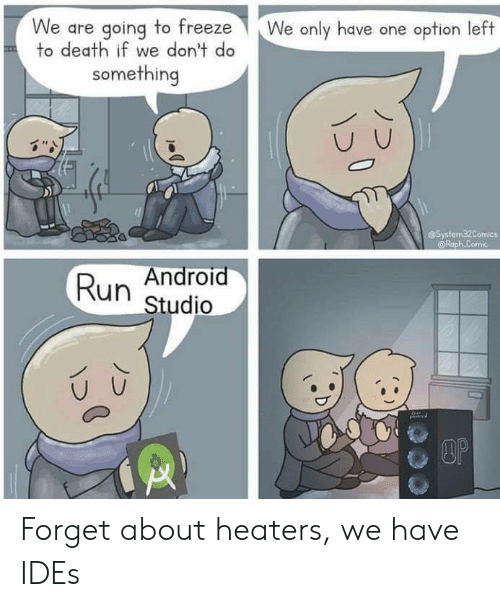
And did you know that Android Studio also has a feature that turns your PC into a stove?
Resources
For more info and features see the Android Studio user guide.
6. Always Use Git
Git is a Version Control System (VCS) and,on a very basic level, there are two great things a VCSallow you to do: track changes in your files and it simplifies working on big projects with multiple developers.
I don’t understand why I should use Git, I can simply make a backup copy of my project. — Me, 3 years ago
I know, I know.
Now, let me tell you what someone should have told me three years ago: you need Git. Git can drastically improve your workflow. Why? Here are some good reasons:
- Your source code is securely stored in the cloud and it’s accessible anywhere.
- All past versions of your code are available. You can check old versions and even go back if something went wrong.
- Teamwork is simplified. Each developer can work on a parallel branch and merge changes when needed.
- You can contribute to thousands of open-source projects.
- With platforms like GitHub and BitBucket, you have the possibility to create and show your project portfolio.
There are many others but I hope these reasons are enough to get the message across: if you think you don’t need Git, you’re wrong.
Resources
GitHub and BitBucket guides to get started with Git.
7. Use a Release Checklist

There’s a time when you think your app is ready to be published. But is it really? How can you be sure? At this stage, you should never be too hasty and it is better to ask yourself a few questions:
- Did I remove any debugging code?
- Have I done enough testing?
- Did I update the name and version code in the build Gradle?
- Did I enable Proguard to obfuscate the APK code?
- Did I localize my app?
- Did I prepare my developer account on Google Play?
If you can answer “yes”to all these questions then you can proceed. I suggest you generate an Android App Bundle (aab) instead of the APK to optimize the size and resources of your app.
After publishing the app on Google Play, always check user feedback and all the analytics you have. They will dramatically help you improve your app.
Resources
Here’s a great launch checklist by Android Developers.
Final Words
I tried to share with you some of the most important lessons I learned during my experience in Android development. I’m sure there’s a lot more to learn.
#android #programming #development
