Today we’re going to explore the process of developing a Chrome extension with Angular.
We will be starting from scratch with ng new and finishing with fully functional Chrome extension, convenient dev environment and hopefully decent understanding of how it works.
But first let’s clear out one thing…
Why would one want to develop a Chrome extension
There are couple of reasons that would make you want to develop a Chrome extension. First (and most improbable one) is to make money.
Yes, there are Chrome extensions that are published in Chrome Store and developers get paid for it. And if you have and idea for extension and business model that will be profitable — well, who am I to tell you not to go for it.
However, I believe that the main use case for developing an extension is to serve your needs as a developer.
For example at my company we have a handful of Chrome extensions that were developed by developers for developers and BOY, how much time it saved me!
I’m sure that you can think of at least one thing that you are doing repeatedly over and over during the development cycle, a thing that can be easily automated with a simple Chrome extension.
Today you’re going to learn how to build one and in order to have even more fun we’re going to do that with Angular.
What Chrome extension consists of

Background script
The background script is the extension’s event handler; it contains listeners for browser events that are important to the extension. It lies dormant until an event is fired then performs the instructed logic. An effective background script is only loaded when it is needed and unloaded when it goes idle.
Content script
Extensions that read or write to web pages utilize a content script. The content script contains JavaScript that executes in the contexts of a page that has been loaded into the browser. Content scripts read and modify the DOM of web pages the browser visits.
We’re not going to touch these in this tutorial (well, almost)
Popup (in browser action)
If a browser action has a popup, the popup appears when the user clicks the icon. The popup can contain any HTML contents that you like, and it’s automatically sized to fit its contents.
Spoiler: this is where we use Angular
You may also like:How to Create a Chrome Extension with Vue.js
Communication between pages
Different components in an extension often need to communicate with each other. Different HTML pages can find each other by using the chrome.extension;methods, such as *getViews()*;*getBackgroundPage()*. Once a page has a reference to other extension pages the first one can invoke functions on the other pages and manipulate their DOMs. Additionally, all components of the extension can access values stored using the storage;API and communicate through message passing.*
In this tutorial we’re going to focus on popup and background page but there are much more options than you can use, make sure to check them out.
So…
As I mentioned we’re going to start from scratch with ng new .Obviously we need Angular CLI for that, so if for some weird reason you don’t have it installed yet, please do:
npm i -g @angular/cli
Creating a project
1. Start with creating a new project: ng new angular-chrome-extension
2. cd angular-chrome-extension
3. Create a manifest in the /src/ folder
Extensions start with their manifest. Create a file called manifest.json and include the following code, or download the file here.
{
    "name": "Great Extension",
    "version": "1.0",
    "description": "Build an Extension with Angular",
    "manifest_version": 2
}
Loading the extension into Chrome
We’re going to load the unpacked extension from the *dist *directory so we need the manifest to be there as well.
Let’s include it in assets (angular.json):
"projects": {
    "angular-chrome-extension": {
      ...
      "architect": {
        "build": {
          "builder": "@angular-devkit/build-angular:browser",
          "options": {
            ...
            "assets": [
              "src/favicon.ico",
              "src/assets",
              "src/manifest.json"
            ],
            ...
          },
          ...
Run ng build to make sure *manifest.json *is indeed present in *dist *directory.
Time to load it to Chrome and watch it working:
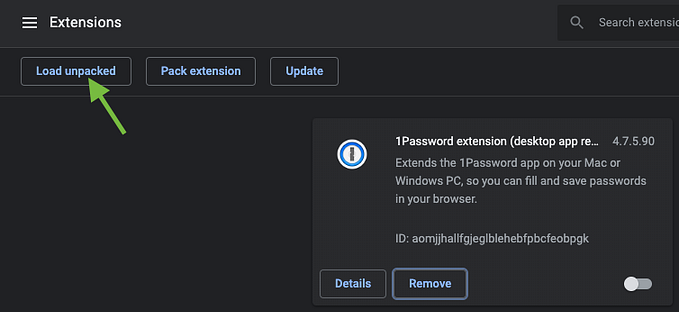
· Open Chrome
· Open the Extension Management page by navigating to chrome://extensions.
· Enable Developer Mode by clicking the toggle switch next to Developer mode.

Click the Load unpacked button and select the extension directory (dist/angular-chrome-extension).
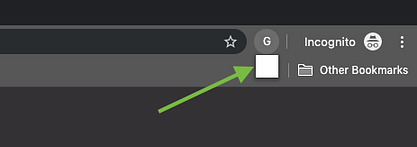
Now you should be able to see the extension in Chrome:
However, as you’ve probably noticed, there is nothing in the extension apart from the default icon and the title we gave it in manifest.json.
The reason is that we didn’t define any action. Let’s define one:
{
    "name": "Great Extension",
    "version": "1.0",
    "description": "Build an Extension with Angular",
    "manifest_version": 2,
    "browser_action": {
        "default_popup": "index.html"
    }
}
Use browser actions to put icons in the main Google Chrome toolbar, to the right of the address bar. In addition to its icon, a browser action can have a tooltip, a badge, and a popup.
Now let’s run ng build again and reload our extension :
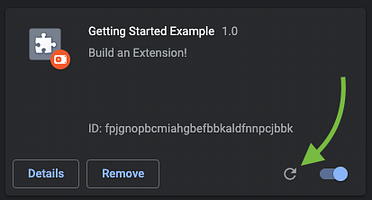
Did it work? Well, not quite:
It did load the index.html but apparently it doesn’t work.
If you look at your extension configuration page now you’ll notice that there has been an error:
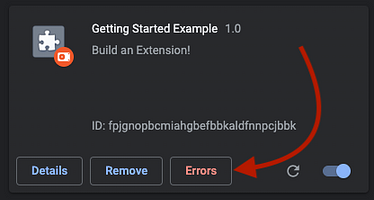
Clicking on it gives you the details:
Uncaught EvalError: Refused to evaluate a string as JavaScript because ‘unsafe-eval’ is not an allowed source of script in the following Content Security Policy directive: “script-src ‘self’ blob: filesystem: chrome-extension-resource:”.
You can also see this error in a more familiar manner, by right clicking on the popup and inspecting the html:
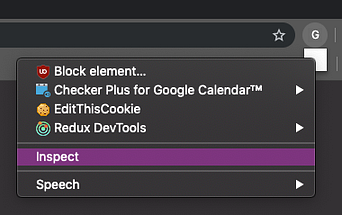

As you can see the error comes from JIT compiler because it tries to evaluate a string, which is not allowed by the default security policy.
Of course you can change the security policy in manifest and allow unsafe-eval to run, but I wouldn’t recommend that.Why? Well, you know…
Instead, we’ll use AOT compiler so that no code is evaluated during the run. Let’s modify *angular.json *to compile in AOT mode:
"projects": {
    "angular-chrome-extension": {
      ...
      "architect": {
        "build": {
          "builder": "@angular-devkit/build-angular:browser",
          "options": {
            ...
            "aot": true
            ...
          },
          ...
Build, reload & click — voila!
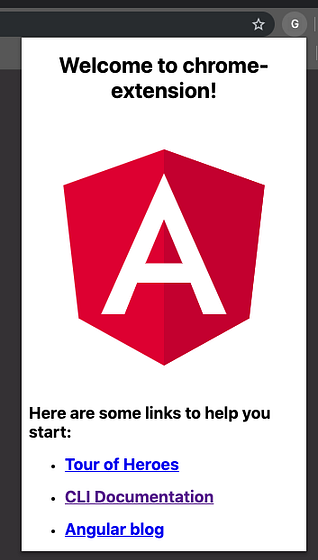
It works with Angular, yay!
ANGULAR IN CHROME EXTENSION — CHECK
Live reload and ng serve
Ideally we would want to use ng serve just like we use it for web applications and expect the extension to be updated automatically every time there was a change. Unfortunately that’s not the case.
We can’t use ng serve here because it writes the bundle into the memory of the dev server, while Chrome needs an actual physical folder on disk in order to load the extension.
We can use ng build --watch though.
It watches the sources (and assets) and rebuilds the relevant files while updating the bundles in dist directory.
It will take care of updating the dist folder when one of the sources or the manifest changes.
The extension is still not updated automatically but it does make your life easier. Now in order to apply the changes you only need a few things:
1. If you’ve changed any source file that affects extension popup, open and close the popup.
** **Chrome loads the popup directly from dist folder every time you open it so any changes to the popup are applied automatically when it is reopen.
2. If you’ve changed the manifest you have to reload the extension on the extensions page (just like we did before).
Manifest is a set of definitions, rules and instructions for your extension so it is applied when the extension is installed. By pressing the reload button you’re effectively reinstalling the unpacked extension.
3. Background scripts can be reloaded automatically, but we’ll cover it later.
Make the extension do stuff
At the moment we have an extension that shows the default Angular app page as a popup and other than that does absolutely nothing. Let’s change it.
First we’ll define what this extension will do:
1. It will be active only on sites under google.com domain
2. It will contain a color picker
3. It will change the background color of a page to the selected color upon pressing a button
Activate extension only on certain sites
Up until now we were using browser_action with no background or content scripts. Let’s recall what a browser_action is:
Use browser actions to put icons in the main Google Chrome toolbar, to the right of the address bar. In addition to its icon, a browser action can have a tooltip, a badge, and a popup.
Since we want to show the extension on google.com sites only we will use page_action instead:
Use the chrome.pageAction API to put icons in the main Google Chrome toolbar, to the right of the address bar. Page actions represent actions that can be taken on the current page, but that aren’t applicable to all pages. Page actions appear grayed out when inactive.
What is the difference?
They are basically the same (apart from a few small features that present in browser_action only) but page_action is disabled by default for all the pages, while browser_action is enabled by default for all the pages.
We could have continued using browser_action while disabling it for all the sites that do not match google.com but the developers guide makes it explicit:
Don’t* use browser actions for features that make sense for only a few pages. Use page actions instead.*
So let’s switch to page_action :
{
    "name": "Great Example",
    "version": "1.0",
    "description": "Build an Extension with Angular",
    "manifest_version": 2,
    "page_action": {
        "default_popup": "index.html"
    }
}
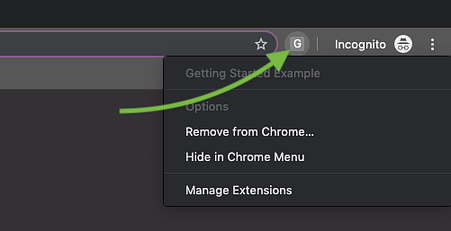
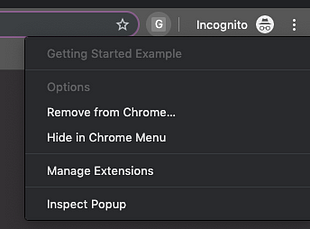
Reload the extension (remember, you changed the manifest?) and now it should be disabled for all the sites.
The icon is grayed out and when you press on it you only have a few options that you normally would receive upon right click:
Now it’s time to enable it for google.com sites.
The Background Script
To remind you, background script is:
the extension’s event handler; it contains listeners for browser events that are important to the extension.
In our case we would like to listen to web navigation completed event, do the URL matching and enable the extension if there is a match.
1. Install the types for Chrome API: npm i -D @types/chrome
2. Add chrome to types entry in tsconfig.app.json
3. Create a file called background.ts in the src/ folder:
chrome.runtime.onInstalled.addListener(() => {
  chrome.webNavigation.onCompleted.addListener(() => {
    chrome.tabs.query({ active: true, currentWindow: true }, ([{ id }]) => {
      chrome.pageAction.show(id);
    });
  }, { url: [{ urlMatches: 'google.com' }] });
});
Chrome APIs are mostly asynchronous so this is what happens here:
1. We add a listener that once the extension is installed will…
2. …add a listener that once a user goes to any URL that contains google.com will…
3. …query the open tabs to pick an active one and once there is an answer will…
4. …activate the page action on this tab
Now let’s run ng build .
Did it compile the background script? Obviously no. The script just hangs somewhere, it is not referenced from anywhere and there is no way for Angular CLI to actually know that this script exists.
We need to integrate the background script into the build process.
Compiling background script as part of Angular build
Since the background scripts run in a context different than the extension’s popup we cannot just add it to the scripts section in angular.json .
Anything that’s in scripts section is compiled by Angular CLI into scripts chunk and loaded by index.html (a popup context in our case).
This is also the reason we can’t just import the background script in main.ts or any other file that is compiled as part of popup build.
What we can do is creating another entry for background script in Webpack build that Angular CLI runs behind the scenes.
For that purpose we’ll use Custom Webpack Builder:
1. Install it: npm i -D @angular-builders/custom-webpack
2. Update angular.json :
"projects": {
  "angular-chrome-extension": {
    ...
    "architect": {
      "build": {
        "builder": "@angular-builders/custom-webpack:browser",
        "options": {
          "customWebpackConfig": {
            "path": "./custom-webpack.config.js"
          }
          ...
        },
        ...
- In the root of your workspace create a file called *custom-webpack.config.js *with the following content:
module.exports = {
    entry: { background: 'src/background.ts' },
}
- Run ng build .
You should see it in the output now (and also in dist/ directory):

Now we need to make Chrome aware of this background script. We also need to grant some permissions to our extension. Update your manifest.json :
{
    "name": "Great Extension",
    "version": "1.0",
    "description": "Build an Extension with Angular",
    "manifest_version": 2,
    "permissions": [
        "activeTab",
        "webNavigation"
    ],
    "background": {
        "scripts": [
            "background.js"
        ]
    },
    "page_action": {
        "default_popup": "index.html"
    }
}
If you reload the extension now and go to http://google.com you’ll still see it’s inactive. If you dig a bit into it you’ll see that the background script is being loaded but it is not being executed. And there is a reason for that.
Let’s take a look at the compiled version of our background.ts :
(window["webpackJsonp"] = window["webpackJsonp"] || []).push([["background"],{
  "./src/background.ts": (function(module, exports) {
    chrome.runtime.onInstalled.addListener(() => {
      // Blah blah the rest of our code
    });
  })
},[["./src/background.ts","runtime"]]]);
As you can see our code is being pushed into webpackJsonp array as part of a dictionary that maps paths to actual code. But no one invokes it.
So yes, the script is being loaded but nothing happens, because no one actually runs the code.
Angular (Webpack) puts the code that is responsible for chunks execution in a separate chunk called runtime . This is the missing part that we need to add to the manifest:
{
    "name": "Great Extension",
    ...
    "background": {
        "scripts": [
            "background.js",
            "runtime.js"
        ]
    },
    ...
}
You can read more about webpackJsonp and Webpack runtime in this post.
Reload the extension, go to http://google.com and you’re back to see this beautiful picture:
Background page live reload? Who said live reload?
Currently the background script behaves much like the manifest — it is reloaded only when you reload the extension.
However, unlike the manifest (that is updated rarely after the initial phase of development) it contains significant part of our code and is updated quite often during the development.
And believe me, it is very annoying to go to Extensions page and press Reload button every time you change a name of a variable in the background script.
So what can be done here? Since we’ve already incorporated Custom Webpack Builder in our build chain we can benefit from it a bit more.
There is a webpack-extension-reloader plugin that does exactly what we want. It augments background script code with code that listens to the changes of the chunks and when there was a change in the background chunk it tells Chrome to reload the extension.
We want this augmentation only during development so let’s create another webpack config that will make use of our initial configuration and add webpack-extension-reloder plugin on top of it:
1. Install extension reloader plugin: npm i -D webpack-extension-reloader
2. Create a file named custom-webpack-dev.config.js in the root of your workspace:
const ExtensionReloader = require('webpack-extension-reloader')
const config = require('./custom-webpack.config');

module.exports = {...config,
    mode: 'development',
    plugins: [new ExtensionReloader({
        reloadPage: true,
        entries: {
            background: 'background'
        }
    })]
}
Refer to the plugin’s README for detailed API description
- Add dev configuration to angular.json :
    ...
      "architect": {
        "build": {
          ...
          "configurations": {
            "dev": {
              "customWebpackConfig": {
                "path": "./custom-webpack-dev.config.js"
              }
            },
            "production": {
          ...
Let’s make sure it works:
1. Run the build with this config: ng build --watch --configuration=dev
2. Reload the extension (the old background script still lacks the live reload code, so you have to do it one last time)
3. Navigate to http://google.com
4. See page action enabled
5. Go to background.ts and change the URL match pattern to blahblah
6. Navigate to http://google.com
7. See page action disabled
ACTIVE ONLY ON CERTAIN SITES — CHECK
Side note: we could have written the background script in JavaScript instead of TypeScript and add it to the assets just like we did with manifest.json but it is not recommended as it diversifies your code. You also loose the live reload ability which is a dealbreaker for me.
Side note 2: everything that we’ve done here for background script (including building it with ng build , live reload etc.) is applicable to content script as well.
Adding color picker
This will be an easy one. We will use ngx-color-picker component.
1. Install ngx-color-picker: npm i ngx-color-picker
2. Add ColorPickerModule to imports in app.module.ts:
import { BrowserModule } from '@angular/platform-browser';
import { NgModule } from '@angular/core';
import { ColorPickerModule } from 'ngx-color-picker';

import { AppComponent } from './app.component';

@NgModule({
  declarations: [
    AppComponent
  ],
  imports: [
    BrowserModule,
    ColorPickerModule
  ],
  providers: [],
  bootstrap: [AppComponent]
})
export class AppModule { }
- Add
colorproperty toapp.component.ts:
export class AppComponent {
  color: string;
  constructor() { }
}
- Replace default Angular content with color picker in app.component.html :
<span [style.color]="color"
  [cpToggle]="true"
  [cpDialogDisplay]="'inline'"
  [cpPositionRelativeToArrow]="true"
  [(colorPicker)]="color"
  [cpOKButtonText]="'Apply'"
  [cpOKButton]="true">
</span>
Refer to the color picker README for detailed API description
- If you don’t want the white frame around the color picker remove the margins from body in styles.scss:
body {
    margin: 0;
}
- Open the popup and behold:
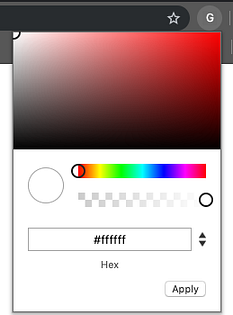
ADD COLOR PICKER — CHECK
But currently it doesn’t do anything. Which brings us to the next (and the last) bullet.
Change the background color of a page
Now that we have all the tools in place we want to actually apply the picked color to the site background.
Let’s do that:
1. Add colorize method to app.component.ts :
export class AppComponent {
  color: string;

  constructor() { }

  public colorize() {
    chrome.tabs.query({ active: true, currentWindow: true }, tabs => {
      chrome.tabs.executeScript(
        tabs[0].id,
        { code: 'document.body.style.backgroundColor = "' + this.color + '";' }
      );
    });
  }
}
We’re using tabs API again — select an active tab and execute programmatically injected content script on this page.
- Bind the method to colorPickerSelect event (called upon Apply button pressed):
<span [style.color]="color"
  [cpToggle]="true"
  [cpDialogDisplay]="'inline'"
  [cpPositionRelativeToArrow]="true"
  [(colorPicker)]="color"
  [cpOKButtonText]="'Apply'"
  [cpOKButton]="true"
  (colorPickerSelect)="colorize()">
</span>
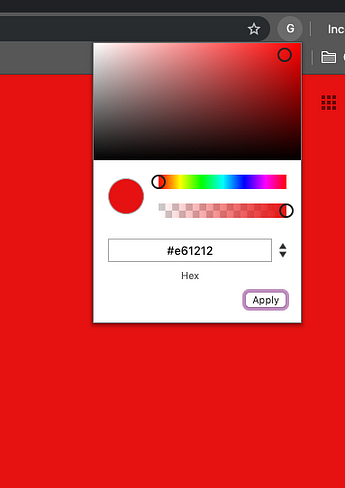
- Open the popup, select a color and press Apply. Gee, did it actually work?!
Bonus: saving the last selected color
To make things neater we’d want to save the last selected color and select it next time we open the popup.
For this we’ll need a few things:
1. Add storage permission to the manifest and reload the extension:
{
    "name": "Great Extension",
    "version": "1.0",
    "description": "Build an Extension with Angular",
    "manifest_version": 2,
    "permissions": [
        "activeTab",
        "webNavigation",
        "storage"
    ],
    "background": {
        "scripts": [
            "background.js",
            "runtime.js"
        ]
    },
    "page_action": {
        "default_popup": "index.html"
    }
}
- Add
updateColormethod to *app.component.ts *and bind it tocolorPickerChangeevent:
<span [style.color]="color"
  [cpToggle]="true"
  [cpDialogDisplay]="'inline'"
  [cpPositionRelativeToArrow]="true"
  [(colorPicker)]="color"
  [cpOKButtonText]="'Apply'"
  [cpOKButton]="true"
  (colorPickerChange)="updateColor($event)"
  (colorPickerSelect)="colorize()">
</span>
export class AppComponent implements OnInit {
  color: string;
  ...
  public updateColor(color: string) {
    chrome.storage.sync.set({ color});
  }
  ...
}
- Set initial color from the storage once the popup is created:
 ngOnInit(): void {
    chrome.storage.sync.get('color', ({ color }) => {
      this.color = color;
    });
  }
- Optional: set a default color in background script:
chrome.runtime.onInstalled.addListener(() => {
  chrome.storage.sync.set({ color: '#3aa757' });

  chrome.webNavigation.onCompleted.addListener(() => {
    chrome.tabs.query({ active: true, currentWindow: true }, ([{ id }]) => {
      chrome.pageAction.show(id);
    });
  }, { url: [{ urlMatches: 'google.com' }] });
});
Finishing words
While most of the extension do not have a complicated UI, there are some of them, such as Checker Plus or 1PasswordX, that have quite a complicated UI.
These extensions would be easier to build and maintain using one of the popular web frameworks, among them Angular.
I hope this article gives you all the necessary tools and understanding for developing a Chrome Extension with Angular in convenient and efficient way.
All the sources are available on Github. For your convenience each commit represents a step in this tutorial so that if you’re stuck you could just check out the corresponding commit.
Today we’re going to explore the process of developing a Chrome extension with Angular.
We will be starting from scratch with ng new and finishing with fully functional Chrome extension, convenient dev environment and hopefully decent understanding of how it works.
But first let’s clear out one thing…
Thanks for reading :heart: If you liked this post, share it with all of your programming buddies! Follow me on Facebook | Twitter
#angular #web-development
