Learn how to build an App with Vuejs and Golang
I know, these two aren’t popular to be used along with each other. But, let’s try…
Background
Okay so first, let’s talk about the features these technologies provide.
Golang
- Binaries — The binaries are generated with all the dependencies built-in. Thus, you need not to install the runtimes to run the application.
- Static typing — The compiler takes care of the code when you are writing it and not only compile it. The type conversions and compatibility etc are taken care of.
- Concurrency — The best feature of Golang is that it has first-class support of concurrency built itself in the language.
- Standard library — The standard library is powerful enough that you mostly won’t need 3rd party libraries.
Vuejs
- Size — After gzipping it weighs only 18kB as compared to the minified jQuery which sizes to 29kB after gzipping.
- Readability — The code and syntax of Vuejs is very clear and simple.
- Documentation — It has thorough documentation which makes it fast and easy to learn.
- Reactivity — The data binding between HTML and Javascript is very fluid.
- Vue CLI 3 — It offers a lot of features that makes developers life easy. Just try it and you’ll love it.
Golang and Vuejs both are fast during runtime. Thus, making them work with each other provide a fast single page application.
Ok, let’s start.
Setting up directories
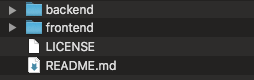
First, set up your directories like below. “LICENSE” and “README.md” for Git.
Now, in backend directory create a file server.go

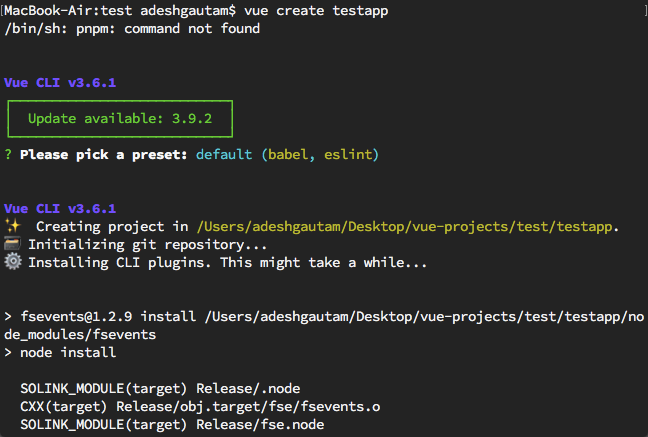
For frontend, type the following in the terminal to create a new app Calculator,
vue create calculator
It will ask you to choose a preset. Choose the default one (babel, eslint).
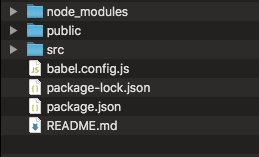
Now this will be the folder structure.
The skeleton is ready!
Now, let’s see what we are going to build. It’s not a fancy app but will help you get started to build complex apps.
We are going to build a calculator in which you will enter two numbers, they will be grabbed by Vue frontend and sent to the Golang server using a POST request. The server will compute addition, multiplication, subtraction and division and send back the results using a POST request. The frontend will then render the results.
Build the backend
Golang is fast and the reason for it is the compiler, which doesn’t let you declare variables unless you use them. If you declare something or import any package you will have to use it. It is very strict about it. And also whatever you are going to do you have to tell the compiler beforehand like: if you want to grab the POST data, you have to declare the structure of the JSON data beforehand. This is a little tricky but worth the speed.
Coming to the code.
So, we’ll use the encoding/json and net/http packages. Then, we’ll declare the structures for the JSON data.
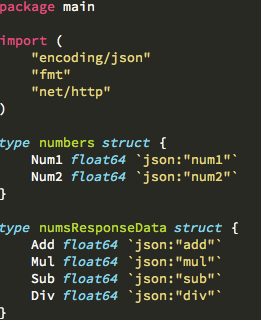
packages and the JSON data structures
Now, we’ll write a simple function to do the calculations. Here, we need to specify the return type explicitly.
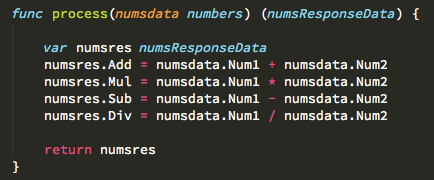
process function
We need to write a function which will be called when we have to process the JSON data coming to the backend using POST request.
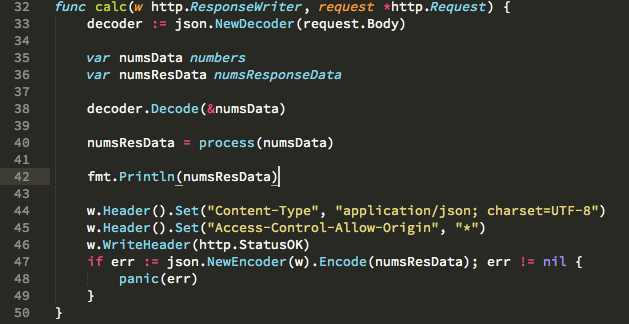
On line 33, we are declaring a JSON decoder to decode the incoming JSON data from therequest's body.
numsData and numsResData are the declared structures.
The incoming data is stored in numsData and is decoded on line 38.
Then we set up the ResponseWriter’s headers and then send the JSON response on line 47 and check for errors.
At last, the main function. Here we can define the HTTP routing. For every URL the respective function can be defined like on line 53. The backend server will run on PORT 8090.

The complete code is below:
package main

import (
	"encoding/json"
	"fmt"
	"net/http"
)

type numbers struct {
	Num1 float64 `json:"num1"`
	Num2 float64 `json:"num2"`
}

type numsResponseData struct {
	Add float64 `json:"add"`
	Mul float64 `json:"mul"`
	Sub float64 `json:"sub"`
	Div float64 `json:"div"`
}

func process(numsdata numbers) (numsResponseData) {

	var numsres numsResponseData
	numsres.Add = numsdata.Num1 + numsdata.Num2
	numsres.Mul = numsdata.Num1 * numsdata.Num2
	numsres.Sub = numsdata.Num1 - numsdata.Num2
	numsres.Div = numsdata.Num1 / numsdata.Num2

	return numsres
}

func calc(w http.ResponseWriter, request *http.Request) {
	decoder := json.NewDecoder(request.Body)

	var numsData numbers
	var numsResData numsResponseData

	decoder.Decode(&numsData)

	numsResData = process(numsData)

	fmt.Println(numsResData)

	w.Header().Set("Content-Type", "application/json; charset=UTF-8")
	w.Header().Set("Access-Control-Allow-Origin", "*")
    w.WriteHeader(http.StatusOK)
    if err := json.NewEncoder(w).Encode(numsResData); err != nil {
        panic(err)
    }
}

func main() {
	http.HandleFunc("/", calc)
	http.ListenAndServe(":8090", nil)
}
Now let’s build the frontend
First cd into the frontend directory and install the dependencies using the below command.
npm install --save bootstrap-vue bootstrap axios vee-validate
We’ll use axios for handling POST requests, vee-validate for validating the input form data and, bootstrap-vue for pretty interfaces.
In src/Calculator.vue we have to write the frontend part.

From line 17 to 25, we are defining the input boxes and labels to get the data.v-model is used to get the data in Vue.
The lines 30–35 define the UI for displaying the calculations and on line 43 a button, which will trigger the postreq() function which we will be defining next.
In the script tag, we write the javascript. First, we’ll import the requirements.
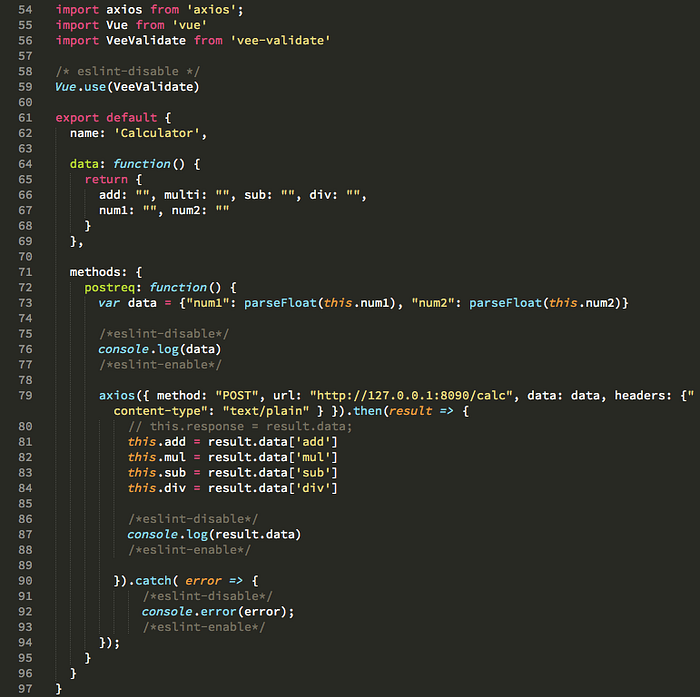
writing scripts tag
Lines 54–59 are the necessary stuff, importing axios and vee-validate.
Then, we’ll define the variables which we’ll use on lines 64–69. The data variable stores all the variables for the Calculator component.
In methods, all the functions are defined. We created postreq() function from where we are sending the POST request with JSON data to the url:<a href="http://localhost:8090/calc" target="_blank">http://localhost:8090/calc</a> . Remember the calc function we created in server.go file? We are sending the JSON data there. After the data is sent, the response from the backend is stored in the result variable, from which we set the add, mul, sub and div variables which are binded to the HTML using {{ add }} etc. to show the result.
<template>
<div class="hello">
<!-- <h1>{{ msg }}</h1> -->
<div>
<h1 class="title">Calculator</h1>
</div>
<hr>
<div>
<b-container fluid>
<b-row class="text-center">
<b-col cols="2" class="text-center"></b-col>
<b-col cols="4" class="text-center">
<form>
<div class="field">
<label class="label">First Number</label>
<b-form-input name="num1" v-model="num1" v-validate="'required|digits'" class="input" type="text"></b-form-input>
</div>
<div class="field" style="margin-top:13px;">
<label class="label">Second Number</label>
<b-form-input name="num2" v-model="num2" class="input" v-validate="'required|digits'" type="text"></b-form-input>
</div>
</form>
</b-col>
<b-col cols="4" class="text-left">
<div><label class="label">Addition: {{ add }}</label></div>
<div><label class="label">Multiplication: {{ mul }}</label></div>
<div><label class="label">Subtraction: {{ sub }}</label></div>
<div><label class="label">Division: {{ div }}</label></div>
</b-col>
</b-row>
</b-container>
</div>
<div>
<b-button variant="primary" v-on:click="postreq()">Calculate</b-button>
</div>
<hr>
</div>
</template>
<script>
import axios from 'axios';
import Vue from 'vue'
import VeeValidate from 'vee-validate'
/* eslint-disable */
Vue.use(VeeValidate)
export default {
name: 'Calculator',
data: function() {
return {
add: "", multi: "", sub: "", div: "",
num1: "", num2: ""
}
},
methods: {
postreq: function() {
var data = {"num1": parseFloat(this.num1), "num2": parseFloat(this.num2)}
/*eslint-disable*/
console.log(data)
/*eslint-enable*/
axios({ method: "POST", url: "http://127.0.0.1:8090/calc", data: data, headers: {"content-type": "text/plain" } }).then(result => {
// this.response = result.data;
this.add = result.data['add']
this.mul = result.data['mul']
this.sub = result.data['sub']
this.div = result.data['div']
/*eslint-disable*/
console.log(result.data)
/*eslint-enable*/
}).catch( error => {
/*eslint-disable*/
console.error(error);
/*eslint-enable*/
});
}
}
}
</script>
<!-- Add "scoped" attribute to limit CSS to this component only -->
<style scoped>
h3 {
margin: 40px 0 0;
}
ul {
list-style-type: none;
padding: 0;
}
li {
display: inline-block;
margin: 0 10px;
}
a {
color: #42b983;
}
</style>
Pretty simple huh? Yes, it is!
And that’s all we need to do. Just remember the points.
- Write the server logic in Golang which will run on a separate PORT.
- Build structures to hold the JSON data. You just can’t store them right away in a variable.
- The Vuejs frontend will communicate to the server using API calls using GET or POST requests.
Run the App
The backend server can be run using
go run server.go
It will run on PORT 8090.
The frontend can be run using
npm run serve
Congratulations !!! Your app is ready.
The whole code is available on the Github repo.
Also, checkout an app Rocket Engine Designer, I built using Vuejs and Golang here.
Thanks for reading ❤
If you liked this post, share it with all of your programming buddies!
Follow us on Facebook | Twitter
#go #vue-js #web-development #javascript
