Modernize Your Azure Diagrams with Updated Shapes
The Azure shape library in draw.io has been updated. You can draw Azure architecture diagrams for your cloud infrastructure from scratch, or import .vsdx files or exported diagrams from automated infrastructure documentation apps like Cloudockit.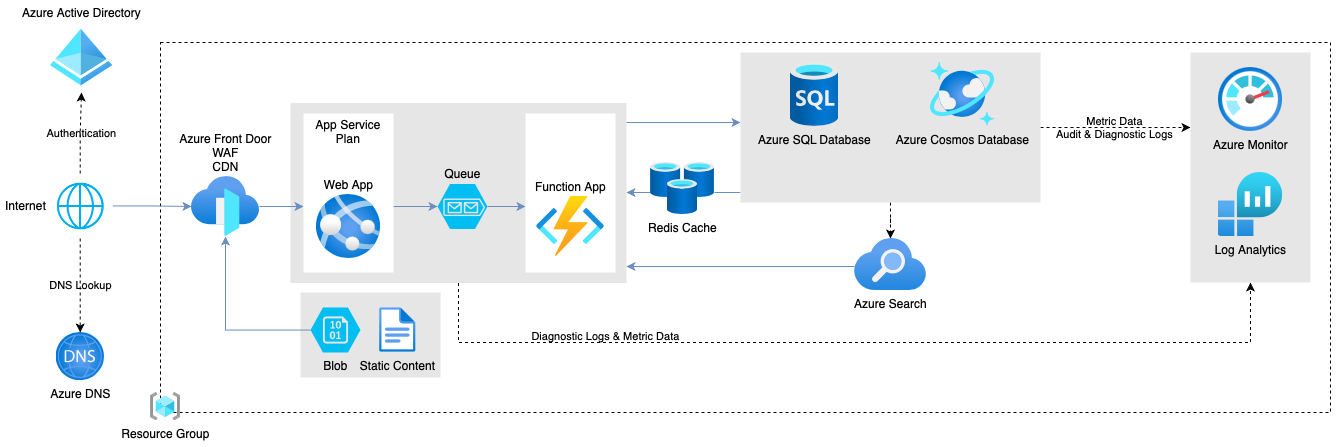
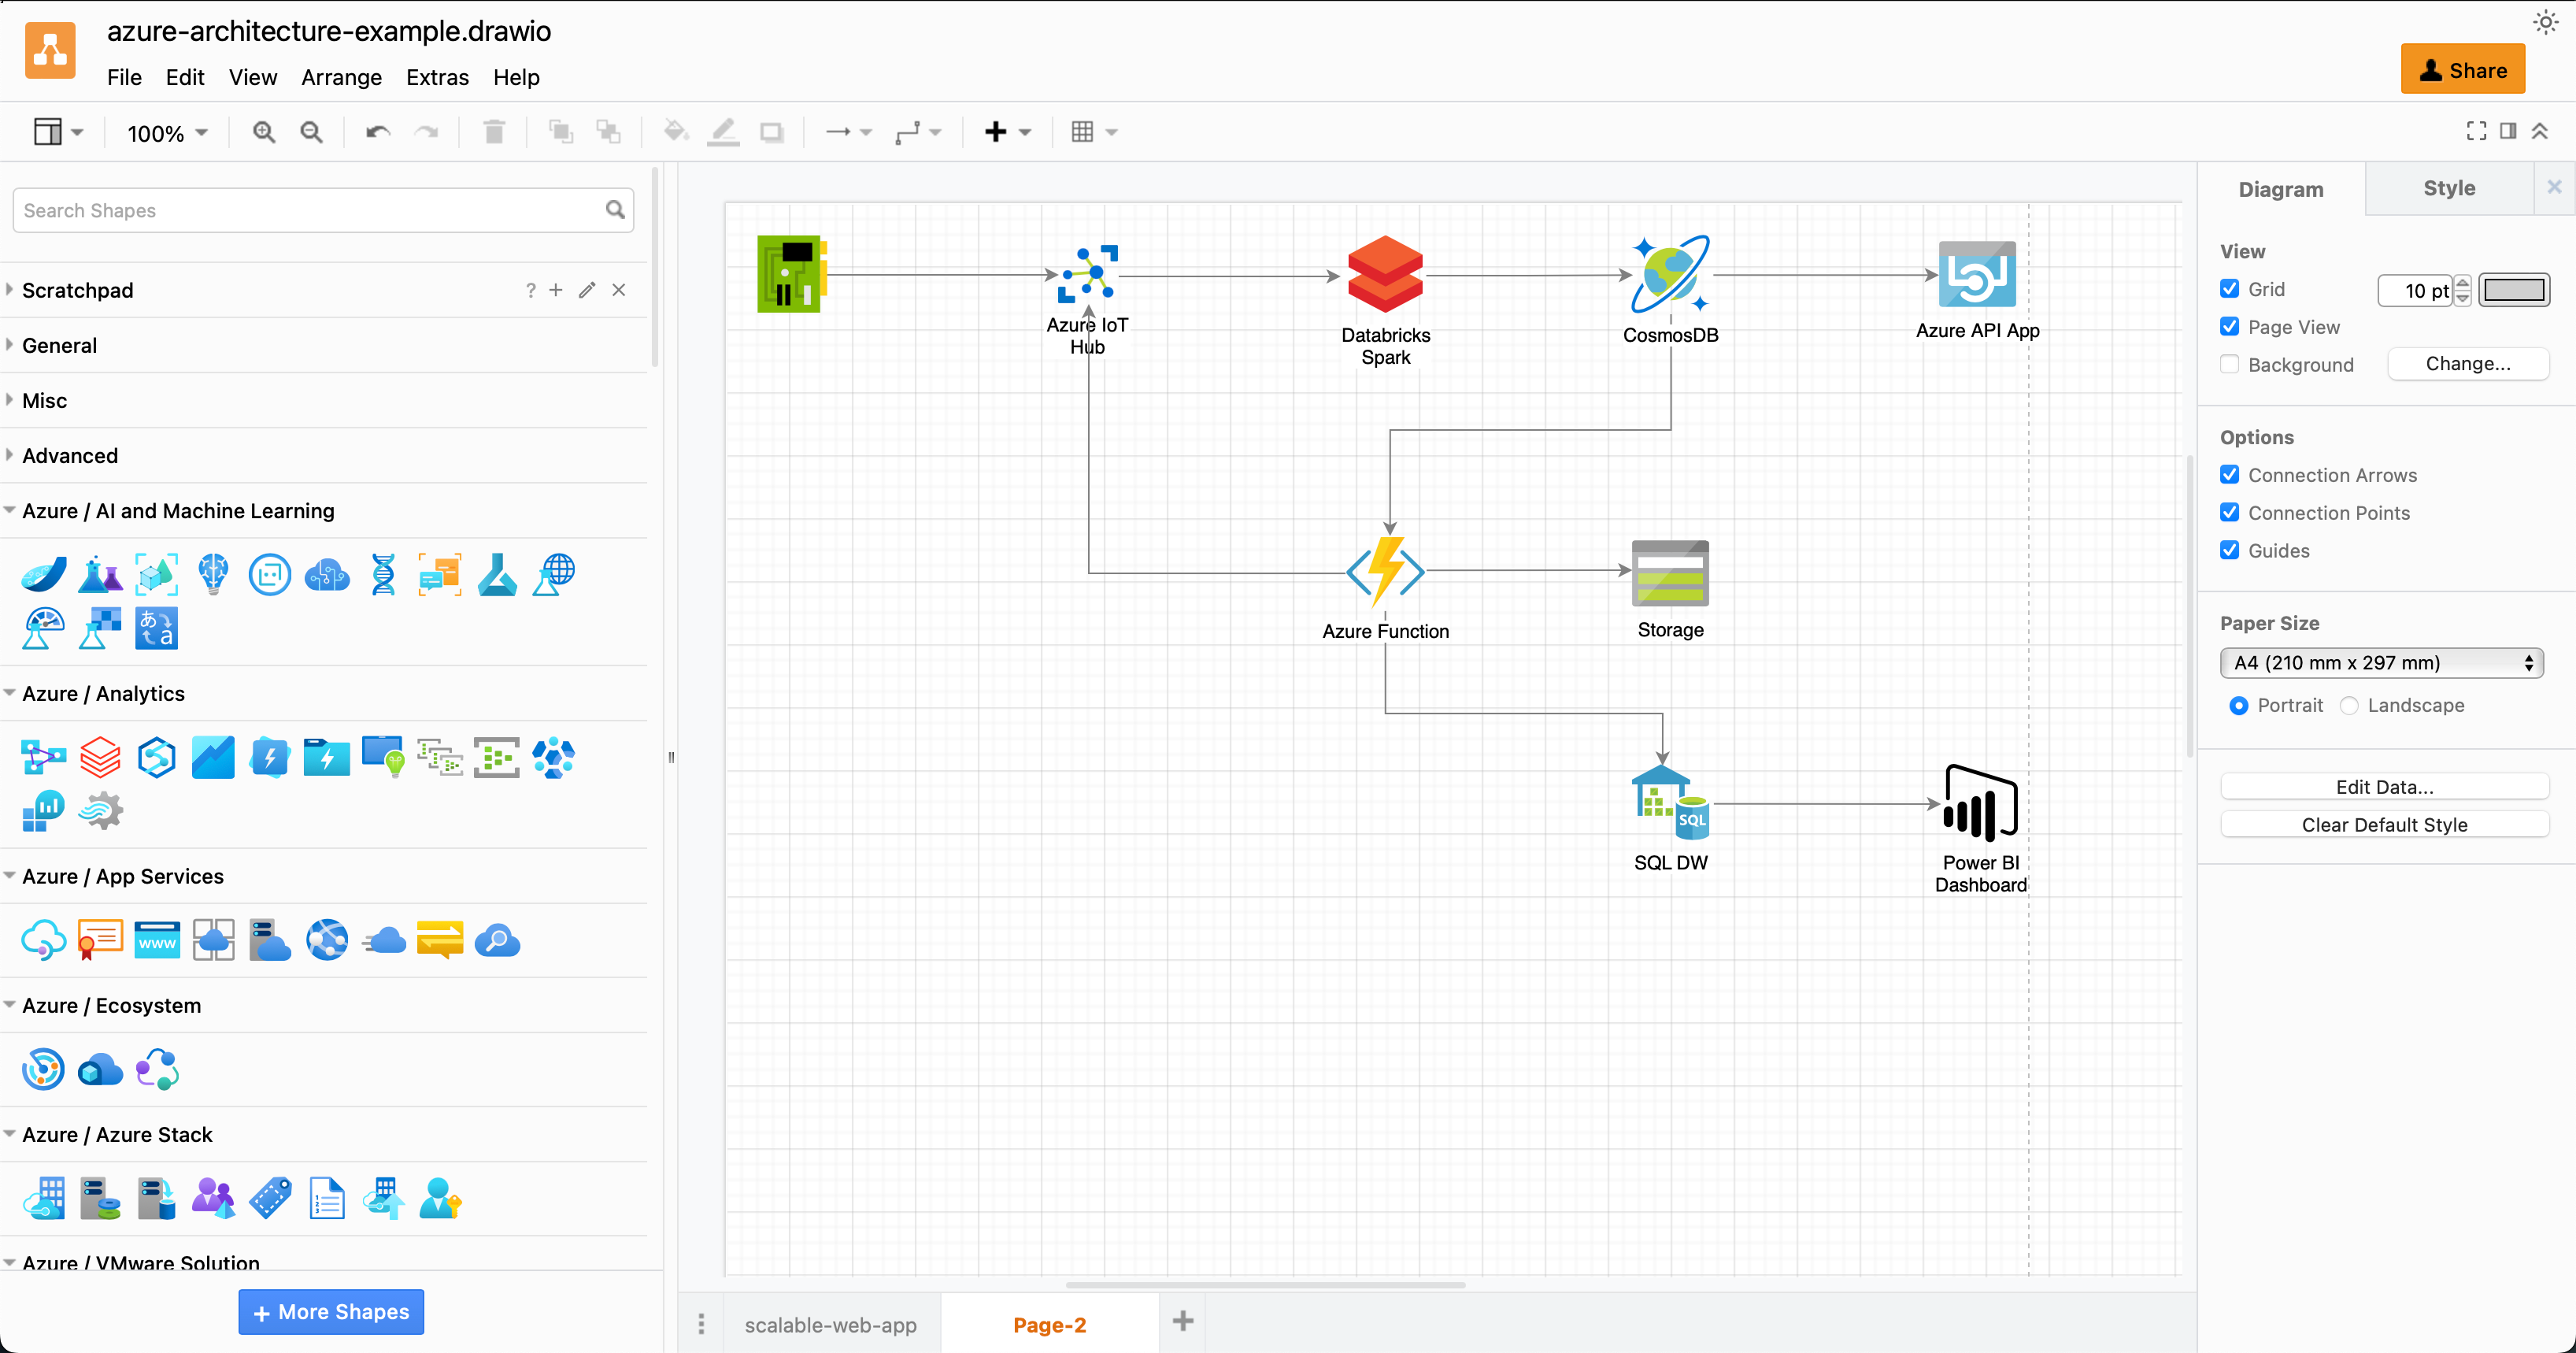
Draw Azure diagrams in logical blocks
You will likely never draw a single Azure diagram that contains all levels of detail. You can either start with the overview diagram and work from this top level down to the details, or bottom up starting with the logical blocks in your architecture.
Azure architecture overview diagram: Includes design principles and the broad choices of specific services in your subscriptions.
High-level Azure diagrams: Includes Azure services and their configuration, resource groups, virtual networks, and environments. Performance, regional service provision, availability zones, monitoring, backup and recovery services are included at this level of detail.
Low-level diagrams: These are less common, and usually document the specific details needed to implement the design and the continuous integration/continuous deployment pipelines.
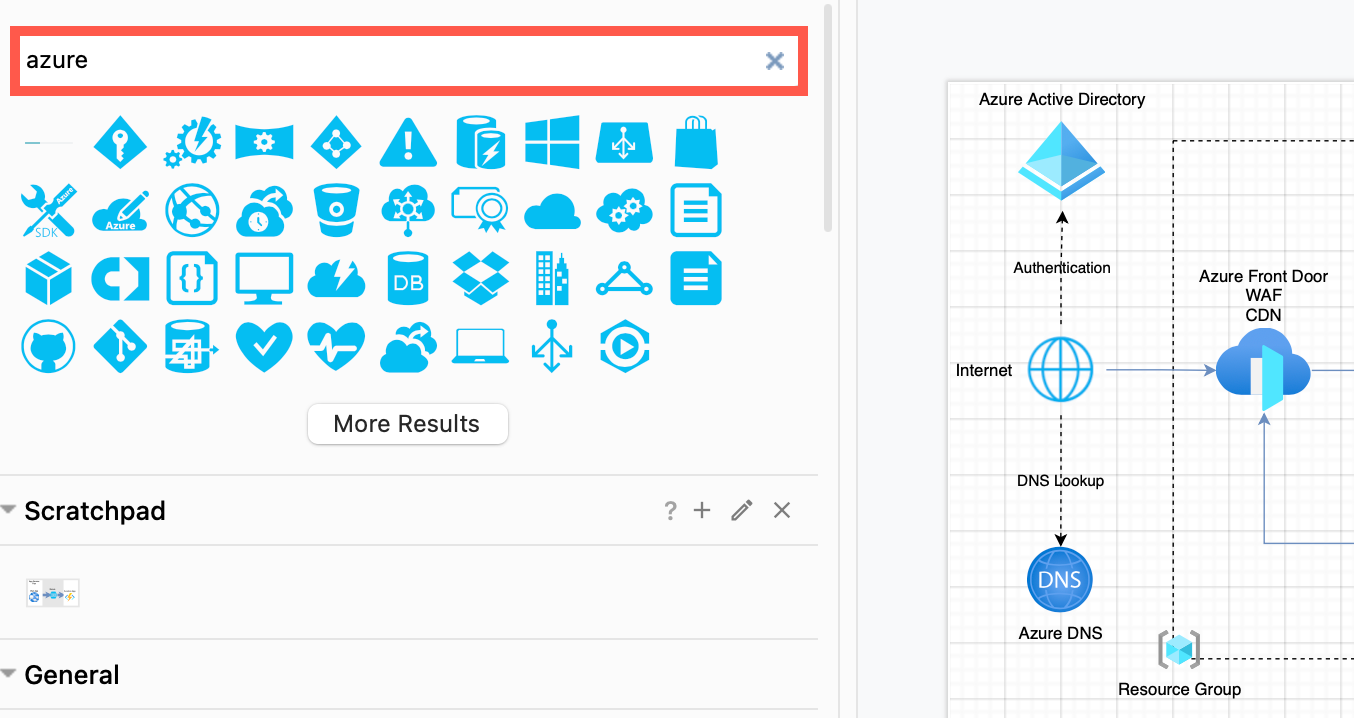
Enable the Azure shape library
- Go to our online editor or open one of the draw.io integrations or our desktop app.
- Click on More Shapes at the bottom of the left panel.
- In the Networking section, click on the checkbox to enable the Azure shape library, and click Apply.
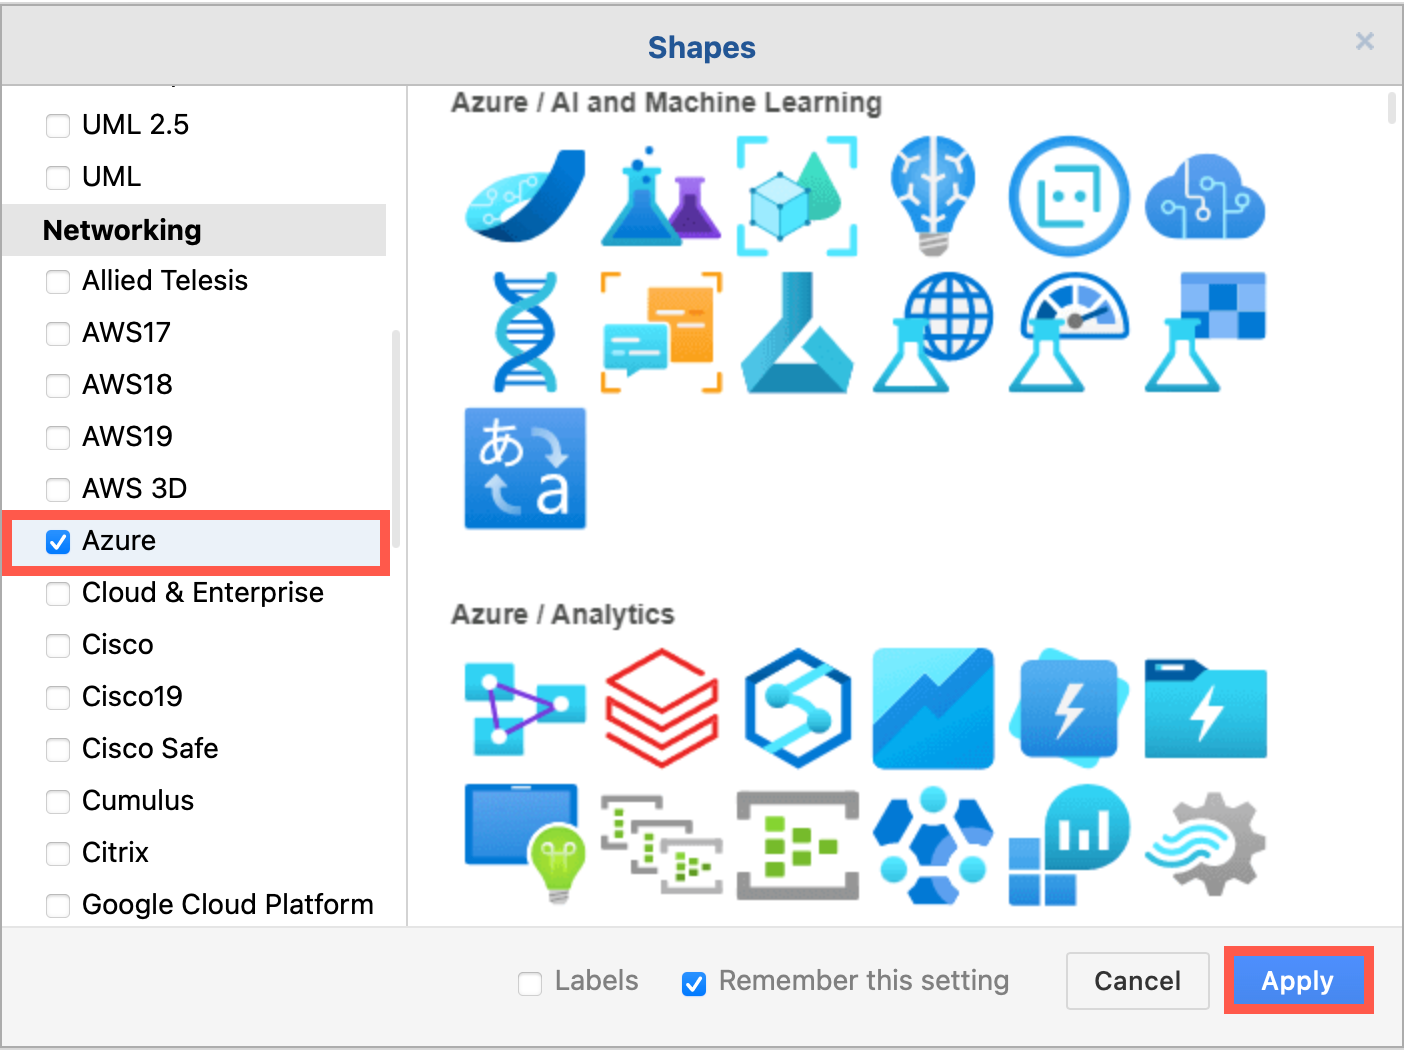
The Azure shape library will load in the left panel, with its shapes separated into categories.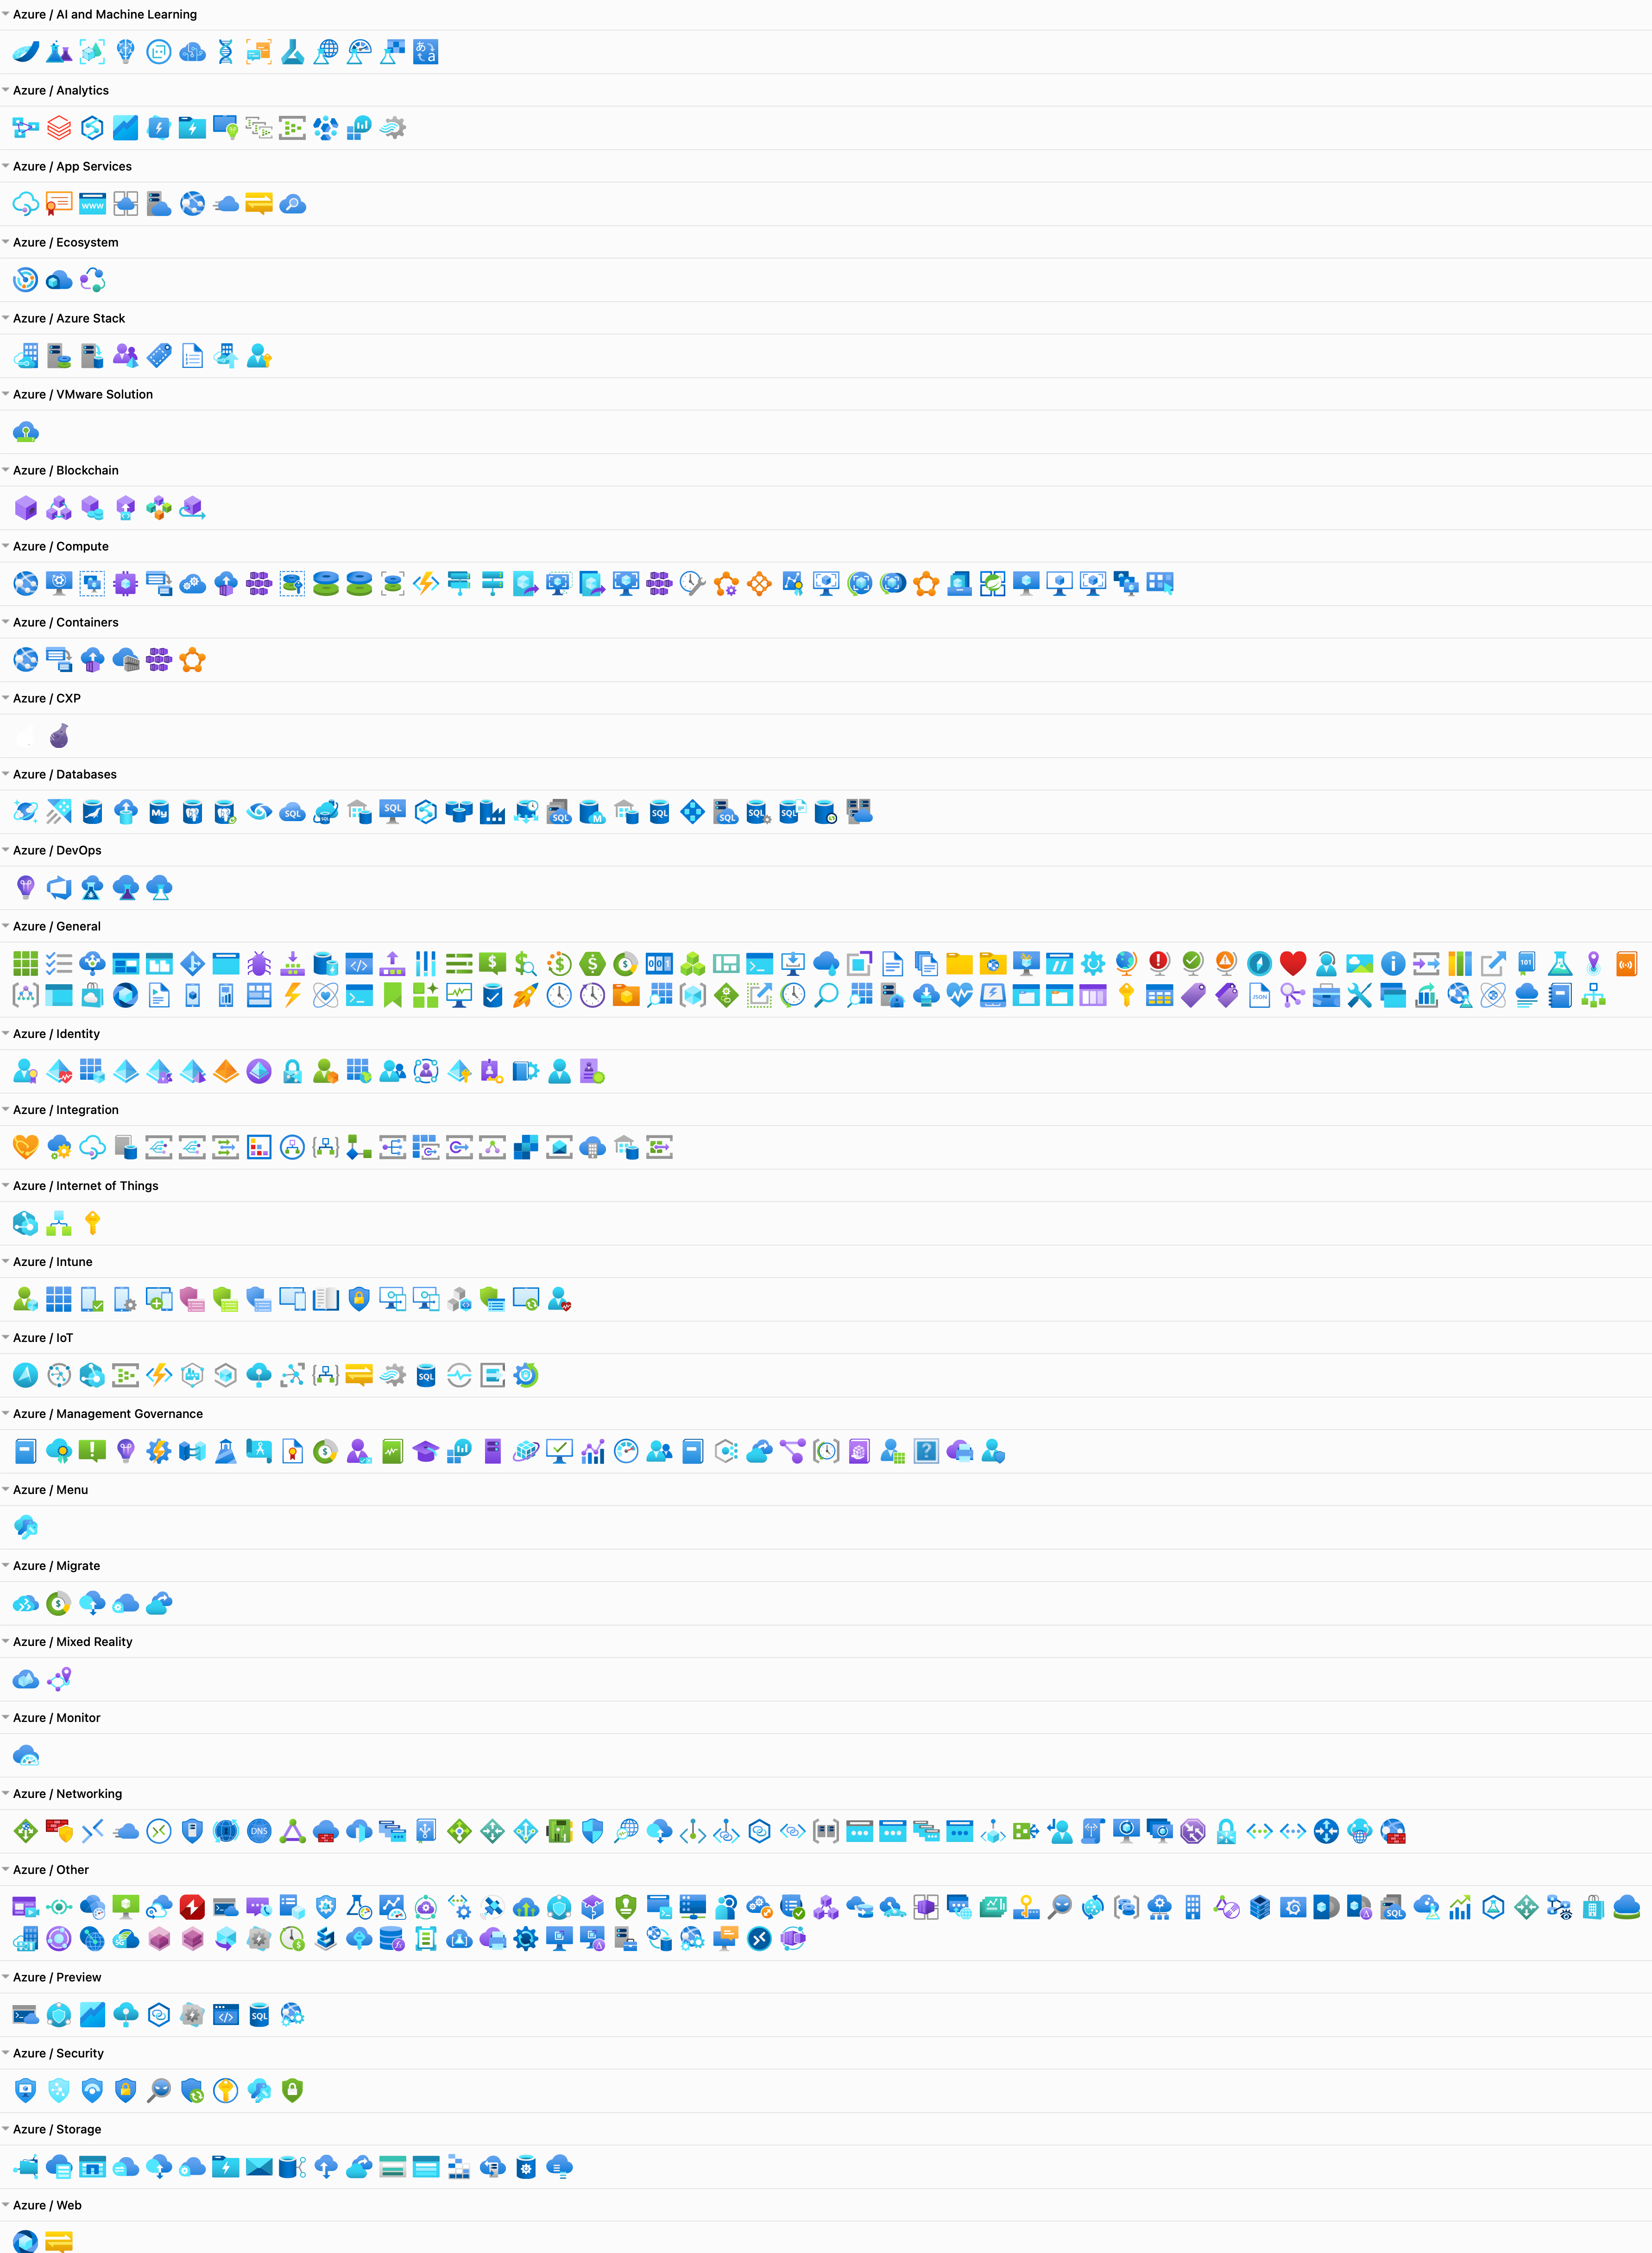
Use the scratchpad
Many Azure architectures repeat sub-sections of the architecture for backup or redundancy purposes. Instead of placing copies, you can put that sub-section into the scratchpad.
- Select all the shapes on the drawing canvas that you want to repeat.
- Drag these onto the scratchpad in the left panel.
Click on the sub-section shape in the scratchpad to add it to the drawing canvas, or drag another copy from the scratchpad into position.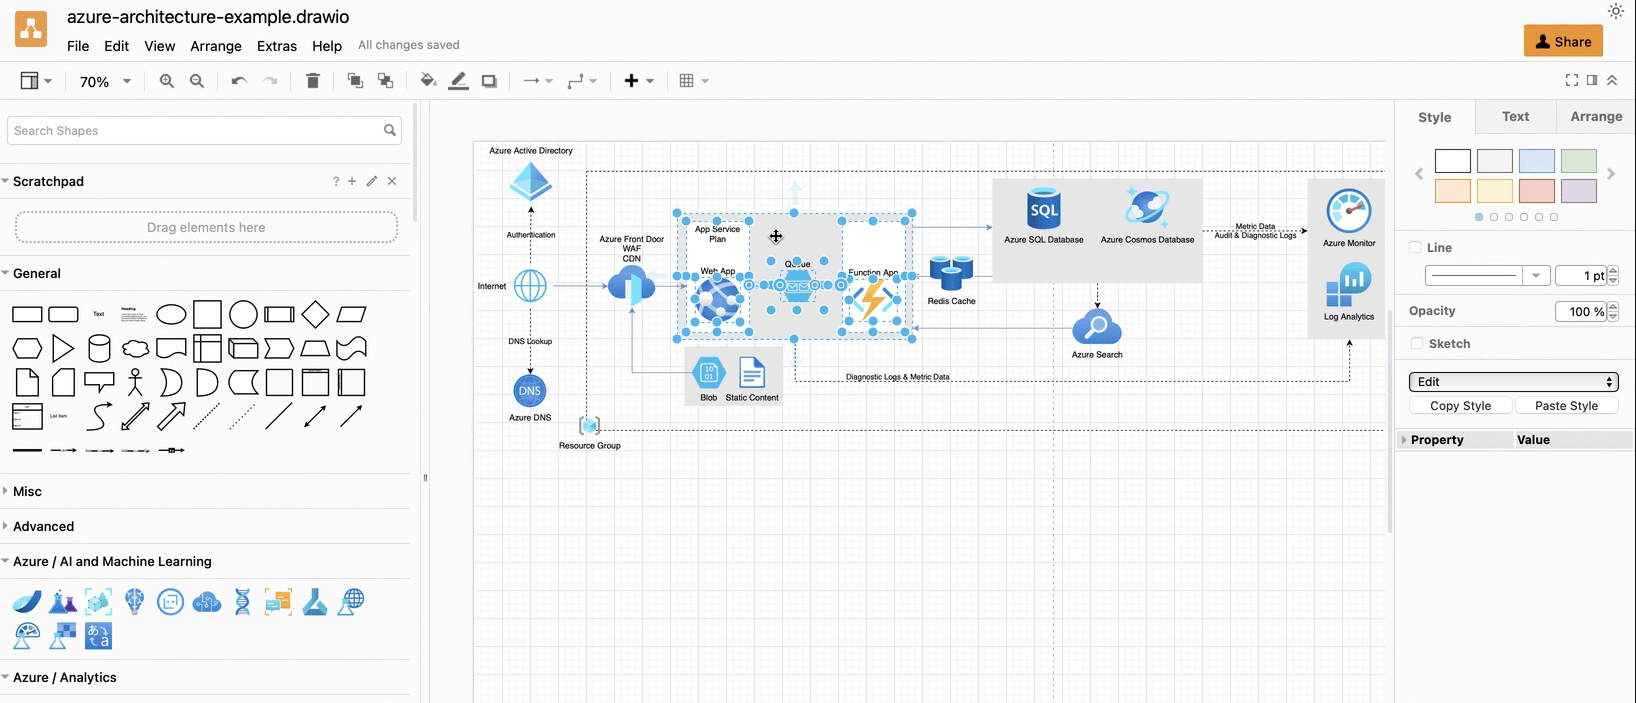
Use rectangles to indicate regions
Use rectangles from the General shape library to indicate a region. Once you’ve placed and resized a region shape, send it to the back on the Arrange tab of the format panel so that it is placed behind the Azure architecture’s shapes.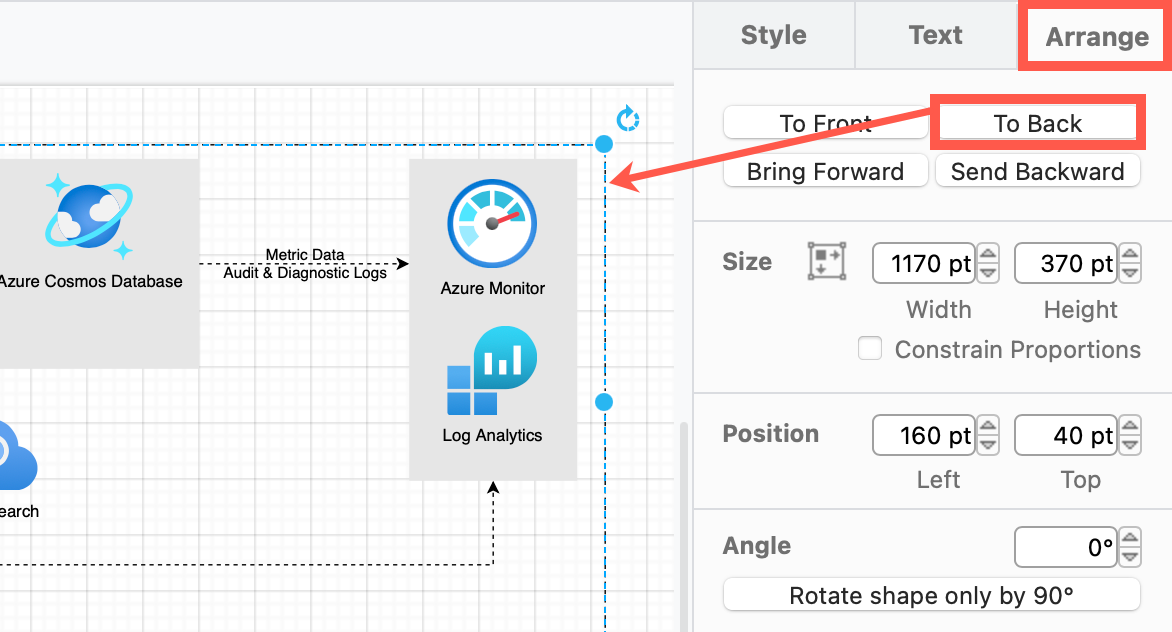
Next, update the rectangle style to separate regions in the Style tab of the format panel on the right.
Dashed outline - Change the Line of the region to Dashed using the dropdown list, and ensure the Fill checkbox is not selected to remove the background.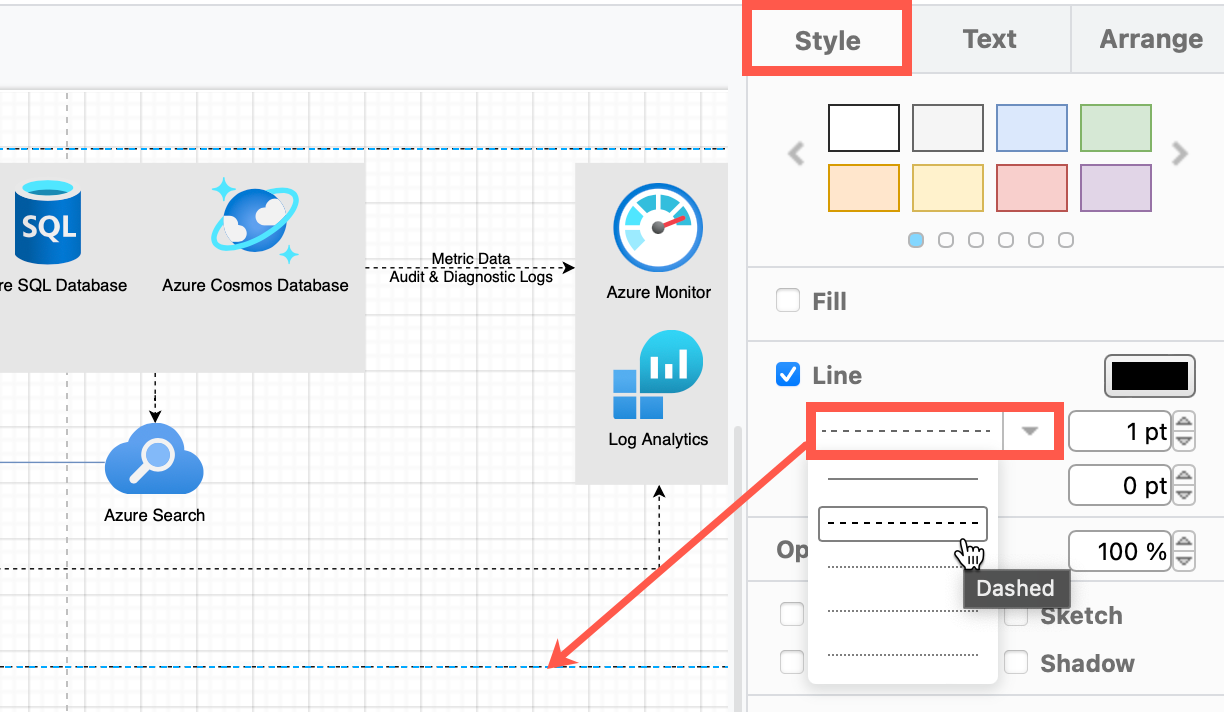
Coloured background - Click on the colour block to the right of the Fill checkbox and select a new colour from the palette. Ensure the Line checkbox is not selected or set the colour to match the fill colour.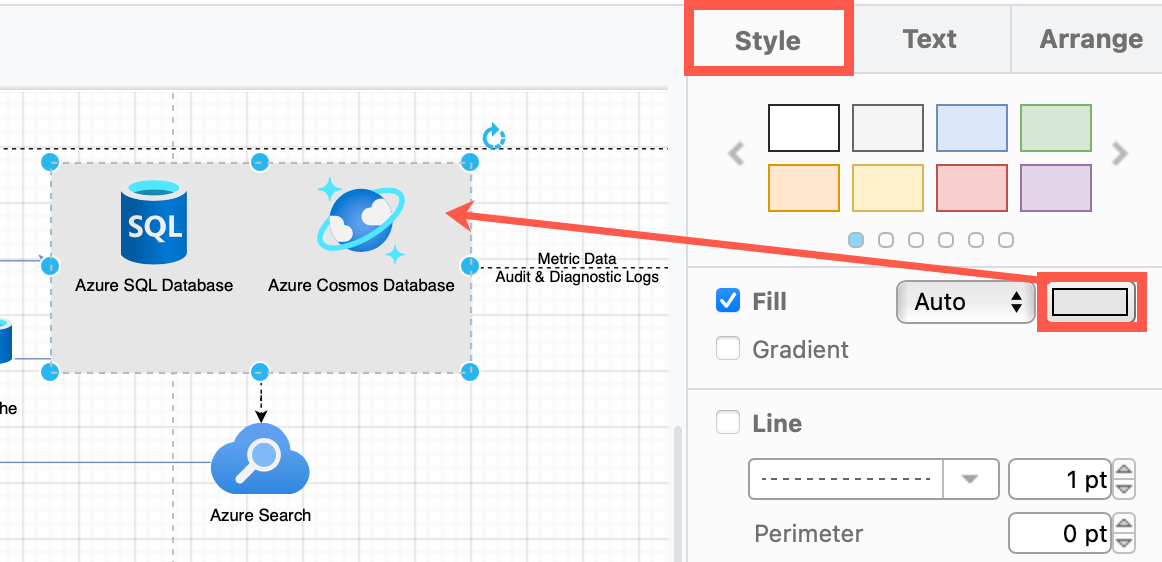
Draw connectors
Hover over any shape in the diagram to drag a connector from one of the four connection arrows, then drop it on another shape (or group of shapes) to connect the two.
Floating connectors: Floating connectors move around the perimeter of the shape intelligently as you reposition it on the drawing canvas. Drop the connector on the target shape when the outline is blue.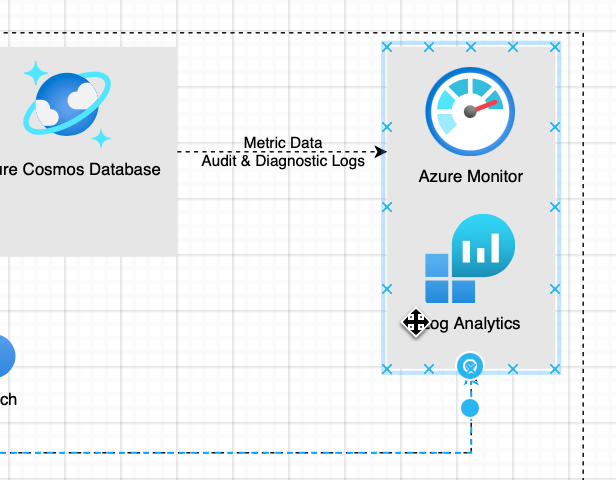
Fixed connectors: Fixed connectors remain connected to a particular point on the target shape when you reposition it. Drop the connector on a connection point (a little cross) or when the outline of the shape is green.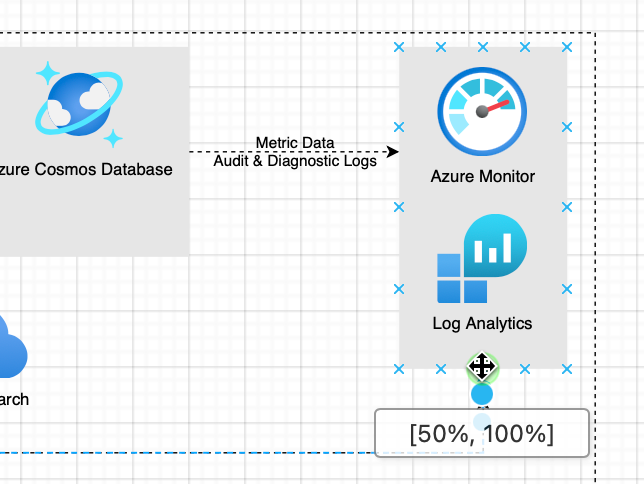
Azure architecture templates
Several Azure diagram templates are available in the template library.
- Click Arrange > Insert > Template to open the template library.
- Expand the Cloud section and select Azure to see the Azure diagram templates.
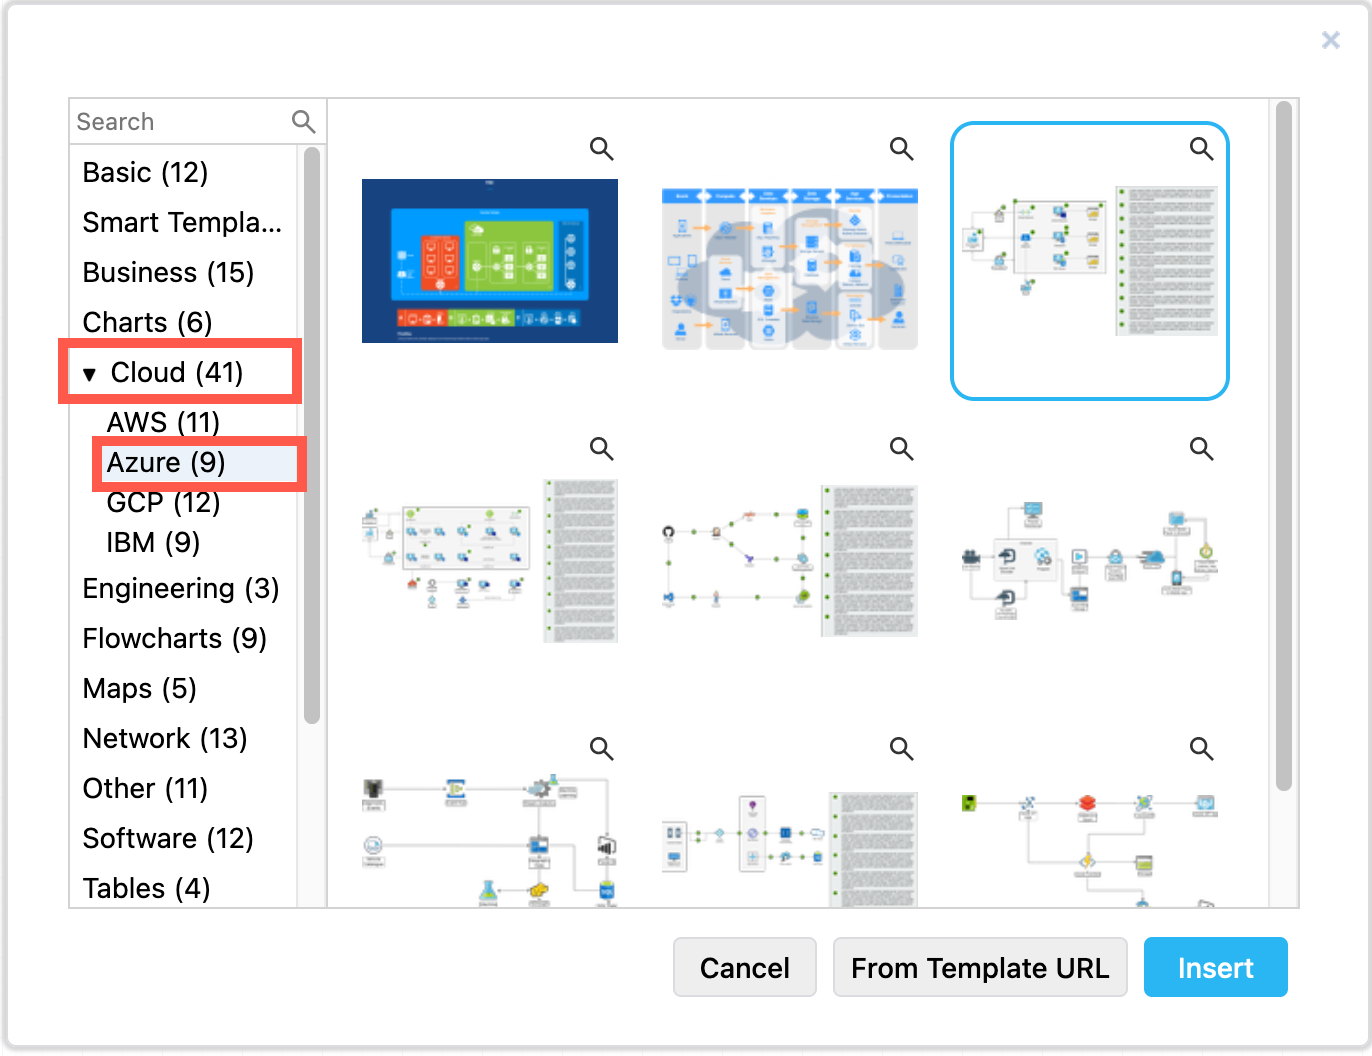
- Click on a magnifying glass in the top right of any template to see a preview.
- Select a template and click Insert to add it to the drawing canvas.
Export and embed your Azure diagram
Select File > Export as from the menu.
- Image formats: Select one of
PNG,SVG, orJPEG. - PDF: You can also crop the PDF export to the diagram size.
Tip: Make sure you select the Include a copy of my diagram in the Image export options dialog to allow those you share it with to edit it.
- This blog post was originally published at: Here
#azure #Microsoft