Docker is currently a hot topic in container-based deployment, whereas Spring Boot is the same for microservice development. Both Spring Boot and Docker together form a great combo for developing microservice-based applications. In this article, I will try to explain in very simple words
- What is Docker and what are its benefits?
- What Spring Boot is and how to create a simple Spring Boot application.
- Hosting the Spring Boot application in a Docker container.
Docker Containers
A Docker container is a tool that makes it very easy to deploy and run an application using containers. A container allows a developer to create an all-in-one package of the developed application with all its dependencies. For example, a Java application requires Java libraries, and when we deploy it on any system or VM, we need to install Java first. But, in a container, everything is kept together and shipped as one package, such as in a Docker container. Read the documentation for more information about Docker containers.
Spring Boot Applications
Spring Boot is a framework that eases the development of web applications. It has a lot of pre-configured modules that eliminate the manual addition of dependencies for developing an application with Spring. This is the sole reason for this being one of the favorites for creating microservices. Let’s see how to create a Spring Boot Application in a few minutes.
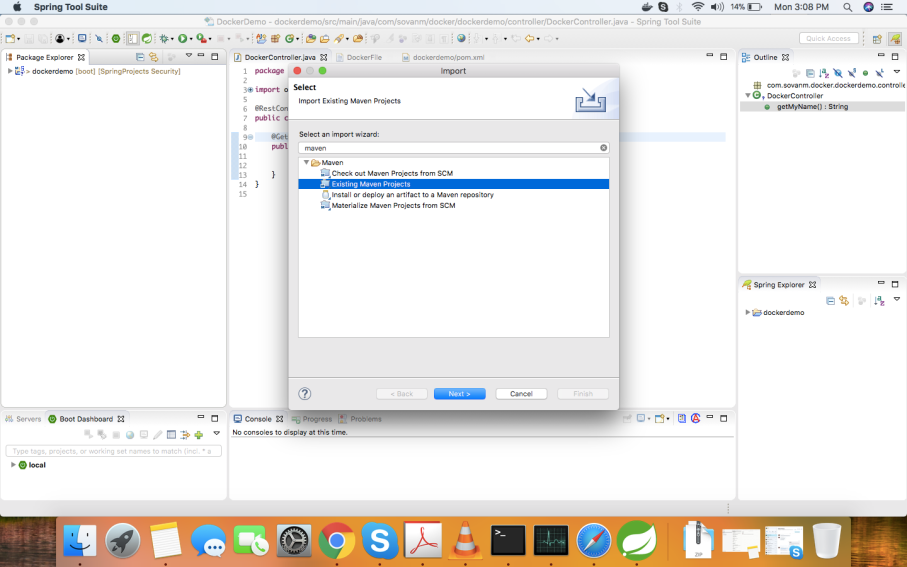
Open Spring Starter to create a Java Maven application with Spring Starter libraries.

Provide the Artifact Group and Name, and in dependencies, add “Web” and leave everything else with the default, which will create a Maven project with Java and Spring Boot. This will generate a ZIP which is to be imported into STS as a Maven project.
That’s it! You have just created a Spring Boot application in the workspace. Now, we need to add a simple RestController so we can test the API.
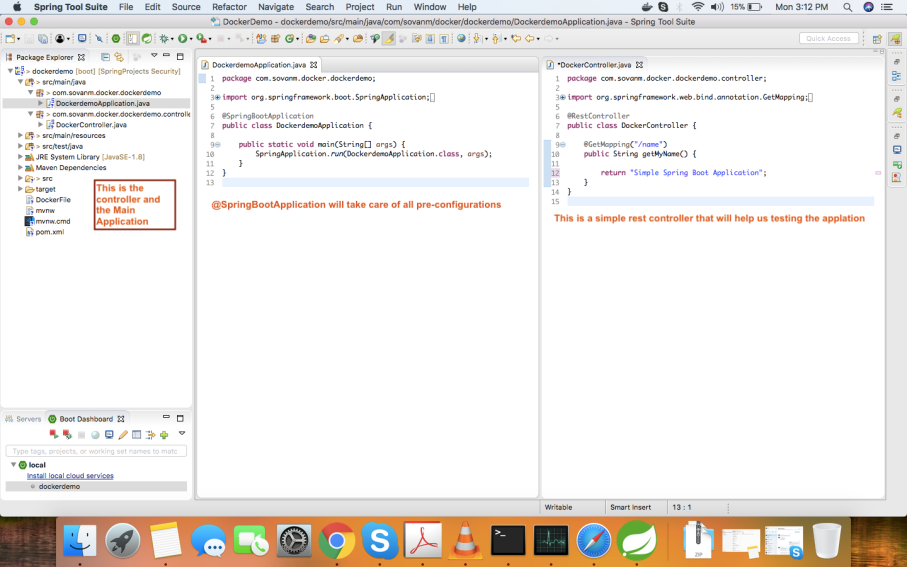
Upon running the application and accessing the endpoint of the API, we will see the output “Simple Spring Boot Application” shown in the browser.

We have successfully created and run the application in the embedded server of the IDE, but now we will deploy it in a Docker container. For this, we have to create a Dockerfile that will contain the steps to be executed by Docker to create an image of this application and run that image from Docker.
You may also like: Spring Boot: Run and Build in Docker
JAR File of This Application
In the pom.XML, we defined that the packaging will be JAR. Let us run the Maven commands to create a JAR file for us.
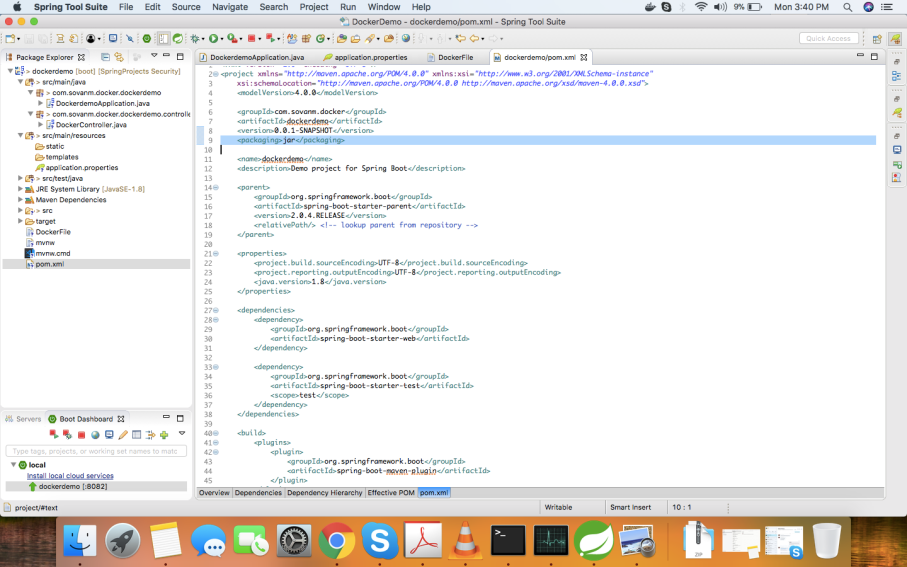
To do so, first clean up the target folder with mvn clean (this can also be done from the IDE by running Maven Clean) and mvn install (this can also be done from IDE by running Maven Install).
This command will create a “dockerdemo.jar” in the target directory of the working directory.

Docker gives the user the capability to create their own Docker images and deploy them in Docker. To create your own Docker image, we have to create our own Dockerfile. Basically, a Dockerfile is a simple text file with all the instructions required to build the image.
Here is our Dockerfile. Create a simple file in the project folder and add these steps in that file:
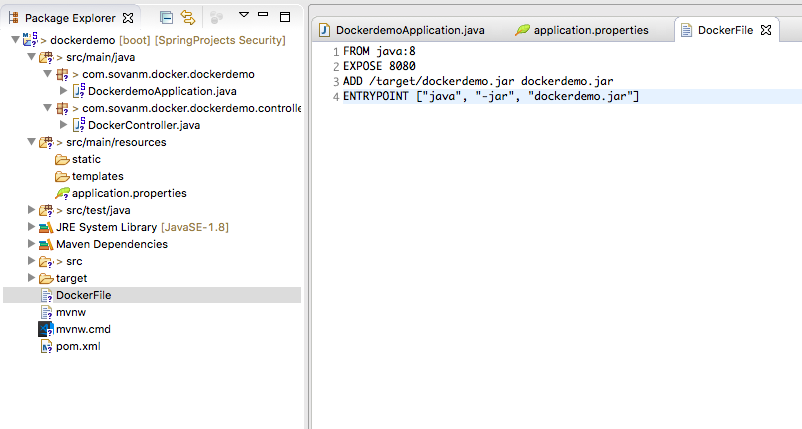
- FROM java:8 means this is a Java application and will require all the Java librariesk so it will pull all the Java-related libraries and add them to the container.
- EXPOSE 8080 means that we would like to expose 8080 to the outside world to access our application.
- ADD /target/dockerdemo.jar dockerdemo.jar
- ADD
- ENTRYPOINT [“java”, “-jar”, “dockerdemo.jar”] will run the command as the entry point as this is a JAR and we need to run this JAR from within Docker.
These are the four steps for that will create an image of our Java application to be able to run Docker.
Okay, we have two pieces ready:
- FROM java:8 means this is a Java application and will require all the Java librariesk so it will pull all the Java-related libraries and add them to the container.
- EXPOSE 8080 means that we would like to expose 8080 to the outside world to access our application.
- ADD /target/dockerdemo.jar dockerdemo.jar
- ADD
- ENTRYPOINT [“java”, “-jar”, “dockerdemo.jar”] will run the command as the entry point as this is a JAR and we need to run this JAR from within Docker.
To load these up in the Docker container, we have to first create the image and then run that image from the Docker container. We need to run certain commands in the folder that contains the Dockerfile.
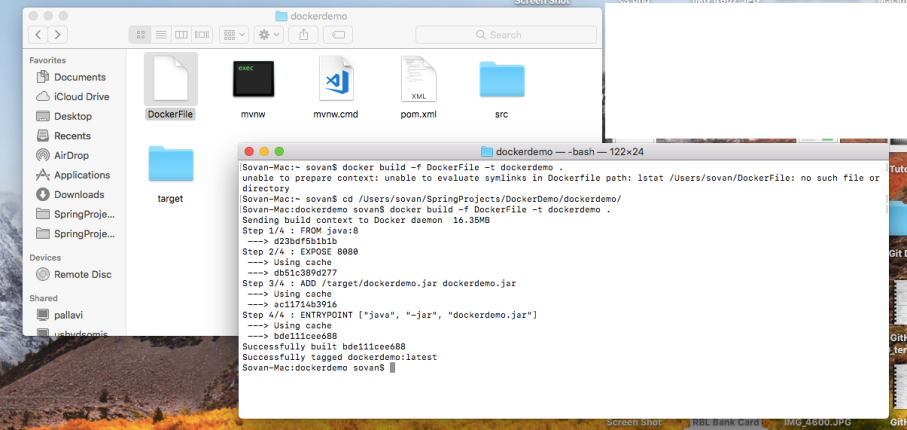
This will create our image in Docker and load it up to the container.

Now that we have the image ready to run, let’s do that with the following command:
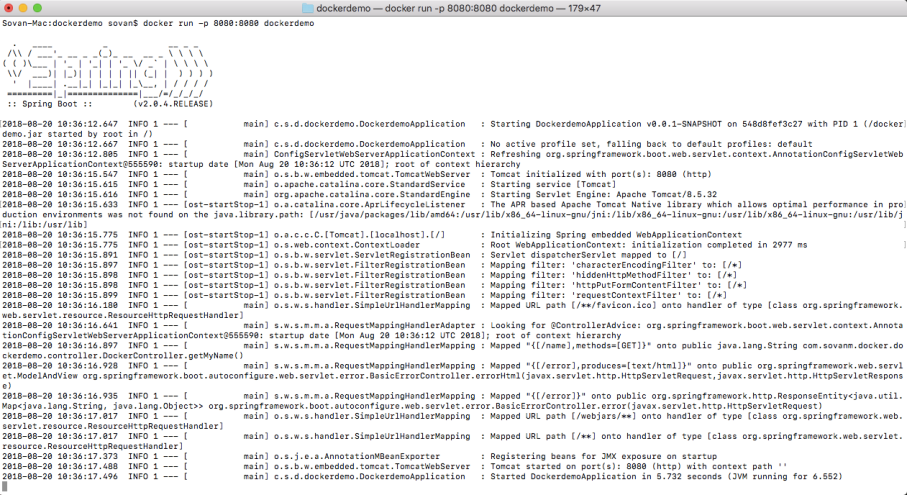
There you go — the Spring Boot application boots up and the server is running on port 8080.

The Spring Boot Application is running from the Docker container.
Here is the repository that contains the code for this article.
Originally published by Sovan Misra at dzone.com

#spring-boot #docker #microservices