The Complete Guide to Webpack 4
Originally published by Esakkimuthu E at https://medium.com
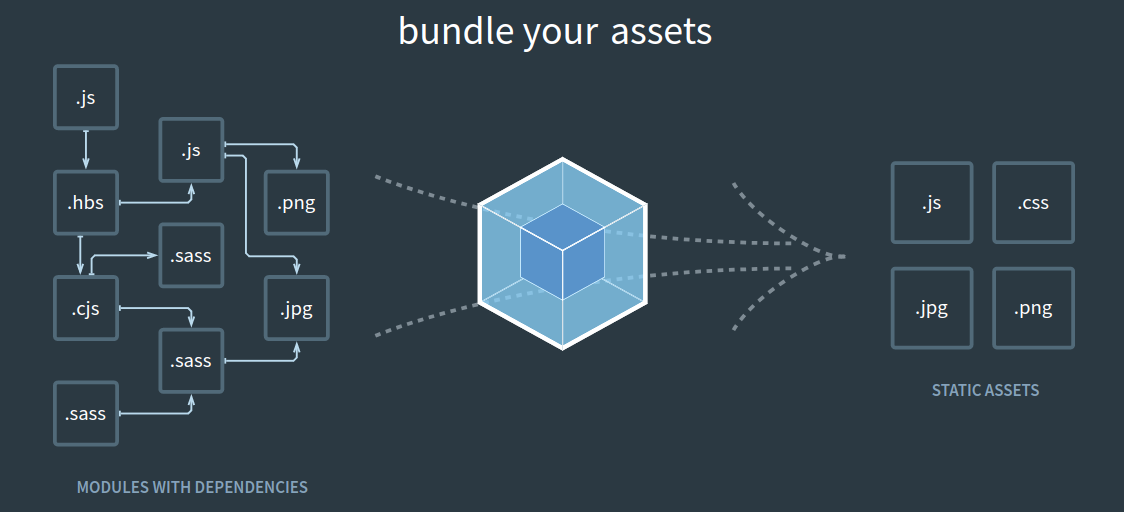
Webpack is a module bundler. In other words, Webpack takes a bunch of different assets or files (like CSS, JS, SASS, JPG, SVG, PNG …) and it combines them into bundles, a separate bundle for each type.
Webpack Setup
We use npm to create a package.json file in a project directory:
npm init
Then we install the webpack by running this command in the terminal:
npm install --save-dev webpack webpack-dev-server webpack-cli
Note: save-dev saves the package as development dependencies, -save saves application dependencies it writes the installed packages into dependencies field in package.json were save-dev writes into devDependencies.
Once package.json is created edit the script part to make a webpack start. The package.json file will look like this:
{
   “name”: “projectName”,
   “version”: “1.0.0”,
   “private”: true,
   “description”: “”,
   “main”: “index.js”,
   “scripts”: {
      “start” : “webpack”
   },
   “keywords”: [],
   “author”: “”,
   “license”: “ISC”,
   “devDependencies”: {
      “webpack”: “^4.2.6”,
      “webpack-cli”: “^3.2.3”
   }
}
Now we can start our application using npm start. When the application starts webpack will search for index.js inside the /src directory. Make sure you have index.js within the /src directory. Webpack bundles index.js and its dependencies into a single file and the bundle file will be created as main.js within /dist directory. We need to add our main.js into index.html.
Webpack reads the entry point and analyses its dependencies and so on. It bundles the entry point and all its dependencies into a single file.
Configuring Webpack
Webpack 4 is a zero-configuration module bundler. It has a set of defaults. If we want to create a configuration file add webpack.config.js in the root directory.
Entry
Webpack needs an entry point. We’re just re-creating what we already have — /src/index.js nothing new for us. We’re explicitly telling webpack to look index.js in the /src directory.
Webpack.config.js
module.exports = {
   entry: ‘./src/index.js’
};
We can have more than one entry point. We will discuss this later.
Output
Where Webpack should bundle our output, /dist/main.js, is the default path. We can rename the output filename and put ‘filename’ inside the output. Path determines where the code split out.
Webpack.config.js
const path = require(‘path’);module.exports = {
entry: ‘./src/index.js’,
output: {
path: path.resolve(__dirname, ‘dist’),
filename: ‘main.js’
}
};
Now edit the script part in the package.json file like this:
“script” : {
   “start” : “webpack --config webpack.config.js”
}
Mode
Mode development will not minify the output file. The bundled output file will be readable for development.
const path = require(‘path’);module.exports = {
mode: “development”,
entry: ‘./src/index.js’,
output: {
path: path.resolve(__dirname, ‘dist’),
filename: ‘main.js’
}
};
Loaders
Webpack does not only bundle JavaScript files, as we’ve already discussed, it bundles images and other static files as well. Loaders are the key to bundle different types of files — you can see the list of loaders here.
CSS loaders
We can define a loader with an array of rules within the module object. Now create main.css in our project and install style-loader and css-loader using this command:
npm install --save-dev style-loader css-loader
Now update the webpack.config.js as below:
const path = require(‘path’);module.exports = {
mode: “development”,
entry: ‘./src/index.js’,
output: {
path: path.resolve(__dirname, ‘dist’),
filename: ‘main.js’
},
module:{
rules:[
{
test: /.css$/,
use: [“style-loader”, “css-loader”]}]
}
};
Webpack reads loader from the reverse. It executes css-loader first, then style-loader where css-loader converts the css files into common JavaScript code and style-loader injects the styles into DOM.
For sass, we need to use a sass-loader, the sass-loader requires node-sass. Install a sass-loader using the below command.
npm install sass-loader node-sass webpack --sav-dev
Now update the webpack.config.js file with a sass-loader.
const path = require(‘path’);module.exports = {
mode: “development”,
entry: ‘./src/index.js’,
output: {
path: path.resolve(__dirname, ‘dist’),
filename: ‘main.js’
},
module:{
rules:[
{
test: /.css$/,
use: [
“style-loader”, // Injects style into DOM
“css-loader”, // Turns CSS into JS
“sass-loader” // Turns SCSS into CSS
]
}
]
}
};
Don’t forget to import our main.css/main.scss into index.html and the style defined in main.css/main.scss will inject into Html DOM. Now we need to make it in standalone CSS.
Cache Busting and Plugins
The browser can cache our code so that every time you make a change the file cannot be re-downloaded by the user. In our case, main.js will download when a change occurs in our code. We can use a special hashing function that changes the file name to main.blablabla.js
Next time we build without any changes in the code the filename remains the same: main.balbalabla.js. But if even a single character changes in the code, the filename changes into main.vnas28r9ysd.js and the browser has to download it again.
This is very useful when we add vendor code in our project. We won’t need to download the vendor code every time, because we don’t always make any changes in vendor files and the file can be cached in the browser.
output : {
   filename : “main.[contentHash].js”
}
Now the problem is how to link this file into index.html. We can’t predict the dynamically generated filename, for the webpack is going to do this. Webpack creates the scripts tag at the bottom of our Html using plugins.
Plugins
The plugins option is used to customize the webpack build process in a variety of ways. You can see the list of plugins here.
Html webpack plugin
The HtmlWebpackPlugin simplifies the creation of HTML files to serve your webpack bundles. This is especially useful for webpack bundles that include a hash in the filename which changes every compilation.
npm install --save-dev html-webpack-plugin
webpack.config.js
const path = require(‘path’);module.exports = {
mode: “development”,
entry: ‘./src/index.js’,
output: {
path: path.resolve(__dirname, ‘dist’),
filename: ‘main.js’
},
plugins: [
new HtmlWebpackPlugin()
]
};
This creates an index.html file for us and drops it in the dist directory with dynamically generated JS file is included at the bottom of the Html.
index.html
<!DOCTYPE html><html>
<head>
<meta charset=”UTF-8">
<title>Webpack App</title>
</head>
<body>
<script type=”text/javascript” src=”main.170skb99wrjcb.js”></script>
</body>
</html>
This newly generated Html file doesn’t have our Html code. For this, we need to supply our template. Then the webpack config file looks like this:
const path = require(‘path’);module.exports = {
mode: “development”,
entry: ‘./src/index.js’,
output: {
path: path.resolve(__dirname, ‘dist’),
filename: ‘main.js’
},
plugins: [
new HtmlWebpackPlugin({
template: ‘./src/index.html’
})
]
};
We used a css-loader to inject our css into DOM, actually, we need stand-alone css. To do that use the mini-css-extract-plugin:
npm install mini-css-extract-plugin
This plugin extracts css into a separate file.
webpack.config.js
const path = require(‘path’);module.exports = {
mode: “development”,
entry: ‘./src/index.js’,
output: {
path: path.resolve(__dirname, ‘dist’),
filename: ‘main.js’
},
module:{
rules:[
{
test: /.css$/,
use: [
MiniCssExtractPlugin.loader,
“style-loader”, // Injects style into DOM
“css-loader”, // Turns CSS into JS
“sass-loader” // Turns SCSS into CSS
]
}
]
},
plugins: [
new HtmlWebpackPlugin({
template: ‘./src/index.html’
}),
new MiniCssExtractPlugin()
]
};
The newly generated css file will be automatically injected into Html — HtmlWebpackPlugin will take care of it.
Splitting Code Dev and Production Mode
This mode is a parameter that webpack 4 introduced. We’re going to split the webpack configuration into development mode and production mode. At the same time, they share a lot of commonly used things. So, we have three config files: the common file for sharing dev and prod mode, the second for development mode, and the final for production mode.
We’re not going to build dist directory for dev mode — webpack-dev-server will help us to load the files from memory. We only need to minify the final version of the code for production mode.
Create two more files: webpack.dev.js and webpack.prod.js. Rename webpack.config.js to webpack.common.js. These names are up to you — use whatever name you want.
Now we install the required npm packages:
npm install --save-dev webpack-dev-server
Webpack-dev-server provides live reloading. It also provides fast in-memory access to the webpack assets. This should be used for dev mode.
npm install --save-dev webpack-merge
Webpack-merge provides a merge function that concatenates arrays and merges objects creating a new object. It returns wrapped values within a function again.
Now we split out the code for dev and prod modes. For common configurations, we don’t need mode parameter and output. We don’t want to add content hash for development mode either. The final version of all three files will look like this:
webpack.common.js
const path = require(“path”);var HtmlWebpackPlugin = require(“html-webpack-plugin”); module.exports = {
entry: “./src/index.js”,
plugins: [
new HtmlWebpackPlugin({
template: “./src/template.html”
})
],
module: {
rules: [
{
test: /.scss$/,
use: [
“style-loader”, // Inject styles into DOM
“css-loader”, // Turns css into commonjs
“sass-loader” // Turns sass into css
]
}
]
}
};
webpack.dev.js
const path = require(“path”);const common = require(“./webpack.common”);
const merge = require(“webpack-merge”);module.exports = merge(common, {
mode: “development”,
output: {
filename: “main.js”,
path: path.resolve(__dirname, “dist”)
}
});
webpack.prod.js
const path = require(“path”);const common = require(“./webpack.common”);
const merge = require(“webpack-merge”);module.exports = merge(common, {
mode: “production”,
output: {
filename: “main.[contentHash].js”,
path: path.resolve(__dirname, “dist”)
}
});
Now we have to configure the webpack-dev-server. We also need to add development mode and production mode on our package.json. Edit the script part in the package.json like this:
“script” : {
   “start”: “webpack-dev-server --config webpack.dev.js --open”,
   “build”: “webpack --config webpack.prod.js”
}
Use npm start for development mode and npm run build for production mode. Now you can see bundled minified files for production mode inside the build directory. In-memory changes for dev mode. -open will automatically open the browser window when it’s ready.
Oops, we need to saw multiple entry points! Don’t worry, it’s not difficult to set up — we have vendor scripts like bootstrap. We need two separate bundles for main.js and vendor.js. Then the entry point in webpack.common.js will look like this:
module.exports = {
   entry: {
      main: “./src/index.js”,
      vendor: “./src/vendor.js”
   }
}
We also have to make changes in output to generate two different bundles: config files for dev and production mode.
webpack.dev.js
module.exports = merge(common, {
   mode: “development”,
   output: {
      filename: “[name].bundle.js”,
      path: path.resolve(__dirname, “dist”)
   }
});
webpack.prod.js
module.exports = merge(common, {
   mode: “production”,
   output: {
      filename: “[name].[contentHash].js”,
      path: path.resolve(__dirname, “dist”)
   }
});
This generates two different bundles in dev and production mode. You can see the bundles main.bundle.js and vendor.bundle.js in development mode. In production mode main.275hsossba83k.js and vendor.934jsdpaczl83.js.
Conclusion
We also use images and other types of assets in our projects. For this we need to add the required packages to webpack, otherwise you will get the error “You may need an appropriate loader to handle this file type” in webpack.
Thanks for reading ❤
If you liked this post, share it with all of your programming buddies!
Follow us on Facebook | Twitter
Further reading
☞ JavaScript Infrastructure: CLI, NPM, Babel 7 and Webpack 4
☞ Webpack 4.30 Tutorial for Beginners 🚀 🚀 🚀
☞ Best JavaScript Frameworks, Libraries and Tools to Use in 2019
#webpack #javascript #web-development