Creating efficient docker images using Dockerfile is very important when pushing out images into production. We need images as small as possible in production for faster downloads, lesser surface attacks.
Here are the topics we cover in this article
- Example Project
- Building Image Using Dockerfile
- Problems With Normal Build
- What is Builder Pattern
- Problems with Builder Pattern
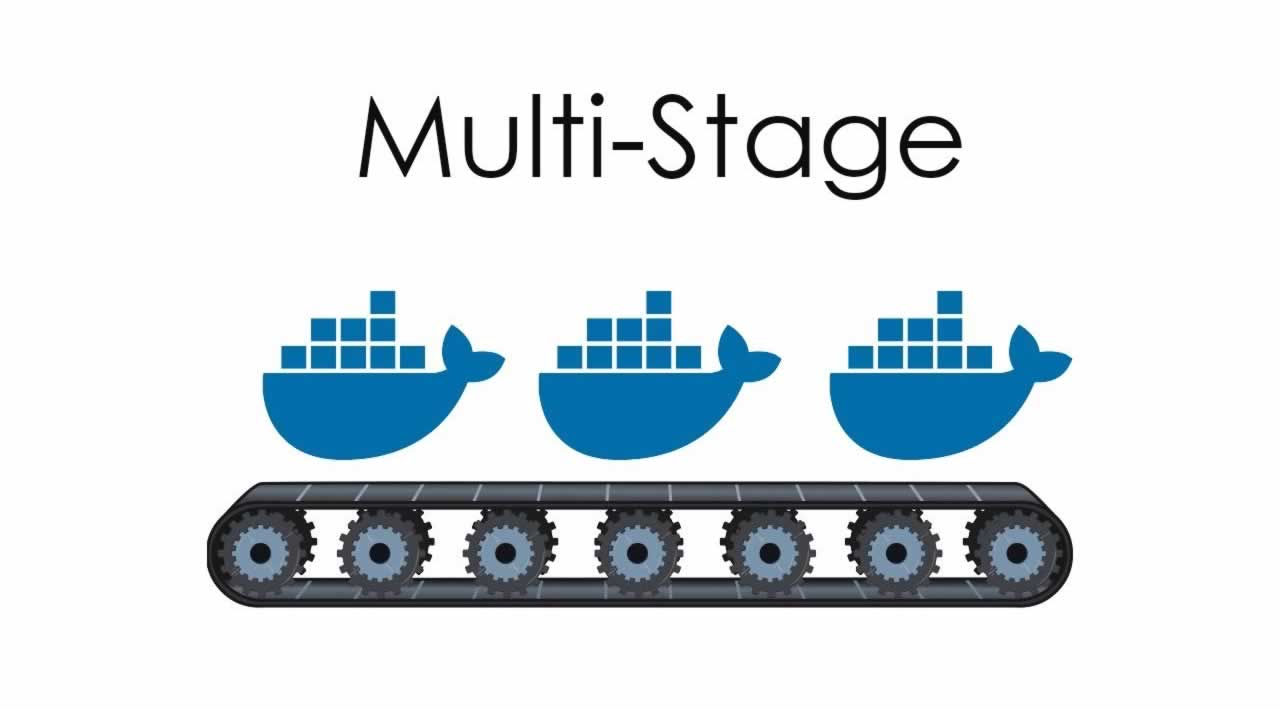
- What are Multi-stage Builds
- Multi-stage Builds Implementation
- Advantages
- Summary
- Conclusion
Example Project
Let’s understand the example project that we are building. It’s a simple web app with Angular and node app server. Look at the following diagram to understand better. We have a UI built with Angular and running on the nodejs server.
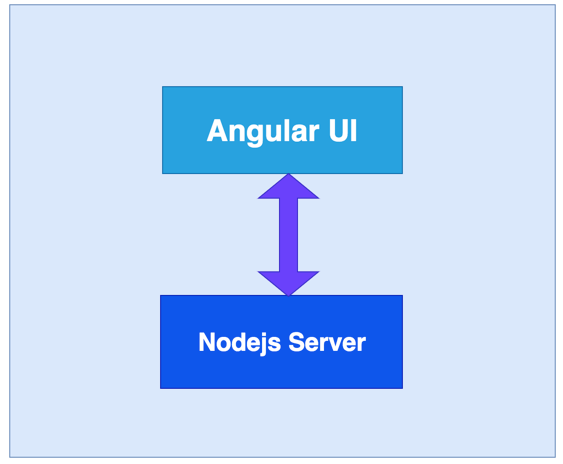
Web App with angular and Nodejs server
You can clone the below project and run it on your machine directly. The nodejs server runs on port 3070.
//clone the project
git clone
https://github.com/bbachi/docker-multibuild-example.git
// change to WebApp directory
cd WebApp// build the Angular Project
npm run build// change back to root directory and start the nodejs server
cd ..
npm start
We are not going to build any functionality in the app for the simplicity reasons and it is irrelevant for this post. We have a simple index.js for Nodejs server and serve Angular app on port 3070.
const express = require('express');
const app = express();
app.use(express.static(process.cwd()+“/WebApp/dist/webapp/”));
const port = 3070;
app.get(‘/’, (req, res) => {

res.sendFile(process.cwd()+“/WebApp/dist/WebApp/index.html”)

});
app.listen(port, (err) => {

if (err) {

logger.error(‘Error::’, err);

}

console.log(running server on from port:::::::${port});

});
We have a UI built with Angular under WebApp folder. We have separate node_modules for UI and nodejs server. Here is the project structure.
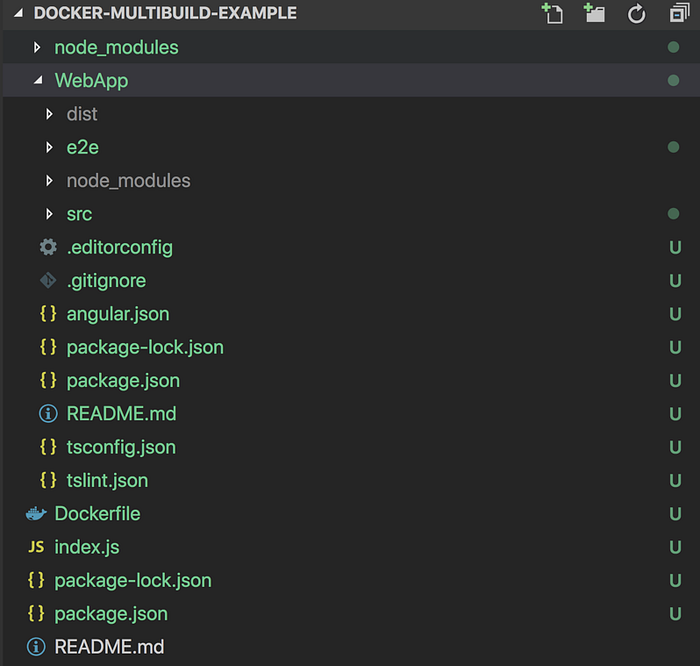
Project Structure
If you follow above commands and you can see the output in the browser served by nodejs server running on port 3070.

Example App
Building Image Using Dockerfile
Let’s build an image with the Dockerfile. Here are the things we need for building an image.
- Start from the base image node:10
- There are two package.json files: one is for nodejs server and another is for Angular UI. We need to copy these into Docker file system and install all the dependencies.
- We need this step first to build images faster in case there is a change in the source later. We don’t want to repeat installing dependencies every time we change any source files.
- Copy all the source files.
- Angular uses Angular/cli to build the app. So, install CLI and install all the dependencies.
- Run npm run build to build the Angular App and all the assets will be created under dist folder within WebApp folder.
Here is the complete Dockerfile
FROM node:10set the work directory
WORKDIR /usr/src/app
copy package.json
COPY package*.json ./
copy webapp folder
COPY WebApp/package*.json ./WebApp/
RUN npm install for node js dependencies
RUN npm install
&& cd WebApp
&& npm install @angular/cli
&& npm installBundle app source
COPY . .
builing Angular UI
RUN cd WebApp && npm run build
EXPOSE 3070
ENTRYPOINT [“node”]
CMD [“index.js”]
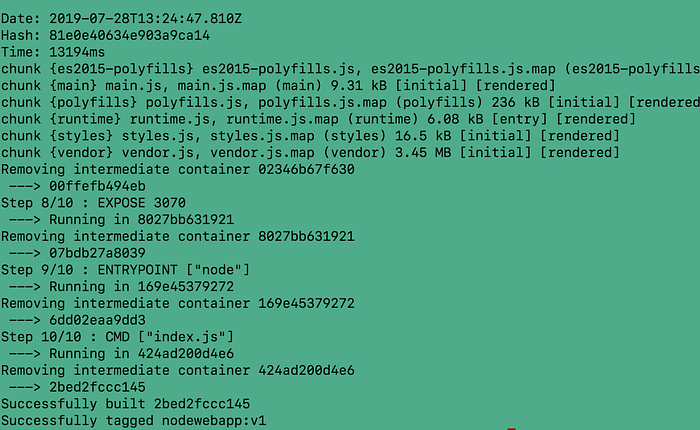
Let’s build the image with the following command. I am giving it a tag nodewebapp:v1. It takes some time to build an image since we are installing two package.json dependencies and Angular/cli.
docker build -t nodewebapp:v1 .
Here are the last lines of output of the successful image.
Docker image build
Let’s run this image as a container and see the result in the webpage. We are running a container with the interactive and detached mode and also exposing the port 3070 to the outside world.
docker run -it -d -p 3070:3070 nodewebapp:v1
Once you run the above command, we can see the same result in the browser.

web app running on port 3070
Problems With Normal Build
There are two main problems with this build 1) size and 2) larger surface area.
size
Let’s list the images that we have with this command docker images

The size of our image is astonishingly high which is 1.21GB. We can’t ship the image of this size to production because of slower downloads. It takes longer than usual to download this image over the network.
larger surface area
Another problem is the larger surface area which is prone to attacks. We included npm dependencies and the entire Angular CLI library in the image which are unnecessary in the final image.
For images to be efficient, they have to be small in size and surface area.
What is Builder Pattern
A builder pattern refers to maintaining two Dockerfiles: one is for development and another is for production. The development version contains everything for building the application and the production version contains only necessary elements for the container to run. We can have a script file dockerbuild.sh which builds the development version first and copies the necessary layers or files into some folder and build the production version from there with only the files we need.
Let’s build the same image with the builder pattern. I am going to create three files Dockerfile.dev, Dockerfile, and dockerbuild.sh.
Dockerfile.dev
This is the development version which contains everything to build the image nodemodules for UI, nodemodules for server, and Angular CLI library. Basically, it’s the same file used for the normal build.
FROM node:10set the work directory
WORKDIR /usr/src/app
copy package.json
COPY package*.json ./
copy webapp folder
COPY WebApp/package*.json ./WebApp/
RUN npm install for node js dependencies
RUN npm install
&& cd WebApp
&& npm install @angular/cli
&& npm installBundle app source
COPY . .
builing Angular UI
RUN cd WebApp && npm run build
EXPOSE 3070
ENTRYPOINT [“node”]
CMD [“index.js”]
Dockerfile
This is the production version which takes only static assets built by Angular CLI in the development version excluding angular cli library and node modules for UI.
FROM node:10set the work directory
WORKDIR /root/
COPY package*.json ./
copy the UI static assets
COPY dist ./WebApp/dist
RUN npm install for node js dependencies
RUN npm install
copy index.js file
COPY index.js .
EXPOSE 3070
ENTRYPOINT [“node”]
CMD [“index.js”]
dockerbuild.sh
This is a script file which builds the first image, create a container out of it, copy the necessary UI static assets from the first image to the specific folder in the local file system. Finally, build the second image and delete the folder.
#!/bin/sh
echo Building nodewebapp from Dockerfile.devdocker build -t nodewebapp:v1 -f Dockerfile.dev .
echo Creating Conatiner Out of Image
docker container create --name extract nodewebapp:v1
docker container cp extract:/usr/src/app/WebApp/dist ./dist
docker container rm -f extractecho Building nodewebapp version 2
docker build --no-cache -t nodewebapp:v2 .
rm ./dist
Once you run the above script file sh dockerbuild.sh, It will create two images with tags v1 and v2. v2 is intended for production.

images v1 and v2
We can see there is a reduction in size in version 2. We can further decrease this size if we use webpack to bundle the nodejs server code.
Problems with Builder Pattern
Builder Pattern works great in reducing the size of the image. But, it has the following disadvantages
- We have to maintain two docker files, shell script and need to use shell tricks such as && , etc.
- When the script runs, we have two images in our disk
- We have used && and \ to combine multiple RUN commands to avoid extra layer. This method is error-prone and sometime we might forget adding \ at the end which leads to a build failure.
What are Multi-stage Builds
With multi-stage builds, we can use multiple FROM statements to build each phase. Every FROM statement starts with the new base and leave behind everything which you don’t need from the previous FROM statement.
We can have the same tiny image without much complexity as in builder pattern.
Here is the Dockerfile for the multi-stage build.
FROM node:10 AS ui-build
WORKDIR /usr/src/app
COPY WebApp/ ./WebApp/
RUN cd WebApp && npm install @angular/cli && npm install && npm run buildFROM node:10 AS server-build
WORKDIR /root/
COPY --from=ui-build /usr/src/app/WebApp/dist ./WebApp/dist
COPY package*.json ./
RUN npm install
COPY index.js .EXPOSE 3070
ENTRYPOINT [“node”]
CMD [“index.js”]
Dockerfile
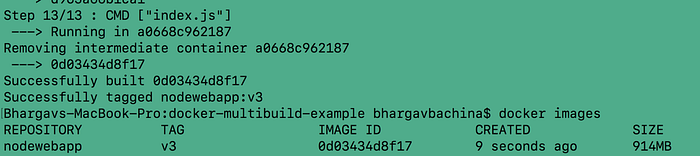
Image
We can see the image size as same as builder pattern.
Advantages
In the builder pattern, We have to maintain two docker files for development and production. In multi-stage build, We can have as many stages as you want in one Dockerfile.
In the builder pattern, We have to extract the artifact to the local system for the production Dockerfile. In multi-stage build, we can use --from flag to copy the files from one stage to another stage.
In the builder pattern, We have to create intermediate images to create artifact and then use those for the final image. It is not required in multi-stage builds
We have multiple stages in the multi-stage Dockerfile. We can stop at any particular stage with the flag — target as below
docker build --target ui-build -t webapp:v1 .
The from command is not only limited for builds from the earlier stage. We can use — from flag with external docker images as well. For example, we are pulling the latest image of nginx from docker hub here.
COPY --from=nginx:latest
Summary
- Building efficient docker images are very important for faster downloads and lesser surface attacks.
- Builder pattern helps to build efficient images to some extent but involves complexity
- Docker introduced multi-stage builds from version 17.05 to solve this problem
- With multi-stage builds, we can have multiple stages and copies only layers which are necessary for the final image form the previous stage.
Conclusion
In this post, We can see the Image size reduced from 1.22 GB to 914 MB with the multi-stage builds. We can further reduce the Image size with the help of webpack excluding node_modules for the node js server as well. My intention of this post to show how we can use multi-stage builds to reduce the image sizes.
Thanks for reading ❤
If you liked this post, share it with all of your programming buddies!
Follow me on Facebook | Twitter
Further reading
☞ Docker and Kubernetes: The Complete Guide
☞ Docker Mastery: The Complete Toolset From a Docker Captain
☞ Docker for the Absolute Beginner - Hands On - DevOps
☞ How to debug Node.js in a Docker container?
☞ Docker Containers for Beginners
☞ Deploy Docker Containers With AWS CodePipeline
☞ Build Docker Images and Host a Docker Image Repository with GitLab
☞ How to create a full stack React/Express/MongoDB app using Docker
#docker #devops