🗽 A REST API is an integral component of a web application. In this tutorial, we’ll be learning how to build a Rest API in Node.js and Express.js by building a simple todo app API 🗽
This tutorial assumes an intermediate knowledge of javascript and experience working on the command line. The source code for the final project can be found here.
Getting Started
To get started create a new folder and call it todo.
$ mkdir todo
$ cd todo
In your todo folder create a new file called app.js
$ touch app.js
The next thing for us to do is to install Node. you can install node here. After node has been installed then we’ll install express with npm. Node comes with npm so we won’t need to install npm.
Initialize The App
Navigate on the command line to the root of your app and run.
npm init
Click the return key repeatedly for every questions asked of you on the command line.
This will create a package.json file for you.
Install Dependencies And Set Up Babel

$ npm install express —-save
We’ll also need to install babel because we’ll be writing ES6 syntax, **Babel **helps to turn our codes from **ES6 **to ES5. why do we have to compile our code down to **ES5 **? well, there are some ES6 features that our browsers and node are yet to understand, and older browsers do not understand ES6 codes, so we use babel to compile our code to *ES5 *so that both old browsers and new browsers can understand. Our Purpose for using babel here is so that *ES6 features *that are not part of node yet can be compiled down to *ES5 *that node understands.
$ npm install babel-cli --save
We’ll also be installing babel-preset-es2015, the presets contains a set of plugins, these plugins are for ES6 features, by installing and configuring babel-preset-es2015 we tell babel to convert any ES6 feature we use that are contained in the preset to their ES5 equivalent.
$ npm install babel-preset-es2015 --save
Now we need to create a .babelrc file, in the babelrc file, we’ll set babel to use the es2015 preset we installed as its preset when compiling to ES5.
At the root of our app, we’ll create a .babelrc file.
$ touch .babelrc
In the babelrc file type the following to set up your preset.
{
   "presets": ["es2015"]
}
This tells babel to use es2015 as its preset, note that ES2015 is another name for ES6.
Create A Dummy Database

The last thing we’ll need to do before we get started creating our Apis is to create a dummy **database **we’ll use.
Create a folder and name it db.
$ mkdir db
In the folder create a file and call it db.js
$ cd db
$ touch db.js
In db.js create a javascript object to create a dummy database
const todos =  [
    {
      id: 1,
      title: "lunch",
      description: "Go for lunc by 2pm"
    }
];

export default todos;
Setup The App And Create Our First Endpoint
Now let’s get started creating our todo app
import express from 'express';
import db from './db/db';
// Set up the express app
const app = express();
// get all todos
app.get('/api/v1/todos', (req, res) => {
  res.status(200).send({
    success: 'true',
    message: 'todos retrieved successfully',
    todos: db
  })
});
const PORT = 5000;

app.listen(PORT, () => {
  console.log(`server running on port ${PORT}`)
});
We imported express which we installed at the beginning of the course, app.get makes a get request to the server with the route/endpoint provided as the first parameter, the endpoint is meant to return all the todos in the database. The second parameter is a function that runs every time we hit that endpoint. the function takes two parameters which are req and res. The req object contains information about our request and the response object contains information about the response and methods we can use to send information back to the client.
**res.status(200) **is used to send back the status of the request, 200 means ok and it indicates a successful request. Status codes are ways for client like web app or mobile app to check wether things went wrong or not.if we get a 404(which means Not Found)we don’t need to check the payload because we know that nothing is coming that we are really interested in. If 200 comes back we can check the payload because we know we are expecting something. You can learn more about HTTP status codes here.
res.send() is used to send back a response to the client, the resource passed into the send as a parameter is what gets sent back to the client. in this case, we send back an object which contains some information, the todos property of the object contains the data we imported at the top of app.js from our dummy database.

**app.listen **creates a web server for us, it takes two parameters, the first parameter is the port we want our application to listen on t, whatever port we provide, in our case, 5000 will be the port our server will be running on in our system. the second parameter is optional, it is a callback function of what should happen when the server gets created, in our case we are logging a message to the console. when the sever gets created then we can access our endpoint ’/api/v1/todos’ from there. the server will run on a port 5000 on a localhost on our machine. so we’ll have our localhost:port/api route. The endpoint we created will be accessed like this localhost:5000/api/v1/todos.
Now to run this code let’s go to the command line.we’ll normally run our node app from the command line like this.
$ node app.js
But this will throw an error because our code is in ES6, to successfully run our code we’ll have to run it with babel-node which will compile it to ES5. babel-node comes with the babel-cli which we installed at the beginning of the course.
$ node_modules/.bin/babel-node app.js
Now we can go to postman and test our endpoint, postman is an application we use to test our endpoints. you can download postman here.
To test the endpoint we’ll go to localhost:5000/api/v1/todos.

Take a look at the ‘GET’ before localhost:5000/api/v1/todos, remember our endpoint is a get request, that is why we set that dropdown to ‘GET, if our endpoint was a post request i.e we had app.post then we would have set that to POST.
Getting our server started by running this every single time is stressful, to simplify this process we are going to do two things, first, we are going to install nodemon, Secondly, we’ll create a script in our package,json to start our server.
Let’s install nodemon, run the following in your terminal.
$ npm install nodemon --save-dev
Nodemon watches your app for file changes and restarts the server every time a file changes in your app. This eases your work because you won’t have to start and restart the server manually every time you change files in your app
Lets create the script, in your package.json, inside the script part include this
"start": "node_modules/.bin/nodemon app.js --exec babel-node --"
You know what babel-node does.
Your package.json scripts should look like this
{
"name": "todo",
"version": "1.0.0",
"description": "",
"main": "index.js",
"scripts": {
"test": "echo \"Error: no test specified\" && exit 1",
"start": "nodemon app.js --exec babel-node --"
},
"author": "",
"license": "ISC",
"dependencies": {
"babel-cli": "^6.26.0",
"babel-preset-es2015": "^6.24.1"
"express": "^4.16.3"
}
}
Now every time we want to start our app we just run the following script on the terminal.
npm run start
This will run the start script in our package.json file.

Let’s create an endpoint to add todos, but before then let’s install a package called body-parser, body-parser parses incoming request bodies in a middleware before your handlers, available under the req.bodyproperty.
When you are sending data to the server, the data could be coming from a form or it could be a json, what body parser does is that it parses this data that is coming from the client in an object called req.body, so for example if I have a JSON data coming from the client to the server.
{
   "name": "Ola",
   "school": "unilag"
}
What body parser does is that it parses this JSON data and makes it available under the req.body as a property. remember req is the first property we provide for our callback when we make an API request, and remember I said req contains information about the request that is coming from the client, so body parser makes the data coming from the form or any *JSON *data coming from the client available as a property under the req.body, so we can access the *JSON *data from req.body as.
req.body.name
req.body.school
So lets install body-parser
$ npm install body-parser --save
Now lets import it in app.js
import bodyParser from 'body-parser';
Now we will configure body parser for our application like this.
const app = express();
// Parse incoming requests data
app.use(bodyParser.json());
app.use(bodyParser.urlencoded({ extended: false }));
Create Todo App

Now lets get to creating an endpoint to create a todo.
app.post('/api/v1/todos', (req, res) => {
  if(!req.body.title) {
    return res.status(400).send({
      success: 'false',
      message: 'title is required'
    });
  } else if(!req.body.description) {
    return res.status(400).send({
      success: 'false',
      message: 'description is required'
    });
  }
 const todo = {
   id: db.length + 1,
   title: req.body.title,
   description: req.body.description
 }
 db.push(todo);
 return res.status(201).send({
   success: 'true',
   message: 'todo added successfully',
   todo
 })
});
In this endpoint, we are not making a request to the server to get data but rather we are posting data. just like we explained, the data coming in are parsed into req.body as properties, so we have req. body.title, etc.
We create a todo object with the information we got from the client through body-parser and then push it to the dummy db array as a new todo.
Let’s test this out in postman, we would have to pass in some data and send them to the server to test this out, on postman, when you select POST, click on n body before Headers which is before Authorization and pass in your values in the field.
localhost:5000/api/v1/todos, ensure you set the HTTP method in your postman to POST.

Take a look at the ‘POST’ before localhost:5000/api/v1/todos, remember our endpoint is a post request, that is why we set that dropdown to POST.Ensure the radio button x-www-form-urlencoded is checked or use raw where you would pass JSON data like this.
{
"title": "breakfast",
"description": "get breakfast"
}
Get A Single Todo

Now let’s create an endpoint to get a single todo from the database. Type the following:
app.get('/api/v1/todos/:id', (req, res) => {
  const id = parseInt(req.params.id, 10);
  db.map((todo) => {
    if (todo.id === id) {
      return res.status(200).send({
        success: 'true',
        message: 'todo retrieved successfully',
        todo,
      });
    }
});
 return res.status(404).send({
   success: 'false',
   message: 'todo does not exist',
  });
});
Just, as usual, this endpoint takes two parameters, the route and the callback function. the different thing here is that the route in this endpoint has a :id, there are times we want to pass parameters to our endpoints because we will need them in our application, to pass those parameters we use :param.
The endpoint created above is meant to get a single todo, to get a single todo we’ll need a unique way to identify this todo in the database, so if we know the id of the todo we want to get we can then fetch it from the database, so every time we make a request to this endpoint we pass along the id of the todo we want to get, the callback function will then query the database for the todo with that application.
What is going on in the endpoint above is that we pass the id of the todo we want to get as a parameter to route, to get the value of id passed to the route we use req.params.id, req.params is an object that contains all the parameters passed to the routes, we convert the id to an int and then we loop through our dummy database db to find the todo whose id will be equal to the one we got from the URL, the matching todo is then returned as the single todo.
Let’s test this out, fetch the total todos in the database to see what we currently have.

Now let’s add a new todo to the database

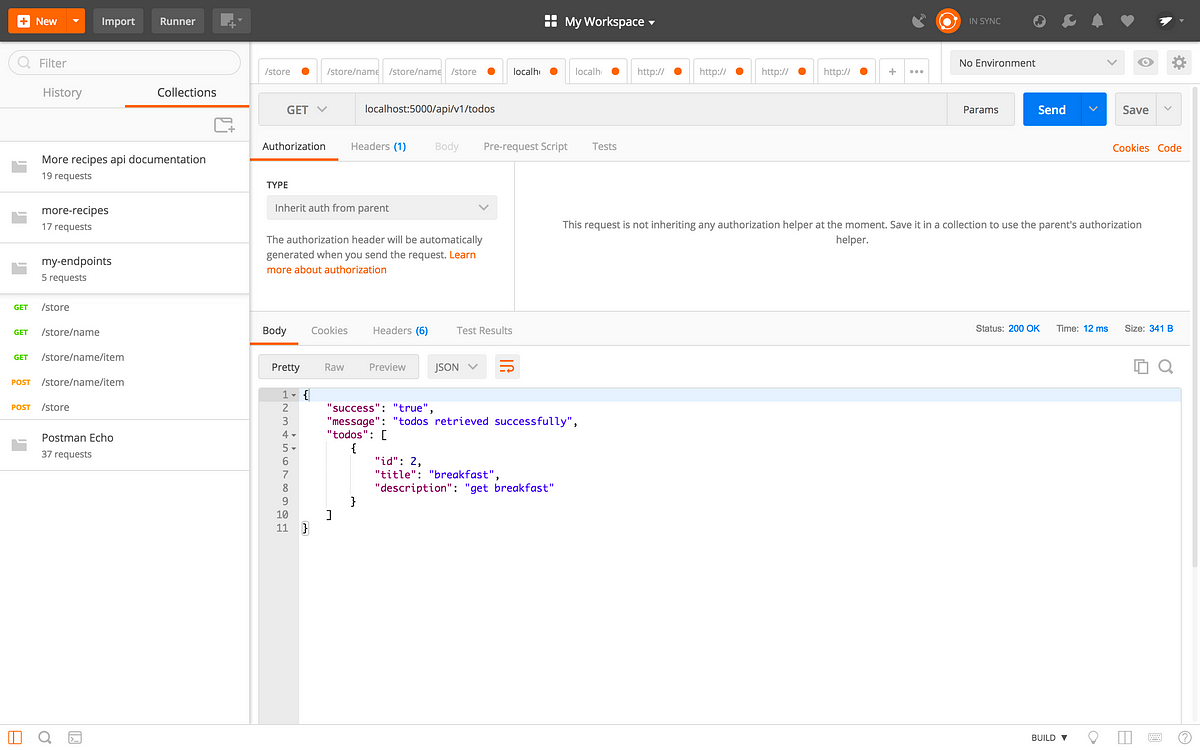
Lets fetch all the todos in the database again

Now we have the new todo we just added to the database.
Let’s test our endpoint now, go to localhost:5000/api/v1/todos/:id, replace :id with the id of the todo you want to get. in our case the todo with and id of 2, Set the http method to GET.

Delete Todo

Now let’s create an endpoint to delete todos from the database.
app.delete('/api/v1/todos/:id', (req, res) => {
  const id = parseInt(req.params.id, 10);

  db.map((todo, index) => {
    if (todo.id === id) {
       db.splice(index, 1);
       return res.status(200).send({
         success: 'true',
         message: 'Todo deleted successfuly',
       });
    }
  });


    return res.status(404).send({
      success: 'false',
      message: 'todo not found',
    });


});
So what are we doing here? well, basically we are passing the id of the todo we want to delete as a parameter to the route /api/v1/todos/:id. we fetch that id with req.params.id, So for us to delete an item with this id we have to first search for it in the database, we did that by mapping through the db array and check the id of the current todo in the iteration against the id we got from route till we find a match, we then use array method splice() to remove that item from the database. you can learn more about array.splice and how it works here. In the case where we do not find anything we return a message to the user stating ‘todo not found’.
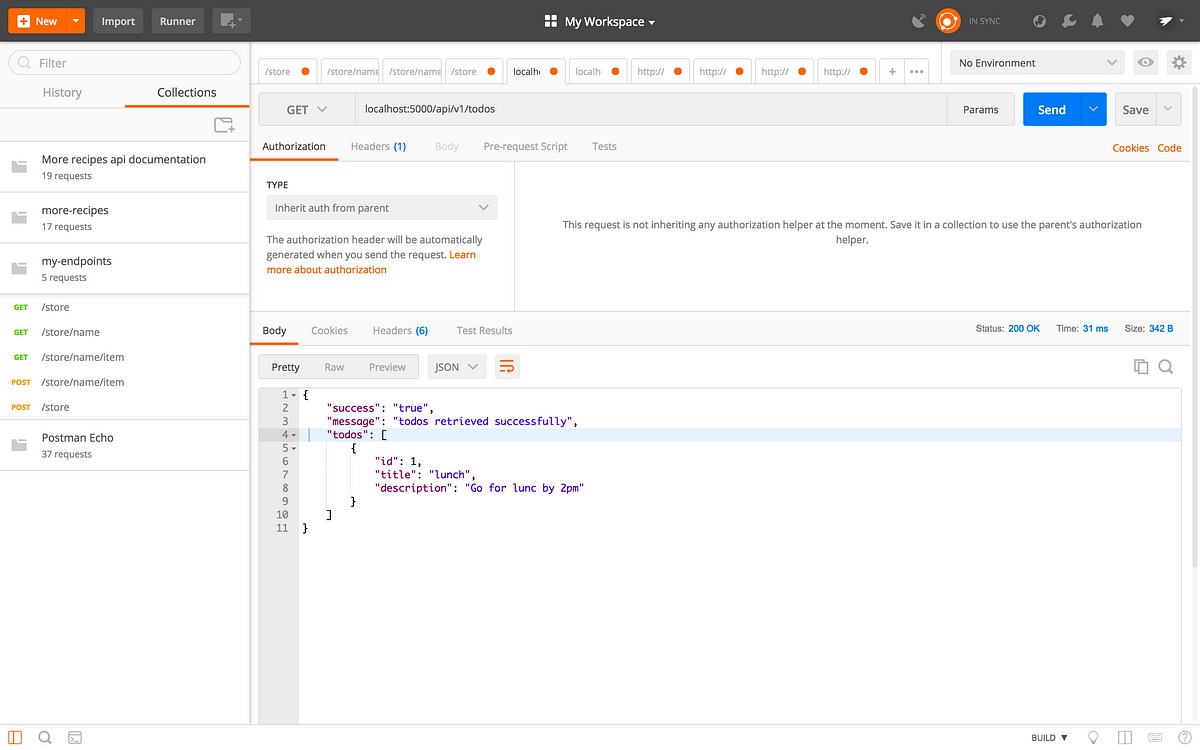
Now lets test this out, first let’s fetch the todos in our database to see what we have.
Now lets add a new todo
let’s fetch all our todos again
As you can see we now have two todos in our database, the previous one that was there initially(we hard coded this in the app) is the todo with an id of 1, and the new one we added is the todo with an id of 2.
Now lets’s remove the todo with an id of 1 by going to the endpoint we just created. Navigate to localhost:5000/api/v1/todos/:id, the id in this case is 1, just replace :id with 1 in the endpoint.

Now let’s fetch all the endpoint to see if we truly deleted the todo.
Now we have only the todo with and id of 2.
Lets try to delete a Todo with an id that does not exist.

We get a message back that the todo is not found.
Update Todo
Now let’s create an endpoint to update todos.
app.put('/api/v1/todos/:id', (req, res) => {
  const id = parseInt(req.params.id, 10);
  let todoFound;
  let itemIndex;
  db.map((todo, index) => {
    if (todo.id === id) {
      todoFound = todo;
      itemIndex = index;
    }
  });

  if (!todoFound) {
    return res.status(404).send({
      success: 'false',
      message: 'todo not found',
    });
  }

  if (!req.body.title) {
    return res.status(400).send({
      success: 'false',
      message: 'title is required',
    });
  } else if (!req.body.description) {
    return res.status(400).send({
      success: 'false',
      message: 'description is required',
    });
  }

  const updatedTodo = {
    id: todoFound.id,
    title: req.body.title || todoFound.title,
    description: req.body.description || todoFound.description,
  };

  db.splice(itemIndex, 1, updatedTodo);

  return res.status(201).send({
    success: 'true',
    message: 'todo added successfully',
    updatedTodo,
  });
});
Just as usual we get the id of the todo we want to update from the URL, we loop through our dummy db to find the todo with that id, if we don’t find the todo then we return a message to the user saying todo not found. If we find the todo then we get new input supplied by the user, the new input is parsed by body parser to the req.body, we get the updated entries from req.body and create an updated todo object with it. We then use db.splice to remove the old todo that match our iteration when we looped through the dummy db and replace it with the updatedTodo that we created.
Let’s test this out.
Let’s get all the todos we have in our database currently, Note that every time your server restarts you lose the entries you have in memory, that’s why we lose todo we added through postman when our server restarts except for the one we hardcoded in the app.
Now lets update the todo with the id of 1.

Now we have come to the end of this tutorial,
Middleware

What is a middleware? from the express doc Middleware functions are functions that have access to the request object (req), the response object (res), and the next middleware function in the application’s request-response cycle. The next middleware function is commonly denoted by a variable named next.
Router middleware
From the terminal navigate to root of your app.
$ cd todo
Create a new directory called routes.
$ mkdir routes
in your routes folder create a new file called index.js.
$ cd routes
$ touch index.js
Now in index.js write the following code
import express from 'express';
import db from '../db/db';

const router = express.Router();
We import express and then create a route handler with express.Router()
In your app.js move the code for your endpoint and paste it in index.js inside of the routes folder. instead of app.get, user router.get and do the same for the remaining endpoints.You should have something like this when you are done.
router.get('/api/v1/todos', (req, res) => {
  res.status(200).send({
    success: 'true',
    message: 'todos retrieved successfully',
    todos: db,
  });
});

router.get('/api/v1/todos/:id', (req, res) => {
  const id = parseInt(req.params.id, 10);
  db.map((todo) => {
    if (todo.id === id) {
      return res.status(200).send({
        success: 'true',
        message: 'todo retrieved successfully',
        todo,
      });
    }
  });
  return res.status(404).send({
    success: 'false',
    message: 'todo does not exist',
  });
});

router.post('/api/v1/todos', (req, res) => {
  if (!req.body.title) {
    return res.status(400).send({
      success: 'false',
      message: 'title is required',
    });
  } else if (!req.body.description) {
    return res.status(400).send({
      success: 'false',
      message: 'description is required',
    });
  }
  const todo = {
    id: db.length + 1,
    title: req.body.title,
    description: req.body.description,
  };
  db.push(todo);
  return res.status(201).send({
    success: 'true',
    message: 'todo added successfully',
    todo,
  });
});


router.put('/api/v1/todos/:id', (req, res) => {
  const id = parseInt(req.params.id, 10);
  let todoFound;
  let itemIndex;
  db.map((todo, index) => {
    if (todo.id === id) {
      todoFound = todo;
      itemIndex = index;
    }
  });

  if (!todoFound) {
    return res.status(404).send({
      success: 'false',
      message: 'todo not found',
    });
  }

  if (!req.body.title) {
    return res.status(400).send({
      success: 'false',
      message: 'title is required',
    });
  } else if (!req.body.description) {
    return res.status(400).send({
      success: 'false',
      message: 'description is required',
    });
  }

  const newTodo = {
    id: todoFound.id,
    title: req.body.title || todoFound.title,
    description: req.body.description || todoFound.description,
  };

  db.splice(itemIndex, 1, newTodo);

  return res.status(201).send({
    success: 'true',
    message: 'todo added successfully',
    newTodo,
  });
});

router.delete('/api/v1/todos/:id', (req, res) => {
  const id = parseInt(req.params.id, 10);
  let todoFound;
  let itemIndex;
  db.map((todo, index) => {
    if (todo.id === id) {
      todoFound = todo;
      itemIndex = index;
    }
  });

  if (!todoFound) {
    return res.status(404).send({
      success: 'false',
      message: 'todo not found',
    });
  }
  db.splice(itemIndex, 1);

  return res.status(200).send({
    success: 'true',
    message: 'Todo deleted successfuly',
  });
});
To make use of this routes in our app we need to import it into app.js, to import it into app.js we need to export it from index.js inside of the route folder, let’s do that.
in index.js file, type in the following code to export router
message: 'Todo deleted successfuly',
  });
});
export default router;
Now in app.js, import the router
import router from './routes/index.js';
the newly imported router is a middleware, to make use of middleware in express you use app.use(middleware)
app.use(bodyParser.urlencoded({ extended: false }));
app.use(router);
Now let’s run our code to be sure that we’ve broken nothing.

Refactor The Callback Functions

from the root of your application create a new folder called todosController
$ mkdir todosControllers
in todosControllers folder create a file called todos
$ cd todosControllers
$ touch todos.js
Now inside todos.js we are going to create a class, this class is going to hold all our callback functions as its methods, whenever we need to make use of any of the methods we’ll create an instance of the class and get the method we need. let’s create this class.
/* eslint-disable class-methods-use-this */
import db from '../db/db';

class TodosController {
  getAllTodos(req, res) {
    return res.status(200).send({
      success: 'true',
      message: 'todos retrieved successfully',
      todos: db,
    });
  }

  getTodo(req, res) {
    const id = parseInt(req.params.id, 10);
    db.map((todo) => {
      if (todo.id === id) {
        return res.status(200).send({
          success: 'true',
          message: 'todo retrieved successfully',
          todo,
        });
      }
    });
    return res.status(404).send({
      success: 'false',
      message: 'todo does not exist',
    });
  }

  createTodo(req, res) {
    if (!req.body.title) {
      return res.status(400).send({
        success: 'false',
        message: 'title is required',
      });
    } else if (!req.body.description) {
      return res.status(400).send({
        success: 'false',
        message: 'description is required',
      });
    }
    const todo = {
      id: db.length + 1,
      title: req.body.title,
      description: req.body.description,
    };
    db.push(todo);
    return res.status(201).send({
      success: 'true',
      message: 'todo added successfully',
      todo,
    });
  }

  updateTodo(req, res) {
    const id = parseInt(req.params.id, 10);
    let todoFound;
    let itemIndex;
    db.map((todo, index) => {
      if (todo.id === id) {
        todoFound = todo;
        itemIndex = index;
      }
    });

    if (!todoFound) {
      return res.status(404).send({
        success: 'false',
        message: 'todo not found',
      });
    }

    if (!req.body.title) {
      return res.status(400).send({
        success: 'false',
        message: 'title is required',
      });
    } else if (!req.body.description) {
      return res.status(400).send({
        success: 'false',
        message: 'description is required',
      });
    }

    const newTodo = {
      id: todoFound.id,
      title: req.body.title || todoFound.title,
      description: req.body.description || todoFound.description,
    };

    db.splice(itemIndex, 1, newTodo);

    return res.status(201).send({
      success: 'true',
      message: 'todo added successfully',
      newTodo,
    });
  }

  deleteTodo(req, res) {
    const id = parseInt(req.params.id, 10);
    let todoFound;
    let itemIndex;
    db.map((todo, index) => {
      if (todo.id === id) {
        todoFound = todo;
        itemIndex = index;
      }
    });

    if (!todoFound) {
      return res.status(404).send({
        success: 'false',
        message: 'todo not found',
      });
    }
    db.splice(itemIndex, 1);

    return res.status(200).send({
      success: 'true',
      message: 'Todo deleted successfuly',
    });
  }
}

const todoController = new TodosController();
export default todoController;
To use the methods in this class we created an instance of the class and export it. now in our routes files(routes/index.js) we will import the class instance we just created and use its methods as callbacks instead of the anonymous function we were using before, let’s replace all of this functions with a method that does exactly the same thing they do.
First we import the object, go to index.js in routes folder and do this.
import todoController from '../todosControllers/todos';
Now replace the function with their equivalent method of the todoController object. our index.js file should look like this.
import express from 'express';
import TodoController from '../todosController/todos';

const router = express.Router();

router.get('/api/v1/todos', TodoController.getAllTodos);
router.get('/api/v1/todos/:id', TodoController.getTodo);
router.post('/api/v1/todos', TodoController.createTodo);
router.put('/api/v1/todos/:id', TodoController.updateTodo);
router.delete('/api/v1/todos/:id', TodoController.deleteTodo);

export default router;
Now let’s test our app to see if it still works.
Configure Sequelize

To get started we’ll start by installing some dependencies. First, we’ll install```sequelize-cli````, sequelize-cli creates a command line interface for us to run Sequelize related commands in our app.
$ npm install -save sequelize-cli
To configure Sequelize for our project we are going to create a** .sequelizerc** file in the root of our app
$ touch .sequelizerc
inside the file type the following
const path = require('path');

module.exports = {
 "config": path.resolve('./config', 'config.json'),
 "models-path": path.resolve('./models'),
 "migrations-path": path.resolve('./migrations')
};
The sequelizerc file is going to bootstrap our application with the above paths, the config.json file is going to contain the configuration for our application, the models path will contain our application models, migrations will contain the different migrations for our application. the migration files are used to create our app’s table using the models that we create. the models contain the design for our application tables
The next thing to do is to install Sequelize and some other dependencies,
$ npm install --save sequelize pg pg-hstore
pg is a PostgreSQL client for Node.js, pg is responsible for creating our application’s database connection. pg-hstore is a node package for serializing and deserializing JSON data to hstore format. read more about pg-hstore here.
Next run
$ sequelize init
this is going to bootstrap our application with the path specified in .sequelizerc file. After running it you should have a config folder which contains a config.json file, a model folder which contains some configurations for the models and a migration folder.
let’s go through the index.js file in the models folder, some required node modules were imported, the line with config.use_env_variable checks if any environment variable is set, if it is set then we use the settings for that environment variable otherwise we use the alternative settings provided for that environment. the process.env gives access to the node env, but this will not work unless we have a dotenv package installed, this will give us access to the node environment from our application.
Configure dotenv

$ npm install --save dotenv
after installation, require the dotenv file as early as possible in your application. I’ll require mine at the top of index.js file in the models folder
require('dotenv').config()
we required the dotenv module and call the method config on it. the next thing we need to do is to create .env file, this will contain all our node environment variables. At the root of your app create a .env file
$ touch .env
now to set up Postgres for our application we can either use the settings provided in the config.json file, we’ll just replace the required information with the information we Setup when we installed Postgres or we can use an environment variable. in the development section, delete everything there and replace it with this
"development": {
  "use_env_variable": "DATABASE_URL"
},
now our model configuration is going to make use of this environment variable when we are on development. remember we had something like this in our model:
if (config.use_env_variable) {
  var sequelize = new
  Sequelize(process.env[config.use_env_variable], config);
} else {
  var sequelize = new Sequelize(config.database, config.username,
  config.password, config);
}
so we are checking if our config is set, in this case, our config variable is set to development object, this line of code is doing that.
var env       = process.env.NODE_ENV || 'development';
var config    = require(__dirname + '/../config/config.json')[env];
we set the env to development by default, then we required the config.json file and pull out the development environment. so config variable is equal to our development object set in config.json file. so we then check if use_env_variable is set, if it is we use process.env[config.use_env_variable] which translates to process.env['DATABASE_URL'] to get the value set in that environment. but we don’t have DATABASE_URL```` set in our node environment. to do that we will go to our .env``` file and set it, so the .env file is where we set custom node_env we want to have access to in our code. in your .env file type the following:
DATABASE_URL=postgres://username:password@localhost:5432/database_name
If you don’t have a password setup then your configuration should be in this format:
DATABASE_URL=postgres://username@localhost:5432/database_name
so our models will make use of this DATABASE_URL to set up our database, replace username with your Postgres username, mine is postgres, replace password with your password and database_name with the name of your database. so in my case, we’ll have something like this:
DATABASE_URL=postgres://postgres:mypassword@localhost:5432/todo-app
then create your Postgres database from your terminal like this:
$ createdb todoapp
ensure you have Postgres installed otherwise this will not work.
note that anything we set in our .env file is available in our node environment and can be accessed with process.env.whatWeSet in our case process.env.DATABASE_URL````. NODE_ENVis equal to whatever we set it to be. we could set it to development, production or testing, depending on what environment we want to work on. we could set it in the** .env** file also. In our case, if it is not set we just default to development:var env = process.env.NODE_ENV || ‘development’```.
Creating our models
Now that we have our configurations out of the way, the next thing is to create our models, Each todo is going to have todo items, so a todo can have many items under it, so we can then say that the relationship between a todo and the todo item is a one to many relationship. Now to create this relationship we first have to create our models, run the following command to create our models
Todo models
$ node_modules/.bin/sequelize model:create --name Todo --attributes title:string
- — name refers to the name of the model
- — attribute refers to the attributes the model should have
this will generate a todo.js file in our model and the todo model should look something like this:
'use strict';
module.exports = (sequelize, DataTypes) => {
  var Todo = sequelize.define('Todo', {
  title: DataTypes.STRING
}, {});
Todo.associate = function(models) {
// associations can be defined here
};
return Todo;
};
A migration file will also be automatically generated in the migration folder and it should look like this:
'use strict';
module.exports = {
up: (queryInterface, Sequelize) => {
return queryInterface.createTable('Todos', {
id: {
allowNull: false,
autoIncrement: true,
primaryKey: true,
type: Sequelize.INTEGER
},
title: {
  type: Sequelize.STRING
},
createdAt: {
  allowNull: false,
  type: Sequelize.DATE
},
updatedAt: {
  allowNull: false,
  type: Sequelize.DATE
}
});
},
down: (queryInterface, Sequelize) => {
return queryInterface.dropTable('Todos');
}
};
TodoItem
We’ll do the same thing for todo items, run the following command in your terminal
$ node_modules/.bin/sequelize model:create --name TodoItem --attributes description:string
the todoItem model should look something like this:
'use strict';
module.exports = (sequelize, DataTypes) => {
  var TodoItem = sequelize.define('TodoItem', {
    description: DataTypes.STRING
  }, {});
TodoItem.associate = function(models) {
// associations can be defined here
};
return TodoItem;
};
the migration file
'use strict';
module.exports = {
up: (queryInterface, Sequelize) => {
return queryInterface.createTable('TodoItems', {
id: {
  allowNull: false,
  autoIncrement: true,
  primaryKey: true,
  type: Sequelize.INTEGER
},
description: {
  type: Sequelize.STRING
},
createdAt: {
  allowNull: false,
  type: Sequelize.DATE
},
updatedAt: {
  allowNull: false,
  type: Sequelize.DATE
}
});
},
down: (queryInterface, Sequelize) => {
return queryInterface.dropTable('TodoItems');
}
};
Refactoring

we are going to refactor some part of our code to make use of Es6, change the functions to arrow functions and all vars to const
module.exports = (sequelize, DataTypes) => {
const Todo = sequelize.define('Todo', {
title: {
type: DataTypes.STRING,
allowNull: false,
},
});
Todo.associate = (models) => {
// associations can be defined here
Todo.hasMany(models.TodoItem, {
foreignKey: 'todoId',
});
};
return Todo;
};
in the above code we modified our todo.js file, first we included an extra attribute to the title field allowNull: false what this attribute does is that it made the title field not nullable, meaning that the database is going to throw an error if we attempt to add an empty or null value to the title field, the DataTypes.string means that we only expect a string value in this field, anything other than that the database is going to throw an error
Also, we created a relationship between out Todo and TodoItem, like we said earlier, every single Todo has many todoItem, that relationship is defined with the hasMany many method of the Todo Model. The** foreignKey: ‘todoId’, **means that todoId is going to be the foreign key column in todoItem, you can read more about foreign keys here.
we will also make the same modification to ur TodoItem
module.exports = (sequelize, DataTypes) => {
const TodoItem = sequelize.define('TodoItem', {
description: {
type: DataTypes.STRING,
allowNull: false,
},
});
TodoItem.associate = (models) => {
// associations can be defined here
TodoItem.belongsTo(models.Todo, {
foreignKey: 'todoId',
onDelete: 'CASCADE',
});
};
return TodoItem;
};
Every single Todo has many TodoItems and each TodoItem belongs to one Todo, that is why we have the TodoItem.belongsTo define in our model above. The onDelete: ‘Cascade’ means if we delete a todo then the associated todoITem should also be deleted
Now that we have our models ready we can now run our migrations, in the migration folder we’ll have a set of migration files, The files contain scripts for creating and dropping our database tables, the migration scripts were created to model what we defined in our models, again, the scripts are responsible for creating and dropping our tables every time we run it. The up function is responsible for creating our tables and its columns, the **down function **is responsible for undoing what the up function runs.
we are going to be modifying our migration scripts since we modified our model files, this is to ensure consistency between our model and migrations
since we are going to be having a** foreingkey: todoId** in the TodoItem as we defined in our models, we are going to modify the migration script for TodoItem to include a todoId
we are going to include this in the migration file for TodoItem
todoId: {
 type: Sequelize.INTEGER,
 onDelete: 'CASCADE',
 references: {
 model: 'Todos',
 key: 'id',
 as: 'todoId',
 },
 },
the **references **contains a property called model, this tells us the model this ForeignKey refers to, in our case it is the Todos, the next attribute is the key attribute which tells us what the todoId in todoItems maps to in Todos models, in this case it is the id of the Todos table, what this means is that the id of the todo table is the same as the todoId in the TodoItem table
the new migrations file should look something like this:
module.exports = {
up: (queryInterface, Sequelize) => {
return queryInterface.createTable('TodoItems', {
id: {
allowNull: false,
autoIncrement: true,
primaryKey: true,
type: Sequelize.INTEGER
},
description: {
type: Sequelize.STRING
},
createdAt: {
allowNull: false,
type: Sequelize.DATE
},
updatedAt: {
allowNull: false,
type: Sequelize.DATE
},
todoId: {
type: Sequelize.INTEGER,
onDelete: 'CASCADE',
references: {
model: 'Todos',
key: 'id',
as: 'todoId',
},
},
});
},
down: (queryInterface, Sequelize) => {
return queryInterface.dropTable('TodoItems');
}
};
Now we are ready to run our migration, running migrations we run the script in the migrations files and create our tables. Before running the migrations, on your terminal export your database url like this:
export DATABASE_URL=postgres://postgres@localhost:5432/database_name
Run the migration like this:
node_modules/.bin/sequelize db:migrate
you should see something like this run in your terminal
== 20180908120703-create-todo: migrating =======
== 20180908120703-create-todo: migrated (0.025s)
== 20180908121020-create-todo-item: migrating =======
== 20180908121020-create-todo-item: migrated (0.013s)
If you check your database you will see that your table has been created and the relationship has been defined
Now it is time to persist our data, to interact with the database we created we are going to be using the models we created, with the models we have access to enormous methods we can use to interact with our database, we can perform CRUD operations through this methods,
In the controller of our todo app i.e todo.jsimport the model
import models from '../models';
This will go to the index.js fileand import dbexported at the bottom of the file. through this model, we can interact with the database.
Create Todo

Now let’s modify createTodomethod, the method to create todo currently looks like this
createTodo(req, res) {
if (!req.body.title) {
  return res.status(400).send({
    success: 'false',
    message: 'title is required',
});
} else if (!req.body.description) {
  return res.status(400).send({
    success: 'false',
    message: 'description is required',
});
}
const todo = {
  id: db.length + 1,
  title: req.body.title,
  description: req.body.description,
};
db.push(todo);
return res.status(201).send({
  success: 'true',
  message: 'todo added successfully',
  todo,
});
}
Now instead of using db.push(todo) to push a new todo to our db object we are going to make use of the create method provided by our models, also we’ll remove the description field since the todos tabel does not have a field for description, the description will be added in the todoItem table
Now our createTodo method looks like this:
createTodo(req, res) {
  if (!req.body.title) {
    return res.status(400).send({
      success: 'false',
      message: 'title is required',
    });
}
const todo = {
  title: req.body.title,
};
models.Todo.create(todo).then((todo) => {
  return res.status(201).send({
     success: 'true',
     message: 'todo added successfully',
     todo,
   });
});
}
The .then function runs when the todo has been successfully added to the database, the parameter passed into the function in the .then is the todo response from the database after the create operation is completed, so what we are basically saying in a layman language is that the line of code should create a todo in the database, and because a database interaction will take a few milliseconds to complete we don’t want to wait for that operation to finish before we move to the next line of code, so we continue to the next line of code but when that database operation finish executing the code in the .then should run with the returned result which we passed as a parameter called todo to the function. This whole operation is called Promises in javascript, you can study more on promises here.
Our returned response looks like this:

Now we have a problem, we can create another todo with the same title and it will be added to the database, we need a way to ensure that a todo with same title doesn’t get added to the database. To do this we have to first check if the todo we are trying to add to the database exists already, if it does then we return a message to the user, if it doesn’t exist already then we add it to the database. so we have to search the database for the title that the user provide to us, if the title exists already then we will return a message to the user, otherwise, we’ll add the todo top the database
After implementing this our createTodo should now look like this
createTodo (req, res) {
  if (!req.body.title) {
    return res.status(400).send({
      success: 'false',
      message: 'title is required',
    });
  }
  models.Todo.findOne({
    where: { title: req.body.title }
  })
  .then((todoFound) => {
    if (todoFound) {
      return res.status(403).send({
       success: 'true',
        message: 'A todo with that title exist already',
      });
    }
    const todo = {
      title: req.body.title,
    };
    models.Todo.create(todo).then((todo) => {
      return res.status(201).send({
        success: 'true',
        message: 'todo added successfully',
        todo,
      });
    });
  })
}
Now we are using the findOne method to check if a todo with the title provided already exist, if it does the we return a message, otherwise we go ahead to add the todo.
Attempting to add a Todo that already exist our response looks like this

Get All Todos

Now let’s modify our getAllTodos method, the code currently looks like this
getAllTodos(req, res) {
  return res.status(200).send({
    success: 'true',
    message: 'todos retrieved successfully',
    todos: db,
  });
}
Now we need to make use of the findAll method provided by our models to find all todos
the modification looks like this:
getAllTodos(req, res) {
  models.Todo.findAll()
  .then(todos => res.status(200).send({
    success: 'true',
    message: 'todos retrieved successfully',
    todos,
  }));
}
the response looks like this:

Get a single Todo

the old code for get a single todo
getTodo(req, res) {
  const id = parseInt(req.params.id, 10);
  db.map((todo) => {
    if (todo.id === id) {
      return res.status(200).send({
        success: 'true',
        message: 'todo retrieved successfully',
        todo,
      });
    }
  });
  return res.status(404).send({
    success: 'false',
    message: 'todo does not exist',
  });
}
The new code looks like this:
getTodo(req, res) {
  const id = parseInt(req.params.id, 10);
  models.Todo.findById(id)
  .then((todo) => {
    if (todo) {
      return res.status(200).send({
        success: 'true',
        message: 'todo retrieved successfully',
        todo,
      });
    }
    return res.status(404).send({
      success: 'false',
      message: 'todo does not exist',
    });
  });
}
We use the findById method and pass the Id of the todo we wish to get, if the todo exist then we get a response and if the todo does not exist we get a response telling us that the todo does not exist
Note: If you are using sequelize v5, findById was replaced by findByPk

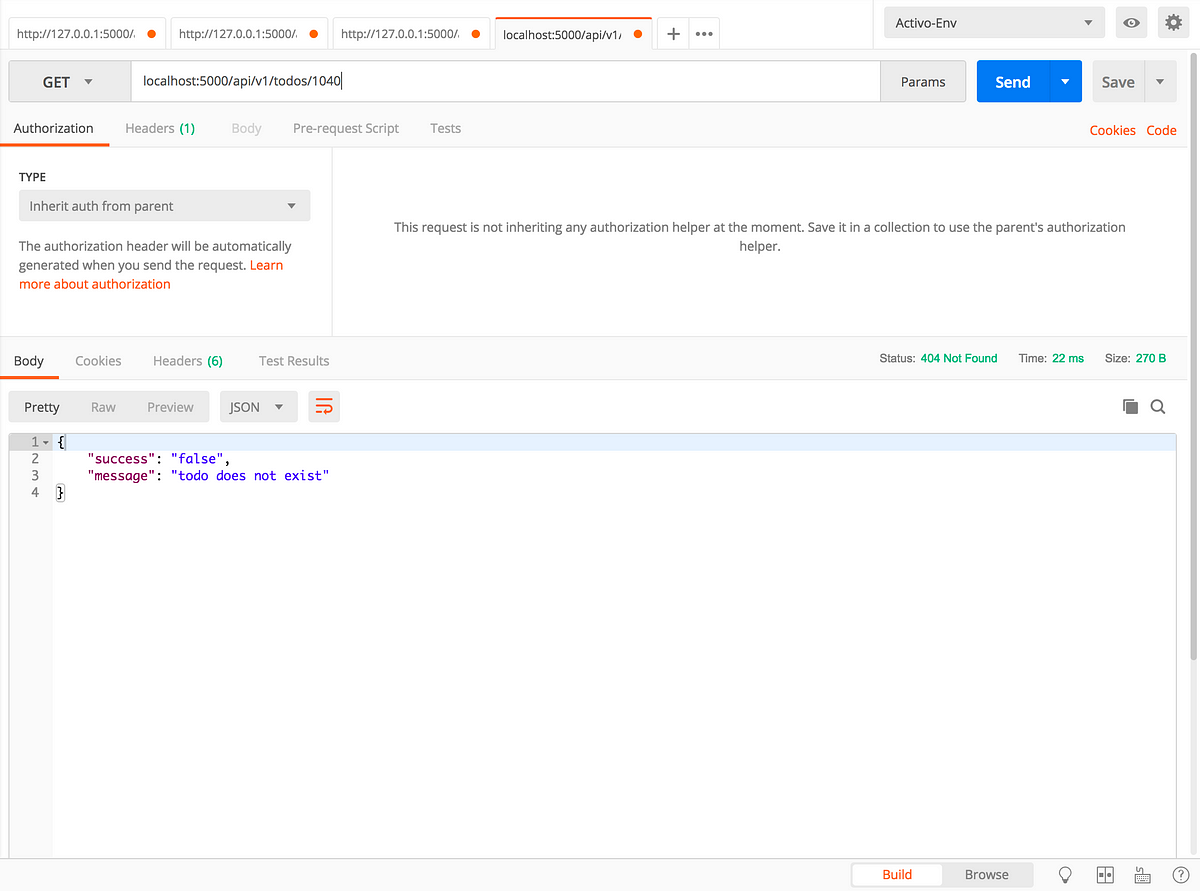
Todo that does not exist in the database

Conclusion
This marks the end of this tutorial, as practised and before the next part of this series you can modify the endpoint for update and delete to make use of our models, Also we’ll not be working with the todoItem model we created, you can take that up as a challenge and add description to the todos that we already created. Cheers!!
#node-js #express #javascript #web-development #rest #api